James Smith studied Security Studies at Georgetown University and has nearly two decades of experience in survival training. A former military instructor, he has trained hundreds of professionals and outdoor enthusiasts in tactical preparedness. His expertise includes emergency response, wilderness survival, and leadership under pressure. He has been awarded recognition from veteran groups for his training programs. When not working, James enjoys mountain trekking, martial arts, and mentoring new trainers. At Survival Prepper, he oversees editorial standards, develops advanced guides, and ensures the authenticity of every article.
Learn how to cook food without electricity using various methods like propane stoves, charcoal grills, solar ovens, and more. Be prepared for any situation.
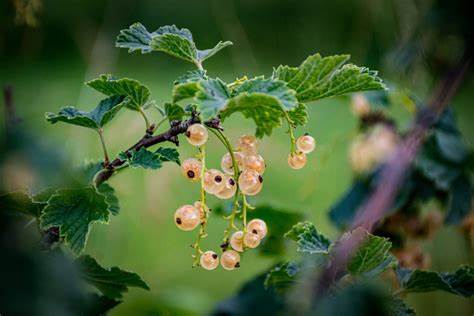
Learn how to identify common poisonous plants and berries to ensure safety in your yard or outdoors. Focus on key visual characteristics and what to do if exposure occurs.
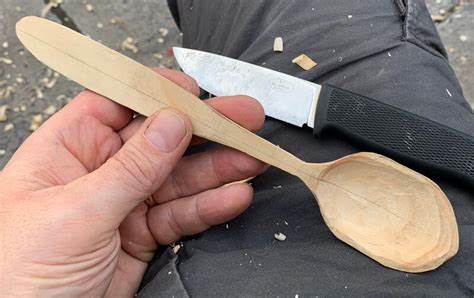
Learn how to carve a functional spoon using only a survival knife. This detailed guide covers wood selection, safe carving techniques, and finishing for bushcraft.
Meta Description: Prepare your home for a winter blizzard with this essential guide. Stock supplies, secure your property, prevent frozen pipes, and ensure warmth and safety for your family