Author: William Smith

  • How to Signal for Help in the Forest Without a Phone

    How to Signal for Help in the Forest Without a Phone

    Venturing into the forest can be an exhilarating experience, offering a chance to connect with nature. However, even the most seasoned adventurers can find themselves in unexpected situations where they become lost or injured. In such dire circumstances, especially without a reliable phone signal or a functioning mobile device, knowing how to signal for help becomes a critical survival skill. This guide will walk you through proven methods to attract attention from rescuers, whether by land or air, relying on ingenuity and an understanding of wilderness survival principles.

    The universal distress signal recognized globally is three of anything: three shouts, three whistle blasts, three fires, three flashes of light. This simple yet powerful convention originated from maritime distress signals and has been adopted by various search and rescue organizations worldwide. Understanding and utilizing this signal consistently across different methods can significantly increase your chances of being located. Every minute counts when you’re in a survival situation, and effective signaling is your primary tool for communicating your need for assistance.

    Initial Steps When Lost

    Before you even start signaling, take a few crucial initial steps to improve your chances of survival and rescue.

    1. S.T.O.P. (Stop, Think, Observe, Plan): This is a fundamental wilderness survival acronym.
      • Stop: Don’t panic. Take a deep breath. Rash decisions often lead to worse situations.
      • Think: Assess your situation. How did you get here? What resources do you have? Are you injured?
      • Observe: Look around. What are the natural landmarks? Where is the sun? Are there any signs of civilization or trails?
      • Plan: Based on your observations, formulate a plan. Is it better to stay put and signal, or try to move? In most cases, staying put is advisable, as it concentrates search efforts on one area.
    2. Stay Put: Unless you are absolutely certain of your direction and proximity to safety, or if staying put poses an immediate threat (e.g., flash flood), staying in one location significantly increases the efficiency of search and rescue teams. You become a stationary target instead of a moving one.
    3. Find or Create Shelter: Protect yourself from the elements. A simple lean-to, a natural cave, or even dense tree cover can provide warmth, dryness, and safety. Conserving your energy is paramount.

    Methods for Signaling for Help

    Once you’ve secured your immediate safety, focus on making yourself visible and audible.

    1. Visual Signals

    Visual signals are effective for attracting the attention of aircraft or distant observers. They rely on contrasts in color, light, or shape against the natural environment.

    1. Signal Fire

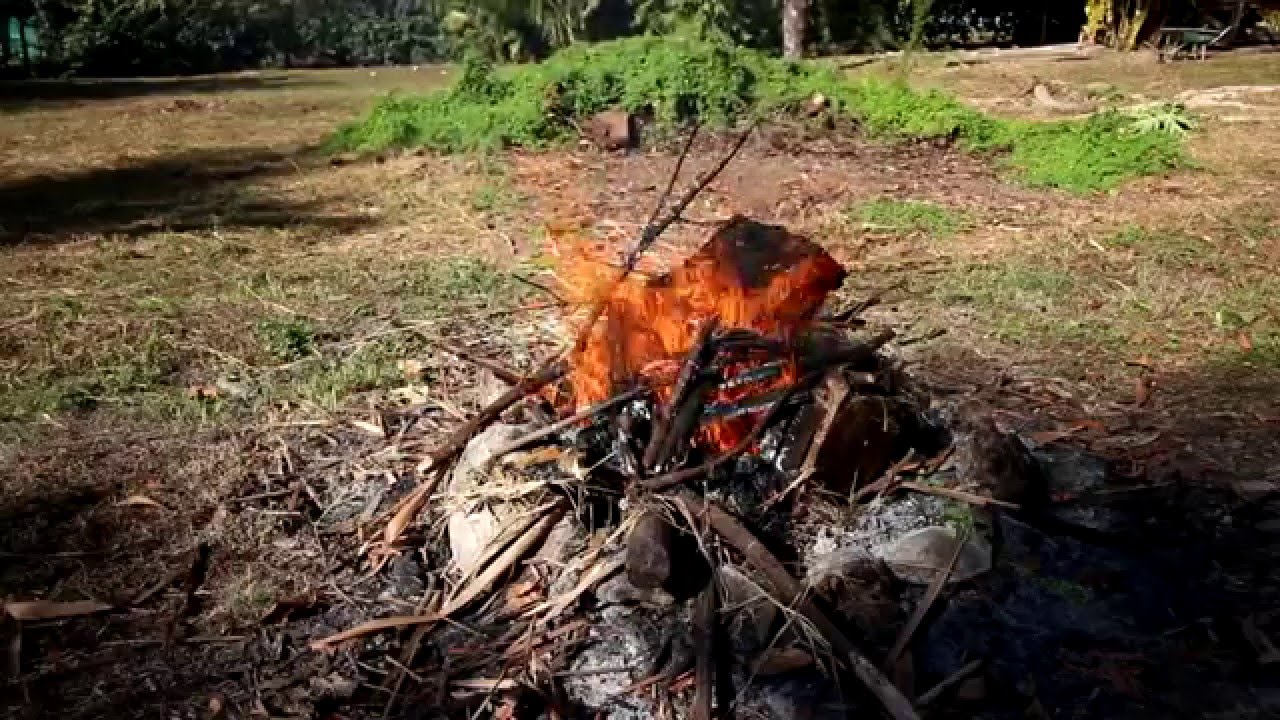
    A signal fire is one of the most effective and universally recognized distress signals, especially in a forested environment where smoke plumes can rise above the tree canopy.

    • Choose a Location:
      • Find an open area, such as a clearing, hilltop, or riverbank, where smoke can easily rise without being immediately obstructed by dense foliage.
      • Ensure the location is safe from igniting a wildfire. Clear a large area around your fire pit down to bare mineral earth (at least 10 feet in all directions) of any flammable materials like dry leaves, grass, or pine needles.
      • Consider wind direction – you want the smoke to be carried upwards, not dispersed horizontally at ground level.
    • Build the Fire Base:
      • Start a regular campfire using the “teepee” or “log cabin” method for a good base of flames. You’ll need tinder (fine, easily ignitable material like dry leaves, bark shavings, cotton lint), kindling (small twigs), and fuel wood (larger branches).
      • Entity Definition: A wildfire is an unplanned, uncontrolled fire that burns in wildland areas, often ignited by natural causes like lightning or human activities. They can spread rapidly and cause extensive damage.
    • Generate Smoke (Daytime Signal):
      • Once your fire is burning strongly, add green, leafy branches, damp moss, or water-saturated materials to produce large amounts of thick, white smoke. The moisture in these materials creates dense smoke that stands out against the sky.
      • For black smoke (which can be more visible against a light sky or snow), add rubber, oil, or plastic, but be cautious about hazardous fumes and the materials you have available.
      • Create three columns of smoke in quick succession. This is the universal distress signal. Build a roaring fire, then smother it repeatedly with green material in three bursts, waiting a few moments between each burst to let the smoke clear slightly before the next.
    • Generate Light (Nighttime Signal):
      • At night, a roaring, visible fire is effective. Keep adding dry fuel to ensure bright, tall flames.
      • You can also try making three bright flashes with a flashlight or by rapidly waving a burning stick if you don’t have enough fuel for sustained bursts.
    1. Signal Mirror or Reflective Surface

    A signal mirror can be a powerful tool for attracting attention during daylight hours by reflecting sunlight towards aircraft, vehicles, or distant observers.

    • Find a Mirror: A dedicated signal mirror is best, but a shiny piece of metal (like a soda can bottom), a CD, a broken piece of glass, or even a smartphone screen (if not fully broken and reflective) can work.
    • Aiming Technique (True Signal Mirror with Aiming Hole):
      1. Hold the mirror in one hand, pointing it towards a distant light-colored surface (like a tree or cloud).
      2. Extend your other arm forward, palm facing the mirror, with your thumb or fingers forming a V-shape.
      3. Look through the aiming hole in the mirror. You should see a bright spot of light on your extended hand or fingers.
      4. Move the mirror slightly until that bright spot appears directly on your target (e.g., an aircraft). This means the beam of light is hitting your target.
      5. Flash the signal three times in quick succession, pause, and repeat.
    • Aiming Technique (Without Aiming Hole):
      1. Hold the reflective surface in one hand, angling it to catch sunlight.
      2. Form a “V” with your fingers on your other hand and hold it outstretched towards your target.
      3. Try to direct the reflection so that the light passes through the “V” and reaches your target. This requires practice.
    • Sweep the Horizon: Even if you don’t see a target, continuously sweep the horizon with flashes. The beam of light can be seen from miles away, even if the observer isn’t directly looking at you.
    1. Ground-to-Air Signals (SOS / HELP)

    Large-scale ground markers are designed to be seen from the air.

    • Choose a Prominent Location: An open clearing, a large rock face, a sandy riverbed, or a snowy field are ideal.
    • Create Large Symbols: Use natural materials that contrast sharply with the ground.
      • Stones/Rocks: Arrange dark stones on light ground, or light-colored stones on dark ground.
      • Branches/Logs: Use freshly cut green branches laid against a snowy or sandy background, or peeled logs against darker soil.
      • Clothes/Tarps: Lay out brightly colored clothing, a sleeping bag, or a tent fly.
      • Trenches: Dig trenches in snow or soft earth.
    • Form the Letters: Create the letters “SOS” or “HELP”.
      • “SOS” is universally recognized and easy to form. Each letter should be at least 10-15 feet tall (3-5 meters), with significant spacing between letters to make them distinct from the air.
      • Alternatively, create a large “X” as a general distress signal.
    • Maintain Visibility: Ensure snow doesn’t cover them, leaves don’t obscure them, or animals don’t disturb them.
    1. Audible Signals

    Audible signals are crucial for attracting attention from ground searchers or people within earshot. Sound travels differently in dense forest environments, but repetition and the universal distress signal are key.

    1. Whistle Blasts

    A whistle is an indispensable survival tool, as it requires less energy than shouting and carries farther.

    • Universal Distress Signal: Blow three short blasts, pause for a minute, and then repeat. This “three-blast” signal is recognizable internationally.
    • Frequency: Blow the whistle every few minutes, especially if you hear sounds that might indicate human presence (e.g., distant voices, vehicles, dogs barking).
    • Direction: Try to listen for a response. If you hear one, try to gauge its direction and angle your blasts accordingly.
    1. Shouting / Yelling

    If you don’t have a whistle, your voice is your next best option.

    • Yell “HELP!” or “HEY!”: Use a strong, clear voice.
    • Three Shouts: Shout in sets of three, with pauses between each set.
    • Conserve Energy: Shouting can quickly deplete your energy and dehydrate you. Use it strategically, perhaps when you hear distant sounds or feel a surge of energy. Avoid constant screaming.
    1. Percussion (Banging)

    Making loud, rhythmic noises can carry surprisingly far in a quiet forest.

    • Find a Resonating Object: Use a hollow log, a large tree buttress, or even an empty metal container if you have one.
    • Strike Repeatedly: Hit the object with a stick or rock in sets of three distinct beats, pause, and repeat. The deeper the sound, the further it might travel.

    Maintaining Hope and Preparedness

    Being prepared is the best defense against getting lost.

    • Tell Someone Your Plans: Always inform someone reliable of your itinerary, including your route, destination, expected return time, and the number of people in your party.
    • Carry Essential Gear: Even for a short hike, carry a basic survival kit. This should include a whistle, a signal mirror, a knife, a fire starter (waterproof matches, lighter, ferro rod), a headlamp or flashlight with extra batteries, a first-aid kit, a map, a compass (and know how to use them), water, and extra layers of clothing.
      • Entity Definition: A survival kit is a collection of essential tools and supplies assembled to aid in survival in an emergency situation. Its contents vary depending on the expected environment and duration of the emergency.
    • Learn Basic Navigation: Even a basic understanding of using a map and compass can prevent you from getting lost in the first place.
    • Stay Hydrated and Fed: Conserve your energy. Ration any food you have and prioritize finding safe drinking water.

    Getting lost in the forest can be a terrifying experience, but knowing how to signal for help can make all the difference. By understanding the universal distress signal and applying these practical, cry-free methods of visual and audible communication, you significantly increase your chances of a successful rescue. Remember, preparedness is key, and the ability to think clearly and act decisively in a crisis is your most valuable asset.

    Frequently Asked Questions (FAQ)

    Q1: What is the universal distress signal?

    A1: The universal distress signal recognized globally is three of anything – three shouts, three whistle blasts, three flashes of light, three fires, or three ground markings. This signal is designed to be easily recognizable and stands out from accidental sounds or visuals.

    Q2: Is it better to stay put or try to find my way out if I’m lost in the forest?

    A2: In most scenarios, it is significantly better to stay put. When you stay in one place, search and rescue teams can focus their efforts on a specific area, making their operation more efficient. Moving around makes you a moving target and can lead you further astray or into more dangerous terrain. Only move if you are absolutely certain of your direction to safety or if your current location is genuinely unsafe.

    Q3: How large should a ground-to-air signal be to be seen by an aircraft?

    A3: For ground-to-air signals like “SOS” or an “X,” each letter or symbol should be at least 10-15 feet (3-5 meters) tall to be clearly visible from an aircraft. Ensure there is significant spacing between the letters to prevent them from blurring together.

    Q4: What materials are best for creating smoke signals during the day?

    A4: To create thick, white smoke during the day, add green, leafy branches, damp moss, or water-saturated organic materials to a well-established fire. The moisture in these materials creates dense, visible smoke. For black smoke, materials like rubber or oil could be used, but use caution with fumes.

    Q5: How far can a whistle signal be heard in the forest?

    A5: The range of a whistle signal varies greatly depending on the terrain, wind, and ambient noise. In dense forest, sound can be absorbed, but a strong whistle blast can still carry for hundreds of meters, and often much further in open clearings or across valleys. It’s much more effective and energy-efficient than shouting over long periods.

    Q6: What basic items should I always carry to help signal for help?

    A6: A basic survival kit should always include items to help you signal. Key items are a whistle, a signal mirror (or a reflective object like a polished metal surface), and fire-starting materials (waterproof matches, lighter, or a ferro rod). These three items cover essential audible and visual signaling.
  • How to Navigate Without a Compass in a Dense Forest

    How to Navigate Without a Compass in a Dense Forest

    Getting lost in a dense forest can be a daunting and disorienting experience. The thick canopy blocks sunlight, familiar landmarks disappear, and the sense of direction can quickly vanish. While carrying a compass and map is paramount for any wilderness excursion, knowing how to navigate using natural signs can be a life-saving skill if your equipment fails or you’re caught unprepared. This article will provide a detailed “how-to” guide on finding your way without a compass in such challenging environments, leveraging ancient techniques and keen observation.

    Historically, humans have relied on natural navigation for millennia. Before the invention of the magnetic compass (believed to have originated in China around the 11th century), explorers, travelers, and hunter-gatherers honed their ability to read the landscape, sky, and even subtle biological cues to find their way. These skills, often passed down through generations, were essential for survival and exploration. Even today, in an age of GPS and satellite navigation, a fundamental understanding of these methods provides a crucial backup and deepens your connection to the natural world.

    First Steps When You Realize You’re Lost

    Panic is your greatest enemy when lost. Staying calm, conserving energy, and thinking clearly are vital.

    1. S.T.O.P. (Stop, Think, Observe, Plan):
      • Stop: Do not wander aimlessly. This will only lead you further astray and exhaust you.
      • Think: Try to retrace your last known movements. When did you last feel oriented? Did you cross any distinct landmarks (streams, unique trees, large rocks)?
      • Observe: Look around for any recognizable features. Listen for sounds (traffic, water, animals).
      • Plan: Based on your observations, formulate a plan of action.
    2. Stay Calm and Conserve Energy: Take deep breaths. Hydrate if you have water. If it’s getting late, prioritize finding shelter and making a plan for the night before attempting to navigate further.
    3. Create a Base Camp (if staying overnight): If self-rescue isn’t immediately apparent or night is approaching, set up a temporary camp. This gives you a central point to return to and helps rescuers find you. Make yourself visible by laying out bright clothing or creating a smoke signal with a fire.

    Method 1: Navigating by the Sun (Daytime)

    The sun is your most reliable guide during the day, even in a dense forest where it might only be partially visible. Its predictable movement across the sky allows for several orientation methods.

    1. The Shadow-Tip Method (Solar Compass)

    This is one of the most accurate solar navigation techniques. It works because the sun’s movement causes shadows to shift from west to east.

    How-To:

    • Find a Clear Spot: Seek out a patch of ground where direct sunlight can hit. This might mean a small clearing or a spot where the canopy is less dense.
    • Set Up Your Stick (Gnomon): Find a straight stick, about 2-3 feet long. Drive it vertically into the ground. Ensure it’s stable and casts a clear shadow.
    • Mark the First Shadow: Place a small stone, twig, or mark a line on the ground precisely at the tip of the stick’s shadow. This is your first mark (W).
    • Wait and Mark Again: Wait for at least 15-30 minutes (the longer you wait, the more accurate the result). The shadow tip will have moved. Mark its new position (E).
    • Draw the East-West Line: Connect the first mark (W) and the second mark (E) with a straight line. This line represents a true East-West line. The first mark (W) will always be to the west, and the second mark (E) to the east.
    • Find North-South: Draw a line perpendicular to your East-West line, passing through the point where the stick is rooted. This perpendicular line indicates North-South. In the Northern Hemisphere, the first shadow tip (West) will always be on your left, and the second (East) on your right when you face North. The stick’s shadow at solar noon (when it’s shortest) points due North.
      • Mnemonic (Northern Hemisphere): Place your left foot on the first mark (W) and your right foot on the second mark (E). You are now facing North.
    1. The Analog Watch Method (Approximate)

    If you have an analog watch (even a digital watch with an analog display), you can use it to find approximate directions. This method is less precise than the shadow-tip method but can offer a quick orientation.

    How-To (Northern Hemisphere):

    • Point the Hour Hand at the Sun: Hold your watch flat. Point the hour hand (the shorter hand) directly at the sun.
    • Bisect the Angle to 12: Imagine a line from the hour hand to the 12 o’clock mark. Bisect (divide in half) the angle formed between the hour hand and the 12. This bisecting line points South.
    • Identify North: Once you know South, North is directly opposite.

    How-To (Southern Hemisphere):

    • Point 12 O’Clock at the Sun: Hold your watch flat. Point the 12 o’clock mark directly at the sun.
    • Bisect the Angle to the Hour Hand: The line bisecting the angle between the 12 o’clock mark and the hour hand points North.
    • Identify South: South is directly opposite North.

    Important Considerations for Watch Method:

    • Daylight Saving Time: If daylight saving time is in effect, point the hour hand at the 1 instead of the 12 in the Northern Hemisphere, or the 1 instead of the 12 in the Southern Hemisphere.
    • Local Solar Noon: This method is most accurate at solar noon. The sun is due south (Northern Hemisphere) or due north (Southern Hemisphere) at this time.

    Method 2: Navigating by the Stars (Nighttime)

    If you’re lost after sunset, the stars become your celestial compass.

    1. Finding Polaris (The North Star – Northern Hemisphere)

    Polaris is the most reliable night-time navigational star in the Northern Hemisphere because it remains almost stationary above the North Celestial Pole.

    How-To:

    • Locate the Big Dipper (Ursa Major): This recognizable constellation (also known as the Plough in the UK) looks like a large ladle or saucepan. It has seven bright stars.
    • Find the “Pointer Stars”: Identify the two stars at the end of the Big Dipper’s “bowl” furthest from the handle (Dubhe and Merak).
    • Follow the Line: Draw an imaginary straight line upwards from Dubhe through Merak. Extend this line approximately five times the distance between the two pointer stars.
    • Identify Polaris: The bright star you arrive at is Polaris, the North Star. Once you’ve located Polaris, you’ve found true North.
    • Verify with the Little Dipper: Polaris is also the last star in the handle of the Little Dipper (Ursa Minor). If you can make out the fainter stars of the Little Dipper, it confirms your sighting.
    • Cassiopeia (W-shape): Look for Cassiopeia, a distinct W or M-shaped constellation. It’s usually opposite the Big Dipper, with Polaris roughly in between them. This can help you find Polaris if the Big Dipper is obscured or low on the horizon.
    1. Finding the Southern Cross (Southern Hemisphere)

    In the Southern Hemisphere, the Southern Cross (Crux) constellation helps locate South.

    How-To:

    • Locate the Southern Cross: This is a small, bright, cross-shaped constellation.
    • Draw an Imaginary Line: Draw an imaginary line from the top star of the cross through the bottom star. Extend this line approximately 4.5 to 5 times its original length towards the horizon.
    • Find the Pointer Stars: Look for two bright stars (Alpha and Beta Centauri) that point towards the Southern Cross. They are often called the “Pointers.”
    • Locate South: The point where the extended line from the Southern Cross intersects with a perpendicular line from the midpoint of the two Pointers will indicate true South on the horizon.
    1. General Star Movement

    If you can’t identify specific constellations, observe the general movement of stars.

    How-To (Northern Hemisphere):

    • Pick any visible star (not Polaris).
    • Use two fixed objects (e.g., two sticks in the ground, or a tree branch and a distant landmark) to align your view of the star.
    • Wait 15-20 minutes.
    • If the star moves:
      • Up and to the left: You are facing generally East.
      • Up and to the right: You are facing generally West.
      • Left (horizontally): You are facing generally North.
      • Right (horizontally): You are facing generally South.

    Method 3: Navigating by Natural Terrestrial Signs

    These methods are less reliable individually but can offer supplementary clues, especially in a dense forest where celestial navigation is difficult. Use them in combination with other methods, not as standalone solutions.

    1. Moss and Tree Growth (Use with Caution!)

    The common adage “moss grows on the north side of trees” is a generalization and often unreliable. Moss thrives in damp, shady conditions, which are more prevalent on the north side of a tree in the Northern Hemisphere (due to less direct sunlight). However, local factors like humidity, tree lean, or nearby water sources can easily override this.

    How-To (Best Practice):

    • Look for Consistency: Don’t rely on a single tree. Observe multiple trees in an open area, or on the same slope, away from immediate water sources.
    • Consider Tree Shape: In open areas, the branches of isolated trees might be thicker and more robust on the side that receives more sun (generally South in the Northern Hemisphere) as they grow towards the light. However, this is less reliable in a dense forest where trees compete for light.
    • Differential Heating: In the Northern Hemisphere, south-facing slopes generally receive more sun, leading to drier, more sun-loving vegetation, while north-facing slopes might have more shade-loving plants.
    1. Water Flow (Rivers and Streams)

    Water always flows downhill. This is a fundamental principle of hydrology.

    How-To:

    • Follow Downstream: Most major rivers and streams eventually lead to larger bodies of water, and often, to human habitation. If you find a stream, following it downstream is often a good strategy for finding civilization or a more significant landmark.
    • Identify Confluences: Streams often merge to form larger rivers. Following the direction of the larger flow is generally a safer bet.
    • Tidal Influence: Be aware that near coastlines, large rivers can experience tidal influence, where the water flows upstream during high tide. This is generally only a few kilometers from the coast and you might notice the water becoming brackish (slightly salty).
    1. Prevailing Winds (Limited Use in Dense Forest)

    In open, flat areas, prevailing winds can affect tree growth, causing them to lean or have fewer branches on the windward side. However, in a dense forest, the canopy and terrain significantly alter wind patterns, making this an unreliable navigation method.

    Method 4: Terrain and Landscape Features

    Understanding how natural features are formed and distributed can provide vital clues.

    • Ridges and Valleys: Water flows down valleys, and valleys often lead to larger bodies of water. Following a valley downstream can be an effective strategy. Ridges can provide higher vantage points to survey the landscape.
    • Elevation: Generally, human settlements are more common at lower elevations, especially near water sources. Walking downhill (following water) is often a sensible strategy.
    • Identifying Major Landmarks: If you have any knowledge of the local geography (e.g., the direction of a major mountain range, a large lake, or a distant city), try to orient yourself relative to those features.

    Method 5: Maintaining a Straight Line (Crucial for Any Method)

    The human tendency, when disoriented, is to walk in circles. To avoid this, you need a technique to maintain a straight line once you’ve determined a general direction.

    How-To (Two-Point Alignment):

    • Pick a Direction: Using one of the methods above, choose a general direction you want to travel (e.g., North, if you know a road is North).
    • Identify Two Objects: Find two distinct objects in that direction, one relatively close (e.g., a tree 20-30 feet away) and one further out (e.g., a tree 100 feet away) that are perfectly aligned.
    • Walk to the Near Object: Walk directly to the closer object, keeping the far object precisely behind it.
    • Re-align: Once you reach the first object, stop. Now, the object you just reached becomes your new “near” object. Find a new distant object that aligns perfectly with your current position and the old “near” object.
    • Repeat: Continuously repeat this process, picking new aligned objects as you move. This ensures you maintain a consistent bearing.

    General Survival and Safety Tips

    • Stay Hydrated: Dehydration can impair judgment. Prioritize finding water.
    • Shelter: If you must spend the night, build a simple shelter to protect against the elements.
    • Signal for Help: Three short blasts of a whistle is a universal distress signal. Build a signal fire. Lay out bright colored items.
    • Positive Mental Attitude (PMA): Maintaining calm and a positive outlook significantly increases your chances of survival.
    • Don’t Travel at Night (Unless Necessary): Navigating in a dense forest at night without proper lighting and knowledge is extremely dangerous.
    • Leave a Trail: If you must move, leave markers (e.g., broken branches, stacked stones) every 10-20 feet so you can retrace your steps if needed.

    Navigating without a compass in a dense forest is a challenging but achievable feat. By combining knowledge of the sun’s path, celestial bodies, and terrestrial cues with careful observation and methodical movement, you can significantly increase your chances of finding your way to safety. Remember, prevention is always better than cure: always carry a map and compass, know how to use them, and inform someone of your itinerary before heading into the wilderness.

    FAQ Section

    Q1: How reliable is the “moss grows on the north side of trees” rule for navigation?

    A1: The “moss grows on the north side of trees” rule is generally unreliable as a standalone navigation method. Moss thrives in damp, shady conditions. While the north side of a tree in the Northern Hemisphere might typically be shadier, other factors like tree lean, humidity, or nearby water sources can easily influence moss growth, leading to false readings. Use it only as a very minor supporting clue, and always verify with other methods.

    Q2: What is the most accurate way to find direction using the sun?

    A2: The shadow-tip method (also known as the solar compass) is the most accurate way to find cardinal directions using the sun. It involves marking the tip of a stick’s shadow at two different times and drawing a line between the marks, which indicates the East-West line.

    Q3: Can I use my smartphone for navigation if I don’t have a compass?

    A3: If your smartphone has battery life and a GPS signal, it can be an invaluable navigation tool. Many mapping apps (like Google Maps, Gaia GPS, or even a pre-downloaded topographic map app) have built-in compass functions and can show your precise location. However, battery life and signal can be unreliable in dense forests, so traditional methods are essential backups.

    Q4: What’s the best strategy if I find a river or stream?

    A4: Generally, following a river or stream downstream is a good strategy. Water flows downhill and usually leads to larger bodies of water, and eventually, to human settlements or civilization. Be mindful of tidal influences near coastlines, where rivers might flow upstream for a short period during high tide.

    Q5: How can I avoid walking in circles when lost in a forest?

    A5: To avoid walking in circles, use the two-point alignment method. Once you determine your desired direction, pick two objects in that line (one near, one far). Walk to the near object, then pick a new far object that aligns with your new position and the old near object. Continuously repeating this process helps maintain a straight path.

    Q6: What should be my absolute first priority if I realize I’m lost?

    A6: Your absolute first priority should be to S.T.O.P. (Stop, Think, Observe, Plan). Do not panic or wander further. Take a moment to calm yourself, assess your situation, and then formulate a logical plan based on the resources available and your knowledge of navigation. Conserving energy and staying calm are crucial for clear decision-making.

  • How to Escape a Sinking Vehicle

    How to Escape a Sinking Vehicle

    Imagine this: You’re driving, and suddenly your car veers off the road and plunges into water. Panic is a natural first reaction, but it’s crucial to fight it. The most important thing to remember is to act quickly and decisively. You typically have only 60 to 120 seconds before a vehicle becomes fully submerged, and some sources suggest even less time in rapidly sinking cars. This isn’t a time for trial and error; it’s a time for a practiced, efficient escape.

    Understanding the Danger: Hydrostatic Pressure and Electrical Failure

    When a vehicle enters water, two major factors come into play:

    • Hydrostatic Pressure: As the car sinks, the water pressure on the outside of the doors rapidly increases. This hydrostatic pressure can make it impossible to open the doors once the water level rises significantly, even if the locks are disengaged. This is why attempting to open the door first is often a fatal mistake.
    • Electrical Failure: Modern vehicles rely heavily on electrical systems. Once water floods the electrical components, power windows, door locks, and even interior lights can fail. This failure can happen surprisingly quickly.

    Historically, older cars were heavier and often sank more slowly, allowing more time for escape. Modern vehicles, with lighter materials and more complex electronics, can sink faster and experience quicker electrical failure, making immediate action even more critical.

    The “SEATBELT, WINDOW, CHILDREN, OUT” (SWCO) Method

    Emergency responders and survival experts often recommend the SWCO method (some variations exist, but the core principle is the same) as the most effective sequence for escape. This method prioritizes the most critical actions in the correct order.

    Step 1: SEATBELT – Unbuckle Immediately

    This is your absolute first action. The moment your vehicle hits the water, before you even fully comprehend what’s happening, unbuckle your seatbelt.

    • Why it’s first: Your seatbelt, while vital for crash safety, will hinder your escape in water. You need to be free to move without restriction.
    • Action: Reach for the release button and press it firmly. If it’s jammed, or you’re disoriented, try to unclip it manually.

    Step 2: WINDOW – Open or Break the Nearest Window

    This is the most critical step. Do not attempt to open the doors.

    • Why windows over doors: As mentioned, hydrostatic pressure will prevent doors from opening once water reaches a certain level, usually just past the windows. Power windows, however, often work for a short period after submersion. Studies have shown they can function for up to 30-60 seconds in some cases.
    • Action:
      • Attempt to open the window: Your first priority is the driver’s side window or the nearest side window. Use the power window switch immediately.
      • If power windows fail or you have manual windows: You must break the window.
        • Use a window breaker (escape tool): This is by far the most effective and recommended method. A dedicated vehicle escape tool (also known as a car escape tool or safety hammer) typically combines a sharp point for breaking glass and a blade for cutting seatbelts. Keep it easily accessible, not in the glove compartment or trunk.
        • How to use a window breaker: Aim for the corner of a side window. Do NOT aim for the windshield or rear window; these are often laminated and much harder to break. Side windows are usually tempered glass and will shatter into small, blunt pieces.
        • If no escape tool: Look for a heavy, sharp, or pointed object within reach. This could be a headrest post (pull the headrest out and use the metal prongs), a sturdy key, or a heavy flashlight. Strike forcefully at the edge or corner of the side window.
        • What about kicking? Kicking a car window is generally ineffective. You need a concentrated point of force to shatter tempered glass.

    Step 3: CHILDREN – Unbuckle and Push Children Out

    If you have children in the car, they are your next priority.

    • Order of children: Start with the oldest child who can swim or follow instructions, or the child closest to an open window. Then move to the youngest.
    • Unbuckle them: Unbuckle their car seats or seatbelts. This can be challenging in a stressful situation, but it’s essential.
    • Push them out: Once unbuckled and the window is open, push them through the opening. Tell them to swim to the surface.
    • Infants/Toddlers: If you have an infant in a rear-facing car seat, consider whether it’s faster to unclip the entire car seat from its base and push the child (still in the seat) out first. This keeps them contained and makes it easier to guide them to the surface. However, this is a highly situational decision.

    Step 4: OUT – Exit the Vehicle

    Once windows are open and children are out, it’s your turn to escape.

    • Take a deep breath: Before submerging completely, take a final deep breath.
    • Swim out: Push yourself out through the open window. Swim upwards towards the surface.
    • Don’t wait for equalization: There’s a common myth that you should wait for the car to fill with water to equalize pressure and then open the door. This is dangerous and time-consuming. The pressure difference is negligible once the water reaches your chest, and by then, the electrical system may have failed, and doors will be impossible to open due to hydrostatic pressure. Focus on the windows immediately.

    Important Considerations and Preparedness

    • Keep a Vehicle Escape Tool Accessible: This is perhaps the single most important preparation. Store it where you can easily grab it, such as clipped to your sun visor, on the dashboard, or in the center console. Do not bury it in the glove compartment.
    • Practice (Mentally): Mentally rehearsing these steps can significantly improve your response time in a real emergency. Imagine the scenario and walk through the SWCO method in your mind.
    • Know Your Car: Understand how your power windows work and how to quickly release your seatbelt.
    • Do Not Attempt to Rescue Belongings: Your life is worth more than any personal item. Leave everything behind.
    • What if the Car Rolls Over? If the vehicle lands upside down, the same principles apply. Unbuckle, find a window, break it, and push yourself out. Orientation underwater can be disorienting; try to remember which way is up (air bubbles will always rise).
    • After Escaping: Once out, swim away from the sinking vehicle to avoid being pulled down by any currents or suction. If possible, find something to cling to for buoyancy.

    The threat of a sinking vehicle is low, but the consequences are extremely high. By understanding the dynamics of such an event and having a clear, actionable plan like the SWCO method, you dramatically increase your chances of survival. Being prepared means having the right tools and the right knowledge.

    Frequently Asked Questions (FAQ)

    Q1: What is the most common mistake people make when their car is sinking?

    A1: The most common and dangerous mistake is attempting to open the door first. Due to hydrostatic pressure, the doors become impossible to open once the water level rises significantly, wasting precious seconds and making escape much harder.

    Q2: Will my power windows still work underwater?

    A2: Yes, often for a short period. Studies suggest that power windows can continue to function for 30 to 60 seconds (or even slightly longer in some cases) after a vehicle enters water. This is why opening the window immediately is critical before the electrical system fails.

    Q3: What is a vehicle escape tool and why do I need one?

    A3: A vehicle escape tool (also known as a car escape tool or safety hammer) is a small device designed to help you escape a car in an emergency. It typically features a pointed tip for breaking tempered glass windows and a sharp blade for cutting jammed seatbelts. You need one because it is the most effective way to break a car window quickly when power windows fail.

    Q4: Where should I keep my car escape tool in my vehicle?

    A4: Keep your car escape tool readily accessible, not in the trunk or glove compartment. Ideal locations include clipped to the sun visor, on the dashboard, or in the center console within arm’s reach.

    Q5: Should I wait for the car to fill with water before trying to open the door?

    A5: No, absolutely not. This is a dangerous myth. Waiting for the car to fill with water wastes critical time, and by then, the electrical system will likely have failed, and the doors will be impossible to open due to external water pressure. Focus on opening or breaking a window immediately.

  • How to Teach Kids Basic Survival Skills

    How to Teach Kids Basic Survival Skills

    Teaching children basic survival skills is not just about preparing them for emergencies; it’s about fostering confidence, resilience, and a deep connection with nature. This guide provides a structured approach to imparting essential survival skills to children, ensuring they are equipped to handle unexpected situations.

    1. Start with Safety and Awareness

    Before diving into specific skills, instill a strong sense of safety and environmental awareness in your child.

    • Discuss Safety Protocols: Teach them how to recognize potential hazards in their surroundings, such as poisonous plants or dangerous animals.
    • Establish Boundaries: Ensure they understand the importance of staying within designated safe zones and the significance of notifying an adult when venturing into unfamiliar areas.
    1. Basic First Aid

    Understanding how to respond to injuries is crucial.

    • Teach Basic Techniques: Show them how to clean and bandage minor cuts and scrapes.
    • Role-Playing Scenarios: Practice scenarios where they need to apply first aid, reinforcing their confidence in handling real situations.
    • Create a Child-Friendly First Aid Kit: Involve them in assembling a kit with essentials like band-aids, antiseptic wipes, and gauze pads, explaining the purpose of each item .
    1. Fire Safety and Building

    Fire is a vital survival tool when used correctly.

    • Understand Fire Safety: Discuss the importance of fire safety, including how to build a fire safely and how to extinguish it properly.
    • Supervised Practice: Under close supervision, allow them to gather tinder and kindling, and build a small fire. Emphasize the need for adult supervision at all times .
    1. Water Purification

    Access to clean water is essential for survival.

    • Demonstrate Purification Methods: Teach them how to purify water using methods like boiling or using purification tablets.
    • Hands-On Practice: Allow them to practice these methods under supervision, ensuring they understand the importance of clean water for health .
    1. Shelter Building

    Knowing how to create a shelter can protect them from the elements.

    • Identify Suitable Materials: Teach them to recognize materials like branches and leaves that can be used to build a shelter.
    • Construct Simple Shelters: Guide them in building basic shelters, such as a lean-to or debris hut, using these materials .
    1. Navigation Skills

    Basic navigation skills can help them find their way in unfamiliar terrain.

    • Introduce Landmarks: Teach them to identify natural landmarks and use them to orient themselves.
    • Use Simple Tools: Introduce them to basic tools like a compass and explain how to use them to determine direction .
    1. Knot Tying

    Knot tying is a practical skill with various applications.

    • Start with Simple Knots: Teach them basic knots like the square knot and bowline.
    • Incorporate Games: Use games and challenges to make learning knots fun and engaging .
    1. Plant Identification

    Knowing which plants are safe to eat can be life-saving.

    • Identify Edible Plants: Teach them to recognize common edible plants in your area.
    • Discuss Poisonous Plants: Educate them about plants that are harmful and should be avoided .
    1. Emergency Signaling

    Being able to signal for help is crucial in emergencies.

    • Teach Signaling Methods: Show them how to use a whistle, mirror, or fire to signal for help.
    • Practice Scenarios: Conduct drills where they practice signaling for help in various situations .
    1. Regular Practice and Drills

    Repetition and practice reinforce learning.

    • Conduct Regular Drills: Schedule regular drills to practice the skills they’ve learned.
    • Review and Improve: After each drill, discuss what went well and what can be improved, ensuring continuous learning and confidence building .
  • Primitive life of the Poor – Catch Fish And Cooking Fish

    Primitive life of the Poor – Catch Fish And Cooking Fish


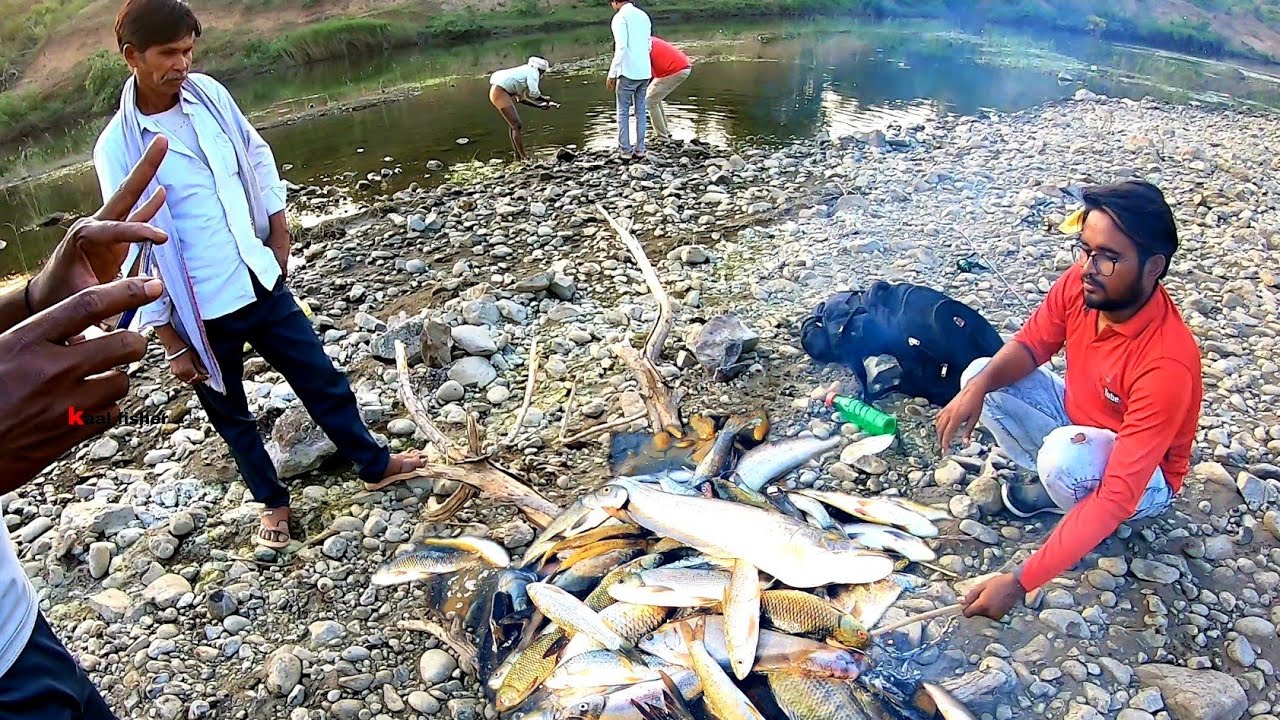
    Today we will release a content called Primitive life of the Poor – Catch Fish And Cooking Fish. Thanks for watching !… Don’t forget LIKE – COMMENT – SHARE …

    source

  • Wazoo Survival Gear – Overview and philosophy

    Wazoo Survival Gear – Overview and philosophy


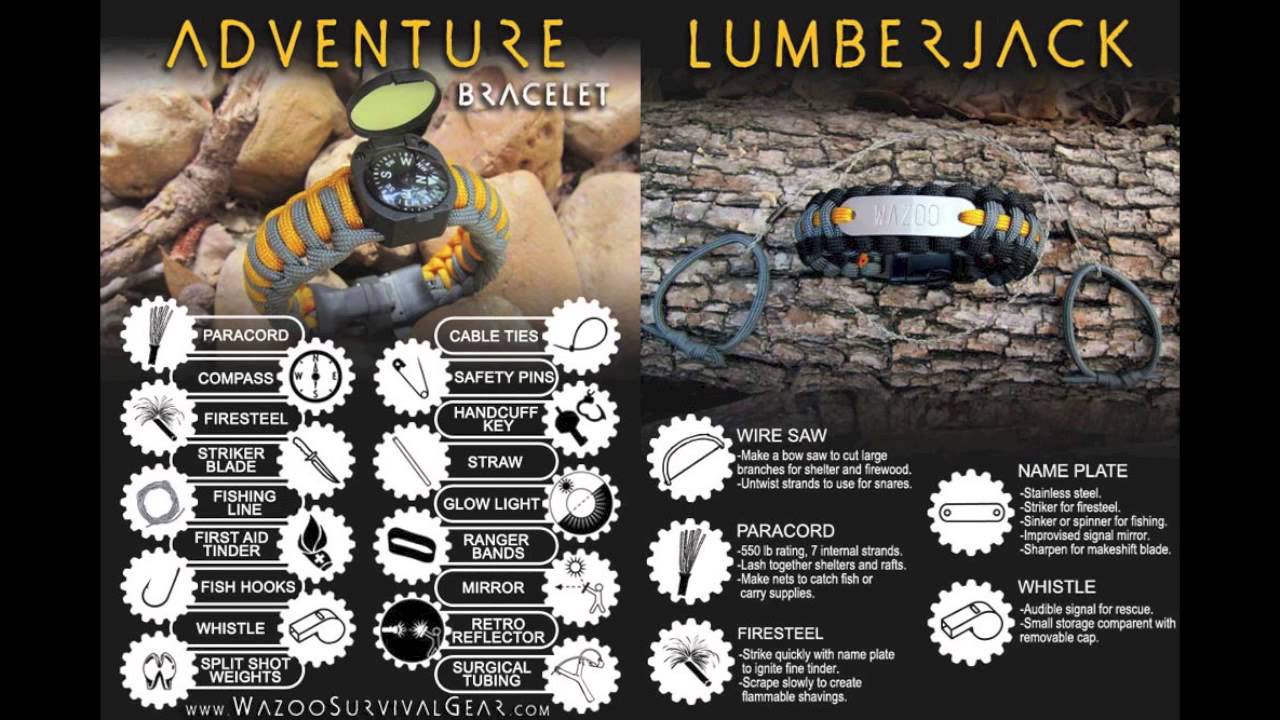
    This is Wazoo Survival Gear, and a quick intro and background of why we do what we do. Hope you enjoy our products and videos.

    source

  • How To Survive in Zombie Mode || Top 5 Tips and Tricks in Survive Till Dawn ( Part 2)

    How To Survive in Zombie Mode || Top 5 Tips and Tricks in Survive Till Dawn ( Part 2)


    How To Survive in Zombie Mode || Top 5 Tips and Tricks in Survive Till Dawn ( Part 2) Survive Till Dawn Tips and Tricks (Part 1) https://youtu.be/oAtwj50KOKE Hi …

    source

  • Testing Out Brand New Survival Gadgets

    Testing Out Brand New Survival Gadgets


    Here SUBSCRIBE! https://www.youtube.com/channel/UCfn_qdZ1XMLRKIfMhexjooA Here’s a link to my Survival Store: http://kidprepper.com/survival-store/ …

    source

  • BRAND NEW GAME MODE…THE HUNT !! | ARK SURVIVAL EVOLVED

    BRAND NEW GAME MODE…THE HUNT !! | ARK SURVIVAL EVOLVED


    BRAND NEW GAME MODE…THE HUNT !! | ARK SURVIVAL EVOLVED ➜➜➜➜➜➜➜➜➜➜➜ JOIN THE PATREON https://www.patreon.com/TheAxeMan …

    source