Category: Survival Tips

  • How to Protect Yourself From Wild Animals in the Wild

    How to Protect Yourself From Wild Animals in the Wild

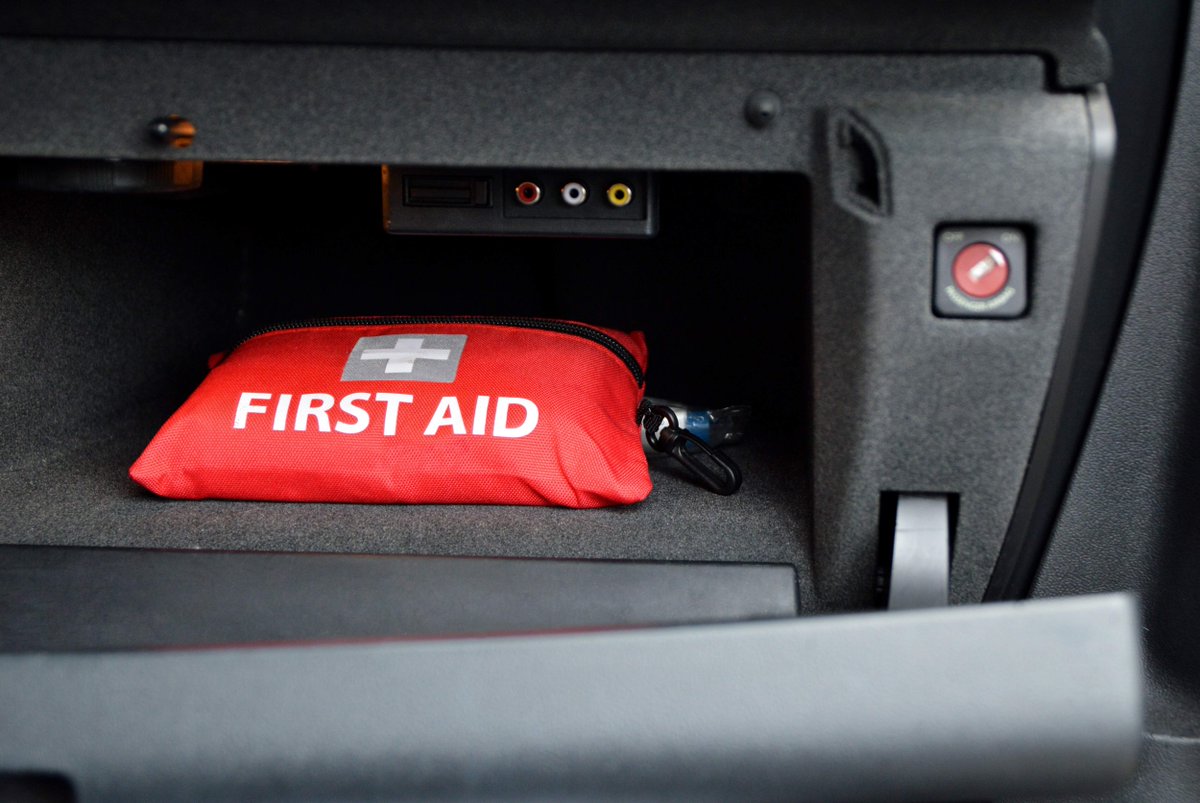
    Venturing into the wild offers unparalleled opportunities for adventure, exploration, and a deeper connection with nature. However, it also means entering the natural habitat of wild animals. While most wild animal encounters are harmless, understanding how to prevent negative interactions and react appropriately in an unexpected situation is crucial for your safety. From the smallest insects to the largest predators, being prepared is your best defense.

    The key to protecting yourself from wild animals lies in knowledge, awareness, and respecting their space. Animals typically avoid humans, and most incidents occur when animals feel threatened, are protecting their young or food, or are habituated to human presence (often due to improper food storage). This guide provides comprehensive steps to minimize risk and react effectively during a wild animal encounter.

    Understanding Wild Animal Behavior

    Before diving into specific protection methods, it’s essential to understand general wild animal behavior:

    • Fear of Humans: Most wild animals instinctively fear humans and will try to avoid confrontation.
    • Territoriality: Animals may become aggressive if they perceive you as a threat to their territory, young, or food source.
    • Habituation: Animals that become accustomed to humans (e.g., by being fed) can lose their natural fear and become bold, leading to more dangerous encounters. This is why “do not feed the animals” rules are critical in national parks and wilderness areas.
    • Surprise Encounters: Many negative interactions occur when an animal is surprised, leading to a defensive reaction. Making noise while hiking can help prevent this.
    • Food Motivation: Animals, particularly bears and rodents, are often driven by food. Improper food storage is a leading cause of human-wildlife conflict.

    Prevention: Minimize Your Chances of an Encounter

    The best way to protect yourself is to avoid an encounter in the first place. Prevention is always better than confrontation.

    1. Research Your Destination and Local Wildlife
    • Know the Inhabitants: Before your trip, research the types of animals prevalent in the area you’ll be visiting. Understand their typical behaviors, feeding habits, and active times (e.g., nocturnal, diurnal).
    • Check Park Advisories: Consult park ranger stations, visitor centers, or official park websites for recent wildlife sightings, warnings, or closures. They often have the most up-to-date information on animal activity.
    • Learn About Local Dangers: Identify specific regional threats, such as venomous snakes, scorpions, or aggressive species like moose in North America or wild boars in parts of Europe and Asia.
    1. Make Your Presence Known
    • Make Noise While Hiking: Talk, sing, or attach a bear bell to your backpack (though some argue their effectiveness for bears, they are good for general awareness). This helps avoid surprising animals, giving them time to move away.
    • Travel in Groups: Groups are generally louder and appear larger, which can deter animals. Many predators are less likely to approach multiple individuals.
    1. Store Food Properly (Crucial for Mammals)

    This is one of the most important steps, especially when dealing with bears, raccoons, rodents, and coyotes.

    • Bear-Resistant Containers/Bags: Use certified bear-resistant food containers (BRFCs) or hang your food in a bear bag at least 10-12 feet off the ground and 6 feet away from the tree trunk.
    • Never Store Food in Tents: Keep all food, scented items (toothpaste, deodorant, lotions), and garbage outside your tent. Animals have an incredibly keen sense of smell.
    • Clean Up Thoroughly: Don’t leave any food scraps or crumbs around your campsite. Pack out all garbage, even tiny bits.
    • Cook Away from Sleeping Areas: Set up your cooking area a good distance (at least 100 yards/meters) downwind from your sleeping area.
    1. Maintain a Clean Campsite
    • No Food Waste: Don’t bury food scraps; animals will dig them up.
    • Proper Waste Disposal: Use designated trash receptacles or pack out all waste, including food wrappers, fruit peels, and even dishwater.
    1. Keep Pets Under Control
    • Leash Your Dogs: Pets, especially dogs, can provoke wild animals. Keep them on a leash at all times, as even a well-behaved dog can trigger a defensive attack from wildlife.
    • No Free Roaming: Do not allow pets to roam freely, as they can chase or harass animals, leading to dangerous confrontations.
    1. Avoid Approaching Wild Animals
    • Maintain Distance: Never approach, follow, or feed wild animals. Use binoculars or a telephoto lens for viewing. A general rule of thumb for large animals is to stay at least 25 yards (23 meters) away, and 100 yards (91 meters) for bears and wolves.
    • Teach Children: Educate children about the dangers of approaching wildlife and the importance of respecting their space.
    • Never Feed Animals: This habituates them to humans and teaches them to associate humans with food, leading to aggressive behavior. It also disrupts their natural diet and behaviors.

    Deterrence: Tools and Strategies

    Even with preventative measures, an encounter can happen. Having deterrents ready can be lifesaving.

    1. Bear Spray (Capsaicin-Based Deterrent)
    • Purpose: Effective against aggressive bears (black, grizzly, polar) and other large mammals like cougars, moose, and aggressive dogs. Bear spray contains a highly concentrated capsaicin (the active ingredient in chili peppers) irritant designed to temporarily incapacitate an animal’s respiratory system and eyes, giving you time to escape.
    • Carry it Accessibly: Keep it in a holster on your hip or chest, not in your backpack. You need to be able to deploy it instantly.
    • Know How to Use It: Practice deploying a training canister. Understand wind direction, effective range (usually 25-35 feet/7-10 meters), and spray duration. Aim for the animal’s face.
    • Check Expiration Dates: Bear spray has an expiration date; ensure yours is current.
    1. Whistles or Air Horns
    • Sudden Noise: A loud, sudden noise can startle and deter some animals, especially smaller ones like coyotes, wolves, or curious bears.
    • Signaling: Also useful for signaling for help in an emergency.
    1. Trekking Poles or Sticks
    • Appearance: Holding trekking poles above your head can make you appear larger.
    • Defense: Can be used as a last resort for physical defense, but primary focus should be on escape.

    During an Encounter: How to React

    Your reaction depends heavily on the type of animal and its behavior.

    General Rules for All Animals:

    1. Stay Calm: Panic can lead to poor decisions. Take a deep breath.
    2. Do Not Run: Running can trigger a chase response in many predators.
    3. Appear Large: Stand your ground, wave your arms slowly, and speak in a firm, loud voice.
    4. Back Away Slowly: Slowly back away, never turning your back on the animal.
    5. Give Them Space: Allow the animal an escape route. Do not corner it.

    Specific Animal Encounters:

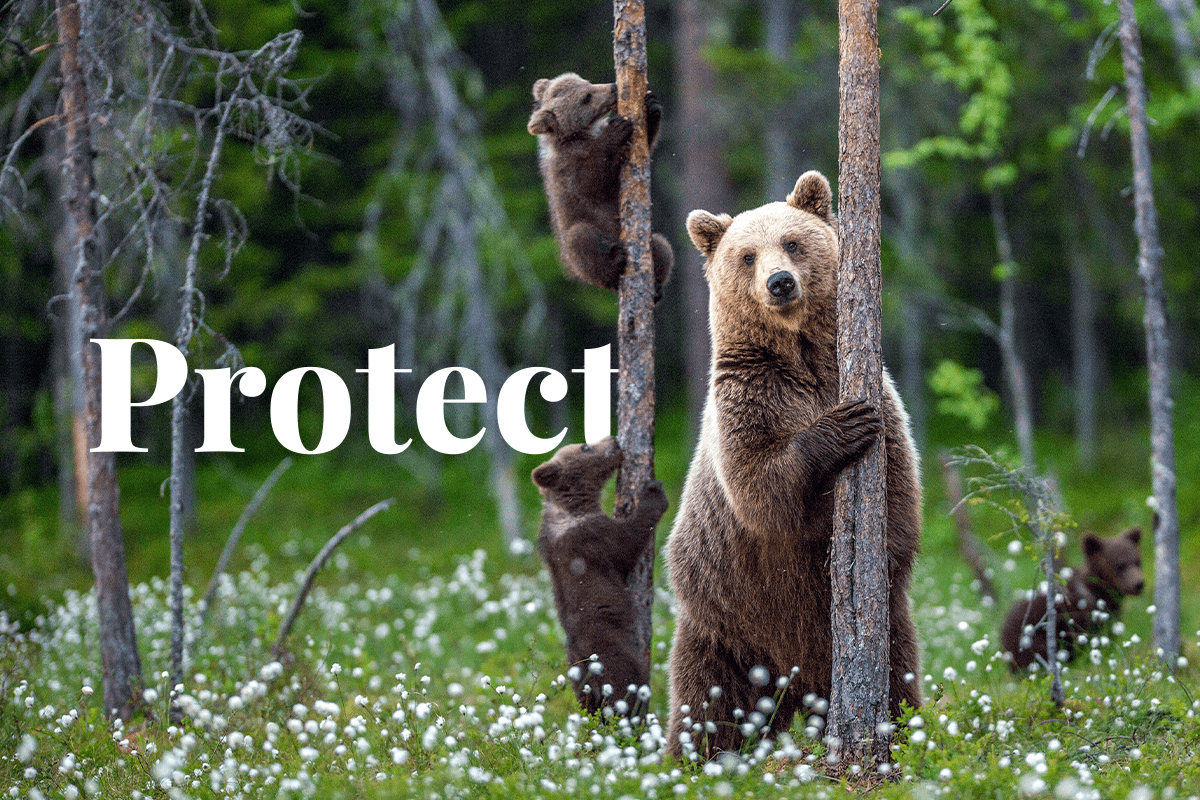
    • Bears (Black Bear, Grizzly Bear/Brown Bear):
      • Black Bear: Generally less aggressive. Make noise, yell, and try to scare it away. If it charges, stand your ground. If it attacks, fight back with everything you have, aiming for the face and eyes.
      • Grizzly Bear/Brown Bear: More aggressive and territorial.
        • If it charges (bluff charge): Stand your ground. Most charges are bluff charges. Deploy bear spray when it’s within range (25-35 feet).
        • If it makes contact (defensive attack): Play dead. Lie on your stomach with your hands clasped behind your neck to protect your vital organs. Spread your legs to prevent rolling. Remain still until you are certain the bear has left.
        • If it’s a predatory attack (rare): If a bear attacks you in your tent or at night, or if it’s a silent, predatory stalk, fight back as aggressively as possible.
    • Cougars/Mountain Lions:
      • Do not run.
      • Make yourself look big: Wave your arms, open your jacket, shout aggressively.
      • Maintain eye contact: Unlike bears, eye contact is generally advised for cougars.
      • Throw objects: If it approaches, throw rocks, sticks, or anything you can reach.
      • Fight back: If an attack occurs, fight back aggressively with anything available, aiming for the eyes and nose.
    • Moose:
      • Recognize Warning Signs: Ears laid back, hair on neck bristling, stomping hooves. Moose are large and can be extremely aggressive, especially cows with calves or during mating season.
      • Do Not Approach: Give them a wide berth.
      • If Charged: Run and try to get behind a large tree or obstacle. If knocked down, curl into a ball and protect your head.
    • Wolves/Coyotes/Wild Dogs:
      • Generally shy, but can become bold if habituated.
      • Make noise, throw objects, appear aggressive.
      • Maintain eye contact.
      • Do not run.
      • If they attack, fight back aggressively.
    • Snakes:
      • Identify Venomous vs. Non-Venomous: Learn local venomous snake species.
      • Leave Them Alone: Most snake bites occur when people try to handle, harass, or kill snakes.
      • Watch Your Step: Be aware of where you place your hands and feet, especially in rocky or grassy areas.
      • If Bitten (Venomous):
        • Stay calm and minimize movement.
        • Remove any tight clothing or jewelry near the bite area.
        • Keep the bitten area below heart level.
        • Clean the wound with soap and water (if available).
        • Seek immediate medical attention. Do not apply a tourniquet, cut the wound, or try to suck out venom. These methods are harmful and ineffective.
    • Insects (Ticks, Mosquitoes, Bees/Wasps):
      • Repellents: Use insect repellents containing DEET or Picaridin.
      • Protective Clothing: Wear long sleeves and pants, tucking pants into socks.
      • Check for Ticks: Perform thorough tick checks after outdoor activities. Remove ticks promptly and correctly with fine-tipped tweezers.
      • Allergies: If you have severe allergies to insect stings (e.g., bees, wasps), carry an Epinephrine Auto-Injector (EpiPen) and know how to use it.
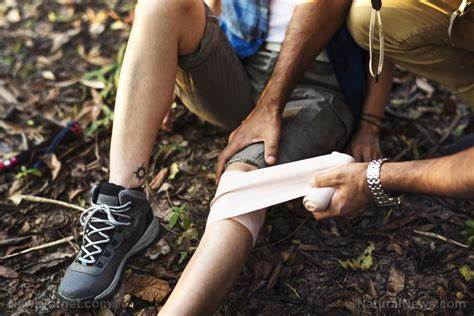
    After an Encounter

    • Assess Safety: Ensure you and your group are safe and out of immediate danger.
    • Check for Injuries: Examine yourself and others for any injuries, even minor ones.
    • Report the Incident: If it was a significant or aggressive encounter, especially with a large animal, report it to park rangers or local wildlife authorities. This helps them monitor animal behavior and issue warnings if necessary.
    • Learn from the Experience: Reflect on what happened and how you can better prevent or handle future encounters.

    By understanding animal behavior, taking preventative measures, carrying appropriate deterrents, and knowing how to react in an emergency, you can significantly enhance your safety and enjoy your time in the wild responsibly. Remember, you are a visitor in their home.

    FAQ (Frequently Asked Questions)

    Q1: What is the most important rule when encountering a wild animal?

    The most important rule is do not run. Running can trigger a chase response in many predators. Instead, stay calm, make yourself appear large, and slowly back away while maintaining eye contact (except for bears where direct eye contact can be seen as a challenge).

    Q2: Is bear spray effective against all types of bears?

    Bear spray is effective against all types of bears (black, grizzly, and polar bears) as well as other aggressive large mammals like cougars or moose. It works by irritating the animal’s respiratory system and eyes, giving you a chance to escape. It’s crucial to carry it in an easily accessible location and know how to use it.

    Q3: How should I store food in the wilderness to avoid attracting animals?

    Always store food, garbage, and all scented items (like toiletries) in bear-resistant containers (BRFCs) or hang them in a bear bag at least 10-12 feet off the ground and 6 feet away from the tree trunk. Never keep food inside your tent. Cook and eat at least 100 yards (91 meters) away from your sleeping area.

    Q4: What should I do if a bear charges me?

    A4: Your reaction depends on the bear species and the type of charge:

    • Black Bear: If a black bear charges or attacks, fight back aggressively with anything you have, aiming for the face and eyes. Black bear attacks are often predatory.
    • Grizzly Bear (Brown Bear): Most charges are bluff charges. Stand your ground and prepare to use bear spray. If the bear makes physical contact and it’s a defensive attack, play dead by lying on your stomach, protecting your neck, and remaining still. If it’s a rare predatory attack, fight back.

    Q5: Should I make eye contact with a wild animal?

    Generally, avoid direct eye contact with bears, as they can interpret it as a challenge. For cougars (mountain lions), wolves, and coyotes, maintaining eye contact is often recommended to show them you are not prey. Always prioritize staying calm and slowly backing away.

    Q6: How far away should I stay from wild animals?

    As a general rule, stay at least 25 yards (23 meters) away from most wild animals. For bears and wolves, maintain an even greater distance of at least 100 yards (91 meters). Always give animals ample space, especially if they have young.

    Q7: What if I encounter a snake?

    If you encounter a snake, leave it alone. Most snake bites occur when people try to handle, harass, or kill snakes. Give it a wide berth and walk around it. Be aware of where you step and place your hands in rocky or grassy areas. If you are bitten by a venomous snake, stay calm, keep the bitten area below heart level, and seek immediate medical attention. Do NOT use tourniquets, cut the wound, or try to suck out venom.

    Q8: Is it safe to bring my dog into the wilderness?

    If allowed in the area, always keep your dog on a leash. Dogs can provoke wild animals, chase them into dangerous situations, or draw aggressive animals to you. A leashed dog is easier to control and less likely to trigger a negative interaction.

  • How long Can We Survive Without Water

    How long Can We Survive Without Water

    Water is not just a beverage; it’s a fundamental component of life. The human body is composed of roughly 55-78% water, playing an indispensable role in virtually every bodily function. From regulating body temperature and lubricating joints to transporting nutrients, removing waste products, and enabling cellular processes, water is constantly being used and lost. This continuous turnover makes hydration absolutely critical for survival.

    The question of how long a human can survive without water is complex, with no single, definitive answer. While the popular “Rule of Threes” in survival lore suggests 3 days without water as a general guideline, this is a broad average. The actual duration can vary significantly based on a multitude of factors, highlighting the body’s delicate balance and its vulnerability to dehydration. Historically, instances of survival in extreme conditions (e.g., desert environments, adrift at sea) have provided stark examples of the limits of human endurance without water, often with tragic outcomes. Medical science has since quantified the physiological impacts of water deprivation, emphasizing the rapid onset of severe health consequences.

    This article delves into the critical factors that determine human survival time without water, the stages of dehydration, and the severe health impacts of water deprivation.

    Understanding Water Loss and Its Impact

    Our bodies constantly lose water through various processes, even at rest:

    • Urination: The primary way the body excretes waste.
    • Sweating: Essential for cooling the body, especially in warm environments or during physical activity.
    • Respiration: Water vapor is exhaled with every breath.
    • Feces: A small amount of water is lost through waste elimination.

    When water intake doesn’t match water loss, the body enters a state of dehydration, which progressively impairs physiological functions.

    Factors Influencing Survival Time Without Water

    The “3 days without water” rule is a simplified average. Actual survival time is influenced by several critical variables:

    1. Environmental Conditions (Temperature and Humidity):
      • High Temperatures: In hot, dry climates (like a desert), the body sweats profusely to cool down, leading to rapid water loss. Survival time can be drastically reduced to just a few hours to a day in extreme heat (e.g., 40°C / 104°F and above).
      • High Humidity: While it reduces evaporative cooling, it still contributes to sweat production if temperatures are high, accelerating dehydration.
      • Moderate Temperatures: In temperate climates, survival might extend to 3-5 days.
      • Cold Temperatures: Surprisingly, cold environments can also cause dehydration. The body still loses water through respiration (humidifying cold air) and increased urination (cold-induced diuresis). People often feel less thirsty in the cold, leading to insufficient intake.
    2. Individual Physical Activity Level:
      • Strenuous Activity: Intense physical exertion (walking, running, building shelter) dramatically increases sweating and, consequently, water loss. Survival time will be significantly shortened.
      • Rest: Remaining still and minimizing movement conserves energy and water, extending survival time.
    3. Individual Health and Metabolism:
      • Age: Infants and the elderly are more susceptible to rapid dehydration and have less physiological reserve.
      • Body Fat: Individuals with higher body fat percentages may theoretically survive slightly longer as fat metabolism releases some water, but this is marginal and not a sustainable strategy.
      • Pre-existing Medical Conditions: Diabetes, kidney disease, heart conditions, or fevers can accelerate dehydration and complicate the body’s ability to cope.
      • Medications: Some medications (e.g., diuretics) can increase fluid loss.
    4. Food Intake:
      • No Food: Surviving without both food and water is more critical, as the body uses metabolic water from food breakdown.
      • Food with High Water Content: If any food is consumed (e.g., certain fruits or vegetables), it can slightly extend survival time by providing some fluid, though not enough to fully rehydrate.
    5. Pre-existing Hydration Level:
      • Someone already mildly dehydrated will have a shorter survival window than someone fully hydrated at the start of the deprivation.

    The Stages and Symptoms of Dehydration

    As the body loses water, it goes through progressive stages of dehydration, each with worsening symptoms:

    • Mild Dehydration (1-5% body weight loss):
      • Thirst (the first and most obvious sign).
      • Dry mouth.
      • Fatigue, lethargy.
      • Headache.
      • Decreased urination (urine becomes darker).
    • Moderate Dehydration (5-10% body weight loss):
      • Intense thirst.
      • Very dry mouth and tongue.
      • Sunken eyes.
      • Dizziness, lightheadedness.
      • Muscle cramps.
      • Reduced urine output, very dark urine.
      • Confusion, irritability.
    • Severe Dehydration (10% or more body weight loss):
      • Extreme thirst, inability to swallow.
      • Rapid, weak pulse.
      • Rapid breathing.
      • Low blood pressure.
      • Lack of sweating.
      • Shriveled skin.
      • Altered consciousness (delirium, stupor, coma).
      • Kidney failure, organ damage.
      • Eventually, death.

    How the Body Copes (and Fails) Without Water

    When deprived of water, the body initiates a series of compensatory mechanisms:

    1. Reduced Urine Output: The kidneys reabsorb as much water as possible to conserve fluids.
    2. Increased Thirst Sensation: The brain signals the need for water.
    3. Blood Volume Reduction: As fluid is lost from the blood, blood volume drops, leading to decreased blood pressure and less efficient circulation.
    4. Electrolyte Imbalance: Essential electrolytes (sodium, potassium) become concentrated or imbalanced, disrupting nerve and muscle function.
    5. Cellular Dysfunction: Cells begin to shrink as water moves out of them to try and maintain blood volume. This impairs cellular processes throughout the body, including brain function.
    6. Organ Failure: Prolonged severe dehydration leads to organ damage, particularly the kidneys (acute kidney injury), and can result in circulatory collapse and death.

    Preventing and Managing Dehydration in Survival Situations

    While this article focuses on the duration of survival, understanding how to prolong it is critical:

    • Conserve Energy: Minimize physical exertion to reduce sweating. Rest in the shade during the hottest parts of the day.
    • Stay Calm: Panic increases heart rate and sweating.
    • Seek/Build Shelter: Protection from sun, wind, and extreme temperatures is paramount to reducing water loss.
    • Prioritize Water over Food: In short-term survival (up to 3-5 days), finding water is far more important than finding food.
    • Avoid Eating Dehydrating Foods: Do not eat salty foods or foods that require a lot of water to digest.
    • Do NOT Drink Urine or Seawater: These contain high concentrations of salts that will increase dehydration as your kidneys work harder to excrete them, accelerating fluid loss.
    • Sip, Don’t Gulp: If you find water, sip it slowly to allow your body to absorb it efficiently without overloading your system.

    Conclusion

    The question of how long one can survive without water is answered with a range, typically 3 to 5 days, but can be as short as a few hours in extreme heat or slightly longer in very favorable, cool, and inactive conditions. Water is the most critical immediate resource for human survival, far surpassing food in its urgency. The devastating effects of progressive dehydration highlight the body’s absolute reliance on a consistent water supply for all its vital functions. Understanding these physiological limits underscores the paramount importance of prioritizing hydration in any survival scenario.

    FAQ

    Q1: What is the absolute minimum amount of time a person can survive without water?

    In extremely harsh conditions, such as direct sunlight in a hot desert with no shade and high physical activity, a person could potentially succumb to severe dehydration in as little as a few hours to a single day.

    Q2: Does eating food help you survive longer without drinking water?

    While some foods, especially fruits and vegetables, contain water, they are not a substitute for direct water intake in a survival situation. The body also requires water to digest food. In a situation where water is scarce, it’s generally recommended to avoid eating foods that require significant digestion, as this can actually increase your body’s water demand. Focus on finding water first.

    Q3: Can drinking urine or seawater help you survive longer without water?

    Absolutely not. Drinking urine or seawater will accelerate dehydration. Both contain high concentrations of salts and other waste products. Your kidneys would have to use more water to process and excrete these substances than you ingested, leading to a net loss of fluid and worsening your condition.

    Q4: What are the first signs of dehydration when you don’t have water?

    The very first and most obvious sign of dehydration is thirst. Other early symptoms include a dry mouth, reduced frequency of urination (and darker urine), fatigue, and headache. These quickly progress to more severe symptoms if water is not consumed.

    Q5: Why is water more important for survival than food?

    Water is more crucial than food for immediate survival because the human body relies on water for all its essential physiological processes, including temperature regulation, nutrient transport, and waste removal. The body can store energy reserves (fat, glycogen) to survive for weeks without food, but it has very limited water reserves. Severe dehydration leads to rapid organ failure and death, whereas starvation takes much longer.

  • How to Reuse and Recycle for Survival

    How to Reuse and Recycle for Survival

    In a world where resources might be scarce or supply chains disrupted, your ability to reuse and recycle becomes a cornerstone of survival. This isn’t just about being environmentally conscious; it’s about making the most of every single item at your disposal to meet your basic needs for shelter, water, food, warmth, and security.

    Step 1: Cultivate a Survivalist Mindset: “Waste Not, Want Not”

    The first and most critical step is to shift your perspective on what constitutes “waste.” In a survival situation, very few things are truly useless. Every discarded item has potential.

    • Observe Everything: Look at every piece of “trash” with an inquisitive eye. What is it made of? What are its properties (flexible, rigid, sharp, waterproof, absorbent)? How was it originally used, and how might those properties be repurposed?
    • Think Beyond Original Purpose: A plastic bottle isn’t just for holding water; it can be a filter housing, a funnel, a makeshift scoop, or even part of a small greenhouse. An old tin can isn’t just a food container; it can be a cooking pot, a stove, or a lantern.
    • Embrace Imperfection: Your recycled survival tools won’t be pristine or factory-made. Functionality trumps aesthetics. A patched-up tarp made from fused plastic bags is a success if it keeps you dry.

    Step 2: Categorize and Store Potential Resources

    Before you can reuse or recycle, you need to know what you have. Develop a system for collecting and categorizing common discarded materials.

    • Plastics:
      • Bottles (PET, HDPE): Water bottles, soda bottles, milk jugs. These are excellent for water storage, purification systems, and making small containers or scoops.
      • Bags (LDPE): Grocery bags, trash bags. Ideal for collecting water, improvised tarps, ponchos, rope (when braided), and even insulation.
      • Containers (PP, PS): Yogurt cups, butter tubs, detergent bottles. Can be used for small storage, planters, or as molds.
    • Metals:
      • Tin Cans: Food cans (soup, vegetables). Perfect for cooking, boiling water, creating stoves (hobo stove, alcohol stove), or signal devices.
      • Aluminum Foil: From food packaging or even old mylar balloons. Highly versatile for cooking (wrapping food for fire cooking), signal mirrors, and temporary repairs.
      • Scrap Metal: Broken tools, wires, springs. Can be repurposed for hinges, clasps, fishing hooks (from paper clips), or improvised weapons.
    • Fabric/Textiles:
      • Old Clothes/Towels: Cotton, denim, wool. Can be cut into rags for cleaning, bandages, insulation (stuffing for bedding), makeshift cordage (strips of fabric), or patching other items.
      • Pantyhose/Stockings: Excellent for water filtering (pre-filter), fishing nets, or even securing items.
    • Paper/Cardboard:
      • Newspapers/Cardboard Boxes: Fire starting material (tinder), insulation, improvised bedding (layered cardboard), or for creating temporary barriers.
    • Glass Jars/Bottles:
      • Food jars (jam, pickles), beverage bottles. Ideal for long-term food storage (dry goods), water purification (solar water disinfection), and lanterns (with a candle).
    • Rubber:
      • Inner Tubes/Rubber Bands: Bicycle inner tubes, old rubber gloves. Can be cut into strong elastic bands for securing items, slingshot bands, or creating seals.

    Prepping involves anticipating needs and acquiring resources in advance. When considering reuse and recycling for survival, “prepping your scraps” means cleaning them thoroughly and storing them efficiently to prevent spoilage or contamination.

    Step 3: Implement Core Reuse Strategies

    Focus on maximizing the immediate utility of items without complex processing. This is about finding secondary or tertiary uses for things you already have.

    Water Collection and Purification

    Water is the most immediate survival need.

    • Rainwater Collection: Use clean plastic sheets (from trash bags or old tarps), buckets, or large containers to collect rainwater. Ensure they are clean to prevent contamination.
    • Improvised Filters:
      • Cut the bottom off a plastic bottle. Invert it. Layer from bottom to top: fine cloth (old T-shirt), charcoal (from a fire, crushed), sand (fine then coarse), small gravel, and then another layer of cloth. Pour murky water slowly through. Remember, this filters out particles but does not purify water from bacteria or viruses.
      • For purification, follow filtration with boiling (using metal cans or pots) or solar water disinfection (SODIS) using clear PET plastic bottles exposed to direct sunlight for at least 6 hours (or 2 days if cloudy).

    Fire Starting and Cooking

    Fire provides warmth, allows for cooking, water purification, and signaling.

    • Tinder: Dryer lint, shredded paper, cotton balls (especially soaked in petroleum jelly from old lip balm tubes), and finely shredded cardboard make excellent tinder. Store these in a waterproof container (e.g., an empty pill bottle).
    • Fire Starters: Toilet paper rolls stuffed with dryer lint and wax (from old candles) are effective. An old CD or DVD can be used as a Fresnel lens to focus sunlight for ignition.
    • Hobo Stove: Cut the top and bottom off a large tin can (e.g., coffee can). Cut a door near the bottom for fuel and small holes around the bottom for airflow. Place smaller branches inside and light. This creates a contained cooking surface.
    • Makeshift Pots/Pans: Clean tin cans or even heavy-duty aluminum foil molded into a bowl can be used for boiling water or cooking small amounts of food over a fire.

    Shelter and Warmth

    Shelter protects you from the elements, and warmth is vital to prevent hypothermia.

    • Improvised Tarp/Shelter: Large, heavy-duty garbage bags can be cut open and taped together with duct tape (a survival essential often found in old toolboxes) to create a makeshift tarp or lean-to. Plastic sheeting from packaging can also serve this purpose.
    • Insulation: Layered cardboard, crumpled newspaper, or even clean, dry plastic bags can be stuffed inside clothing or used as ground insulation beneath a sleeping area to reduce heat loss.
    • Emergency Blanket: Mylar material from emergency blankets (if you have one) can be patched with duct tape. Failing that, layers of aluminum foil can provide some reflective warmth.

    Tools and Utilities

    Your ability to adapt existing items into tools is a hallmark of preparedness.

    • Knives/Scrapers: A broken piece of glass (carefully used), a sharpened piece of plastic (e.g., from a sturdy plastic container), or even an old credit card can be improvised as a scraper or a basic cutting tool for light tasks.
    • Cordage/Rope: Braided plastic bags (cut into strips and twisted), strips of old fabric (T-shirts, denim), or even unravelled shoelaces can be used for tying, securing, or creating snares.
    • Containers: Any clean plastic or glass container can be used for storing food, water, or small items. Empty pill bottles are excellent for waterproof storage of tinder, matches, or small first-aid items.
    • Lighting: A clean glass jar with a small amount of oil (cooking oil, even rendered animal fat) and a cloth wick can create an improvised lantern. Old candles, if found, are invaluable.
    • First Aid: Clean fabric strips from old clothes can serve as makeshift bandages or slings. Empty plastic bottles can hold sterilized water for cleaning wounds.
    • Repair: Duct tape is king for repairs. Old bicycle inner tubes can be cut into strong rubber bands or patches for other rubber items.

    Step 4: Practical Recycling and Upcycling Techniques

    Beyond simple reuse, upcycling involves transforming “waste” into items of higher value or different function.

    • Plastic Bottle Planters: Cut plastic bottles in half horizontally or vertically to create planters for growing small herbs or seedlings.
    • Vertical Gardens: Stack plastic bottles or old tires (if available and clean) to create vertical planting spaces, maximizing yield in small areas.
    • Composting: Food scraps (fruit and vegetable peels, coffee grounds, eggshells) and organic materials (leaves, grass clippings, shredded paper/cardboard) can be composted to create nutrient-rich soil for gardening. This is a fundamental aspect of sustainable living and self-sufficiency, turning organic waste into a valuable resource.
    • Ash Usage: Wood ash from your fires can be used to enrich soil (provides potassium and calcium), clean surfaces (mild abrasive), or even make lye for primitive soap-making (requires caution and knowledge).
    • Sewing and Patching: Learn basic sewing skills to repair torn clothing, blankets, or tents using needles (improvised from wire or bone) and thread (from strong fibers, dental floss, or unravelled fabric).
    • Tool Sharpening: A smooth rock can be used to sharpen dull knives or improvised cutting tools.

    Step 5: Prioritize Safety and Hygiene

    While resourcefulness is key, safety should never be compromised.

    • Cleanliness: Always thoroughly clean any item before reusing it, especially for food or water contact. Soap and water, or boiling, are crucial.
    • Hazardous Materials: Be extremely cautious with containers that held hazardous chemicals. It’s often safer to avoid them.
    • Sharp Edges: When cutting or modifying materials, be mindful of sharp edges. Use gloves or protective wraps if available.
    • Ventilation: If using improvised stoves indoors, ensure proper ventilation to avoid carbon monoxide poisoning.

    By integrating these steps into your thinking and habits, you transform from a consumer into a creator, leveraging discarded materials to enhance your chances of survival and self-sufficiency.

    FAQ: How to Reuse and Recycle for Survival

    Q1: What are the most important items to save for reuse in a survival situation?

    Plastic bottles and bags, tin cans, aluminum foil, old clothing/fabric, and duct tape are among the most versatile. These can be repurposed for water, fire, shelter, and basic tools.

    Q2: How can I purify water using recycled materials?

    A plastic bottle can be turned into a makeshift filter using layers of cloth, charcoal, sand, and gravel. However, this only removes particles. For purification, you must then boil the water in a metal container or use solar water disinfection (SODIS) with clear plastic bottles exposed to sunlight.

    Q3: Is it safe to cook directly in a tin can?

    Yes, clean tin cans that originally contained food are generally safe for cooking or boiling water over a fire. Ensure the inside coating (if any) is food-grade and watch for any fumes if the outside has paint or labels.

    Q4: Can I make fire starters from recycled household items?

    Absolutely. Dryer lint, shredded paper or cardboard, cotton balls (especially if soaked in petroleum jelly from old lip balm tubes), and wax (from old candles) are excellent components for DIY fire starters.

    Q5: What are some ways to get cordage or rope from discarded materials?

    Strong cordage can be made by braiding strips of plastic bags (cut into continuous loops), tearing and twisting strips of old fabric (like denim or cotton T-shirts), or even by unraveling old shoelaces or strong threads from clothing.

    Q6: How can I use old plastic bags for shelter?

    Large, heavy-duty plastic garbage bags or even multiple smaller plastic bags can be cut open and fused together (carefully, with heat) or taped with duct tape to create improvised waterproof tarps, groundsheets, or even ponchos for protection from rain.

  • How to Survive in Snowstorm

    How to Survive in Snowstorm

    A snowstorm, also known as a blizzard when conditions are severe, is a weather event characterized by significant snowfall and strong winds, often leading to very low visibility. These powerful winter phenomena are formed when cold air meets moist air, typically occurring in temperate regions during winter months. Historically, snowstorms have caused widespread disruption and danger. Notable examples include the Great Blizzard of 1888 in the northeastern United States, which caused immense snowfall and economic paralysis, and the Blizzard of ’77 in the Great Lakes region, which demonstrated the devastating impact of wind chill and heavy snow.

    The primary dangers associated with a snowstorm include:

    • Hypothermia: A dangerous drop in body temperature caused by prolonged exposure to cold.
    • Frostbite: Damage to body tissue caused by freezing, most commonly affecting fingers, toes, ears, and nose.
    • Power Outages: Heavy snow and ice can down power lines, leading to loss of heat, light, and communication.
    • Stranded Travel: Roads become impassable, leading to vehicles getting stuck and people being trapped.
    • Carbon Monoxide Poisoning: Improper use of alternative heating sources (like generators or charcoal grills indoors) can lead to this silent killer.
    • Falling Trees/Branches: Ice and heavy snow can cause trees and branches to break, posing a hazard.

    Knowing how to survive a snowstorm means being prepared for these challenges, whether you’re safe at home or unexpectedly caught outdoors.

    Preparation is Paramount: Before the Snowstorm Hits

    The best way to survive a snowstorm is to prepare well in advance. Pay attention to weather forecasts and act swiftly when a snowstorm warning is issued.

    1. Monitor Weather Forecasts:
      • Stay updated with local weather advisories and warnings. Terms like “Winter Storm Watch” mean conditions are possible, while “Winter Storm Warning” means severe weather is imminent or occurring. A “Blizzard Warning” indicates sustained winds of 35 mph or more, considerable falling or blowing snow, and visibility of less than a quarter mile for at least three hours.
    2. Assemble an Emergency Kit:
      • Water: At least 1 gallon per person per day for several days, for drinking and sanitation.
      • Non-Perishable Food: A 3-7 day supply of easy-to-prepare food (canned goods, dried fruit, nuts, energy bars). Include a manual can opener.
      • First-Aid Kit: Bandages, antiseptic wipes, pain relievers, prescription medications, any necessary personal medical items.
      • Flashlights and Extra Batteries: Headlamps are also excellent for hands-free illumination.
      • Battery-Powered or Hand-Crank Radio: For receiving emergency broadcasts.
      • Fully Charged Power Bank: For charging mobile phones and small devices.
      • Warm Blankets/Sleeping Bags: Essential for staying warm if heating fails.
      • Matches/Lighter: For lighting candles or starting a controlled fire (if safe and applicable).
      • Whistle: To signal for help.
      • Moist Towelettes, Garbage Bags, Plastic Ties: For personal sanitation.
      • Wrench or Pliers: To turn off utilities if necessary.
      • Local Maps: In case electronic navigation is unavailable.
      • Emergency Contact Information: Written down, in case your phone dies.
      • Cash: ATMs may not work during power outages.
    3. Prepare Your Home:
      • Insulate: Seal drafty windows and doors with caulk or weatherstripping.
      • Heating System Check: Have your furnace or heating system serviced annually. Ensure you have alternative heating sources if safe to use (e.g., a well-maintained fireplace with sufficient wood, a propane heater with proper ventilation).
      • Carbon Monoxide Detector: Crucial if using alternative heating. Test it regularly.
      • Clear Gutters: Prevent ice dams and water damage.
      • Stock Up: Fill your vehicle’s fuel tank, get necessary prescriptions, and stock up on groceries.
      • Charge Devices: Fully charge all phones, laptops, and power banks.
      • Fill Bathtub with Water: For flushing toilets if water supply is interrupted.
      • Know How to Shut Off Utilities: Locate your main water shut-off valve and electrical breaker box.
    4. Prepare Your Vehicle (if travel is unavoidable):
      • Keep your fuel tank full.
      • Have a winter survival kit in your car: blankets, shovel, sand/kitty litter for traction, tow rope, first-aid kit, jumper cables, flashlight, non-perishable food, water.
      • Ensure tires are properly inflated and have good tread. Consider snow tires or chains.

    Surviving at Home During a Snowstorm

    If you are at home when a snowstorm hits, your priority is to stay warm, safe, and connected.

    1. Stay Indoors:
      • Avoid all unnecessary travel.
      • Stay off roads to allow emergency services and snowplows to operate.
    2. Stay Warm:
      • Layer Clothing: Wear multiple layers of loose, warm clothing. Wool, fleece, and down are excellent insulators.
      • Conserve Heat: Close off unused rooms. Drape blankets over windows for added insulation.
      • Safe Heating: If power goes out, only use safe alternative heating sources.
        • NEVER use a gas oven, charcoal grill, or unvented propane/kerosene heaters indoors. These produce carbon monoxide, a colorless, odorless, deadly gas.
        • Ensure fireplaces are well-vented and only burn appropriate materials.
        • Keep a carbon monoxide detector with fresh batteries in a central location.
      • Stay Hydrated: Drink plenty of warm fluids (water, broth, tea) to help maintain body temperature. Avoid caffeine and alcohol, which can lead to dehydration.
      • Eat Regularly: Your body needs calories to generate heat.
    3. Ensure Safety:
      • Generator Safety: If using a generator, always place it outdoors in a well-ventilated area, far from windows and doors, to prevent carbon monoxide buildup.
      • Fire Safety: Keep flammable materials away from heat sources. Have a fire extinguisher readily available.
      • Avoid Overexertion: Shoveling heavy snow can be strenuous and lead to heart attacks. Take frequent breaks and listen to your body. Avoid shoveling alone.
      • Check on Neighbors: Especially the elderly or those with medical conditions.
    4. Communication:
      • Use your charged phone or a battery-powered radio for news and updates.
      • Conserve phone battery by limiting usage. Texting uses less power than calling.
      • Have a plan for communicating with family members in case traditional methods fail.

    Surviving Stranded in a Vehicle During a Snowstorm

    Getting stuck in a vehicle during a snowstorm can be life-threatening. Staying calm and taking the right actions can make all the difference.

    1. Stay in Your Vehicle:
      • Your vehicle offers immediate shelter and makes it easier for rescuers to find you. Do not attempt to walk to safety in blizzard conditions. Hypothermia and disorientation are severe risks.
    2. Signal for Help:
      • Tie a brightly colored cloth to your antenna or door handle.
      • Turn on your interior dome light at night when rescuers are likely to be looking for lights.
      • Turn on your hazard lights.
    3. Stay Warm:
      • Run the Engine Periodically: Run the engine for about 10 minutes every hour to warm the interior. Ensure the exhaust pipe is clear of snow to prevent carbon monoxide buildup. Crack a window slightly for ventilation.
      • Layer Up: Put on all available warm clothing and cover yourself with blankets or sleeping bags.
      • Cuddle for Warmth: If with others, huddle together for shared body heat.
      • Stay Active (Carefully): Wiggle fingers and toes, clap hands, move arms and legs to maintain circulation, but avoid vigorous activity that leads to sweating.
    4. Conserve Resources:
      • Fuel: Use the engine sparingly.
      • Battery: Limit use of lights, radio, and phone.
      • Food and Water: Ration your emergency supplies. Eat high-calorie foods.
    5. Maintain Ventilation:
      • Crucially, periodically clear snow from the exhaust pipe to prevent carbon monoxide poisoning. Even a small amount of snow blockage can be deadly.
      • Crack a window (on the side away from the wind and snow) slightly for ventilation, especially when the engine is running.
    6. Stay Aware:
      • Listen for news on your radio.
      • Conserve your phone battery for emergencies.
      • Monitor yourself and others for signs of hypothermia (shivering, confusion, drowsiness, slurred speech) and frostbite (numbness, white or grayish-yellow skin, firm or waxy skin).

    What to Do After the Snowstorm

    Once the snowstorm has passed, safety remains paramount.

    • Avoid Travel Immediately: Wait until authorities declare roads safe and clear.
    • Check for Damages: Inspect your home for burst pipes, roof damage, or downed power lines. Report any downed lines to your utility company immediately and stay far away from them.
    • Be Mindful of Carbon Monoxide: Before re-entering your home if you left it, ensure there is no carbon monoxide buildup if alternative heating was used.
    • Conserve Food and Water: Continue to ration supplies until services are fully restored.
    • Help Neighbors: Check on elderly or vulnerable neighbors.
    • Shovel Safely: If shoveling, take breaks, lift with your legs, and avoid overexertion.

    Key Entities:

    • Snowstorm: A severe winter weather condition characterized by heavy snowfall, strong winds, and reduced visibility.
    • Blizzard: A more extreme form of a snowstorm, defined by specific criteria of sustained wind speeds (35 mph or more), significant snow (falling or blowing), and very low visibility (less than 0.25 miles) lasting for at least three hours.
    • Hypothermia: A medical emergency that occurs when your body loses heat faster than it produces it, causing a dangerously low body temperature.
    • Frostbite: Injury to body tissue caused by freezing, leading to loss of feeling and color in the affected areas.
    • Carbon Monoxide (CO): A colorless, odorless, and poisonous gas produced by the incomplete burning of carbon-containing fuels (e.g., wood, coal, gasoline, natural gas, propane). It’s often called the “silent killer.”
    • Great Blizzard of 1888: A historic, severe snowstorm that affected the northeastern United States in March 1888, causing widespread disruption and deaths.
    • Blizzard of ’77: A major snowstorm that impacted the Great Lakes region in January 1977, known for its extreme cold and significant snowfall, particularly in Buffalo, New York.
    • Emergency Kit: A collection of basic items a family or individual may need in the event of an emergency or disaster.

    FAQ Section

    Q1: How long can a person survive stranded in a car during a snowstorm?

    Survival time varies greatly depending on factors like external temperature, the person’s clothing, health, and access to food/water. With proper preparation (warm clothing, blankets, emergency kit) and careful rationing of fuel for heat, a person can significantly extend their survival time, potentially for days. However, the most immediate danger is often carbon monoxide poisoning if the exhaust pipe is blocked.

    Q2: What is the most important thing to remember if the power goes out during a snowstorm?

    The most important thing is carbon monoxide safety. If using any alternative heating source (like a fireplace, gas heater, or generator), ensure proper ventilation and have a working carbon monoxide detector with fresh batteries. NEVER use outdoor heating equipment indoors.

    Q3: Can I drink melted snow if I’m thirsty during a snowstorm?

    Yes, you can drink melted snow, but it’s crucial to melt it first and preferably boil it if possible to kill any potential pathogens, as snow can contain impurities. Eating snow directly lowers your core body temperature and uses more energy for your body to warm it, which is counterproductive for staying warm.

    Q4: How do I know if I’m getting hypothermia or frostbite?

    • Hypothermia symptoms: Shivering (initially), confusion, slurred speech, drowsiness, memory loss, fumbling hands, exhaustion. Seek immediate warmth.
    • Frostbite symptoms: Numbness, tingling, pain, aching, white or grayish-yellow skin, skin that feels unusually firm or waxy. Do NOT rub the affected area. Gently rewarm with body heat or warm (not hot) water. Seek medical attention.

    Q5: Is it safe to use a propane heater inside my house during a power outage?

    Only if it’s specifically designed and rated for indoor use and you have excellent ventilation and a working carbon monoxide detector. Most propane heaters are intended for outdoor or well-ventilated construction site use. Using an unvented propane heater indoors without proper precautions can lead to deadly carbon monoxide poisoning. Always read manufacturer instructions carefully.

  • How to Trap Animals for Survival Food

    How to Trap Animals for Survival Food

    In a survival situation, securing a reliable food source is paramount. While foraging for plants is an option, animal protein provides crucial calories and nutrients. Trapping animals is a highly effective, low-energy method for acquiring food, allowing you to set multiple traps and focus on other survival priorities. However, it requires knowledge, patience, and adherence to ethical considerations when not in a dire emergency.

    Disclaimer: This article is for informational purposes related to survival scenarios. In non-survival situations, trapping animals may be illegal or require specific licenses and adherence to local wildlife regulations. Always prioritize legal and ethical practices.

    Understanding Survival Trapping Principles

    Before setting a single trap, understanding key principles will significantly increase your success rate and efficiency.

    • Location, Location, Location: This is the most critical factor. Animals follow predictable paths. Look for game trails, water sources, feeding areas, and natural funnels (like narrow passes between rocks or dense vegetation).
    • Target the Right Animal: Focus on smaller game (rabbits, squirrels, birds, rodents) as they are more abundant, easier to catch, and require less processing.
    • Camouflage: Traps must blend seamlessly with the environment to avoid detection by wary animals. Use natural materials from the immediate surroundings.
    • Scent Control: Animals have a keen sense of smell. Minimize human scent by handling trap components with gloves or by rubbing them with local vegetation (pine needles, leaves). Avoid strong odors like soap or insect repellent.
    • Baiting: While some traps are effective without bait, adding an appropriate lure can increase success. Use natural food sources for your target animal.
    • Multiple Traps: Set several traps in different locations and using different designs. This increases your chances and provides a backup if one fails.
    • Regular Checks: Check your traps frequently (at least twice a day – dawn and dusk). This is crucial for humane dispatch and to prevent scavengers from taking your catch.
    • Legality and Ethics (Non-Survival): In normal circumstances, trapping is heavily regulated. Always check local laws and obtain necessary permits. In a genuine survival scenario, these rules are overridden by the necessity of life.

    Key Components of a Trap

    Most traps consist of a few fundamental elements:

    • Trigger: The part that, when activated by the animal, releases the trap mechanism.
    • Snare/Restraining Device: The loop or enclosure that captures the animal.
    • Power Source: The tension (from a bent sapling or spring) that closes the trap.
    • Support/Anchor: The stable element that holds the trap in place.
    • Bait (Optional but Recommended): Attracts the animal to the trigger.

    Common Survival Trap Designs

    Here are several effective, primitive trap designs you can construct with minimal tools.

    1. The Snare Trap (Survival Staple)

    The snare trap is one of the most basic, versatile, and effective traps for small to medium-sized game. It’s relatively easy to construct and requires minimal materials.

    Materials:

    • Snare Wire: Preferred. Small gauge, flexible wire (brass, copper, stainless steel) from salvaged items (coat hangers, fishing line, electrical wire).
    • Natural Cordage (if no wire): Strong vine, root, twisted plant fibers (yucca, nettle, inner bark). Note: Natural cordage is less effective as animals can chew through it, but it’s a viable last resort.
    • Strong Stick/Sapling: For the spring pole.
    • Trigger Stick/Toggle: Small, easily dislodged stick.
    • Forked Stick/Stake: For the upright support.

    How to Construct a Basic Spring-Pole Snare:

    1. Find a Spring Pole: Locate a flexible sapling or tree branch (live is best for tension) about 1-2 inches in diameter, positioned near a game trail. Bend it over to test its spring action.
    2. Create the Snare Loop:
      • If using wire: Form a loop with a slipknot that tightens as pulled. The loop size should match your target animal (e.g., 4-6 inches for rabbit/squirrel, larger for fox/coyote).
      • If using cordage: Tie a strong loop with a slipknot.
    3. Set Up the Upright Support: Drive a sturdy forked stick into the ground directly in the path of the spring pole’s tension, forming an upright support.
    4. Fashion the Trigger Mechanism (Figure-4 or Toggle):
      • Figure-4 Trigger (more complex but secure): Consists of three notched sticks that interlock to hold the spring pole down and release when the bait or snare is disturbed.
      • Simple Toggle Trigger: Tie one end of your snare line to a short, strong toggle stick. Tie the other end to the bent spring pole. The toggle rests against an upright stake or branch, holding the spring pole down.
    5. Position the Snare Loop: Carefully place the snare loop on the game trail, about 2-3 inches off the ground for rabbits/squirrels, ensuring it’s directly in the animal’s path. Camouflage it with leaves or dirt.
    6. Test the Trap: Gently activate the trigger to ensure it functions smoothly and quickly.
    7. Baiting (Optional for Snares): While snares work on trails, a bait might draw curious animals. Place bait beyond the snare loop, ensuring the animal must pass through the loop to reach it.
    1. The Deadfall Trap

    Deadfall traps use a heavy weight (log, rock) dropped onto an animal, crushing it instantly. They are excellent for small-to-medium ground-dwelling animals.

    Types of Deadfalls:

    • Figure-4 Deadfall: Uses a precisely cut and notched Figure-4 trigger system.
    • Paiute Deadfall: A more sensitive and arguably safer (for the setter) design using a vertical pin and horizontal stick.

    Materials (for Paiute Deadfall, highly recommended):

    • Heavy Weight: A large, flat rock or log (heavy enough to crush the target).
    • Three Sticks for Trigger:
      • Upright Post: Sturdy, straight stick.
      • Horizontal Bar: Longer stick that supports the weight.
      • Bait Stick/Vertical Pin: Short, slender stick with a notched end.

    How to Construct a Paiute Deadfall:

    1. Select Weight: Choose a flat, heavy rock or log.
    2. Find a Stable Resting Place: Elevate one end of the weight on a small rock or stable log.
    3. Prepare the Upright Post: Cut a sturdy stick (about 6-8 inches long) with a flat top and a V-notch cut into one side, roughly an inch from the top.
    4. Prepare the Horizontal Bar: Cut a longer stick (length depends on the weight) with a pointed end on one side and a corresponding notch on the other to fit the upright post’s notch.
    5. Prepare the Bait Stick/Vertical Pin: Cut a short, slender stick (about 3-4 inches) with a sharp point on one end (for bait) and a small notch or flat spot on the other to rest against the horizontal bar.
    6. Set the Trap:
      • Place the heavy weight on the ground, elevated on one side.
      • Prop up the raised end of the weight using the upright post. The V-notch of the upright post should face inwards.
      • Carefully insert the horizontal bar. Its notched end rests in the V-notch of the upright post, and its pointed end supports the weight.
      • Now for the sensitive part: Place the vertical pin (bait stick). Its notched end rests against the horizontal bar (near the upright post), holding the horizontal bar in place. Its pointed end will be baited.
    7. Bait It: Skewer a piece of bait (nut, seed, berry, grubs) onto the pointed end of the vertical pin.
    8. Test and Camouflage: Gently touch the bait stick to ensure it collapses easily. Camouflage the trap, leaving only the baited end exposed.
    1. The Pitfall Trap

    Pitfall traps are simple but effective for catching ground-dwelling animals (especially small rodents, insects, or even larger animals if dug sufficiently large and deep).

    Materials:

    • Digging Tool: Stick, sharpened rock, or hands.
    • Cover Material: Leaves, twigs, grass.
    • Bait (Optional):

    How to Construct a Pitfall Trap:

    1. Choose Location: Find a game trail or area with animal droppings.
    2. Dig the Pit: Dig a hole large enough and deep enough for your target animal to fall into and not escape. For small rodents, a bucket-sized hole works. For larger animals, it needs to be deeper with undercut edges.
    3. Line the Pit (Optional but Recommended): If the soil is loose, line the sides with smooth rocks, bark, or mud to prevent the animal from climbing out.
    4. Camouflage the Opening: Lightly cover the opening of the pit with a thin layer of sticks, leaves, and grass that will collapse under an animal’s weight.
    5. Bait (Optional): Place bait (scraps of food, nuts, seeds) in the bottom of the pit or on the camouflaged cover to lure animals.
    6. Fences/Guiding Funnels: Create small fences or walls of sticks and brush leading to the pitfall trap. This “funnels” animals directly into the trap opening.

    Baiting Strategies

    Good bait is crucial for many traps.

    • Herbivores (Rabbits, Squirrels): Nuts, seeds, berries, tender green shoots, fruit.
    • Omnivores (Raccoons, Opossums): Fish scraps, corn, sweet fruits, carrion.
    • Birds: Grains, seeds, shiny objects (for curious birds).
    • Insects/Grubs: Rotting wood, decaying fruit.

    Tips for Baiting:

    • Use bait that is native to the area.
    • Position bait to force the animal onto the trigger.
    • Refresh bait regularly as it loses scent or spoils.
    • Consider using “scent trails” (e.g., rubbing crushed berries) leading to the trap.

    Processing Your Catch

    Once you have successfully trapped an animal, you must process it quickly and humanely.

    1. Humane Dispatch:
      • Small Game (Rabbit, Squirrel): A swift, firm blow to the back of the head or neck will dispatch the animal quickly.
      • Snared Animal: Hold the snare line and deliver a quick blow.
      • Larger Animals: Never approach a trapped larger animal without extreme caution.
    2. Bleeding: If possible, bleed the animal by making a cut to a major artery (e.g., in the neck) to ensure better meat quality and safety.
    3. Skinning/Plucking:
      • Fur-bearing animals: Make an incision from the sternum to the tail, then carefully peel the skin. Cut around the legs and head.
      • Birds: Pluck feathers or skin them.
    4. Evisceration (Gutting):
      • Make an incision from the sternum to the pelvis.
      • Carefully remove all internal organs. Identify and remove any scent glands.
      • Keep the liver and heart, as they are nutrient-dense.
      • Inspect for any signs of disease (unusual spots, lumps, strong odors). If in doubt, discard.
    5. Cooking: Always cook wild game thoroughly to kill parasites and bacteria. Boiling, roasting, or grilling are effective methods.

    Safety and Ethical Considerations

    • Practice Before Emergency: Build and test traps in a non-survival setting (without live animals) to understand their mechanics and improve your skills.
    • Trap Sensitivity: Ensure your traps are sensitive enough to trigger easily but not so sensitive that they are set off by wind or small insects.
    • Awareness of Your Surroundings: Be mindful of other people or domestic animals if you are practicing or in a situation where they might encounter your traps.
    • Local Regulations: Reiterate that in non-survival scenarios, adhere strictly to all local, state, and national hunting and trapping laws. These regulations are in place for conservation and safety.
    • Respect the Animal: Even in survival, aim for a quick, humane dispatch.

    Mastering animal trapping for survival food is a valuable skill that provides a significant advantage in challenging situations. By understanding the principles, learning common trap designs, and practicing safely, you can confidently acquire necessary protein when it matters most.

  • How to Avoid Mosquito-Borne Diseases While Camping

    How to Avoid Mosquito-Borne Diseases While Camping

    Camping offers a fantastic escape into nature, but it also brings you closer to potential nuisances, especially mosquitoes. These tiny insects aren’t just annoying; they can transmit serious diseases like West Nile Virus, Zika Virus, Dengue Fever, and Malaria, depending on your location. Knowing how to avoid mosquito-borne diseases while camping is crucial for a safe and enjoyable outdoor experience. This guide will provide practical, step-by-step advice to keep those buzzing threats at bay.

    Understanding the Threat: Mosquitoes and Diseases

    Mosquitoes are most active during dawn and dusk, though some species bite all day. They are attracted to standing water, where they lay their eggs. Understanding their habits helps in prevention.

    Common mosquito-borne diseases and their general prevalence:

    • West Nile Virus: Found across North America, Africa, Europe, Asia, and Australia.
    • Zika Virus: Primarily tropical and subtropical regions, including parts of the Americas, Africa, and Asia.
    • Dengue Fever: Widespread in tropical and subtropical regions, particularly urban and semi-urban areas.
    • Malaria: Predominantly in tropical and subtropical areas, especially sub-Saharan Africa, parts of Asia, and Latin America.

    Always research the specific risks in your chosen camping destination before you go.

    Essential Preparations Before Your Trip

    Prevention starts before you even pack your bags.

    1. Research Your Destination’s Risks
    • Check local health advisories: Before heading out, consult health organizations like the CDC (Centers for Disease Control and Prevention) or local public health departments for current information on mosquito-borne disease activity in your camping area.
    • Understand peak seasons: Mosquito activity often peaks during warmer, humid months and after heavy rainfall.
    1. Pack Smart: Clothing and Gear

    Your clothing choices and gear can be your first line of defense.

    • Long-sleeved shirts and long pants: Even in warm weather, opt for lightweight, breathable fabrics that cover as much skin as possible.
    • Light-colored clothing: Mosquitoes are believed to be more attracted to dark colors.
    • Permethrin-treated clothing: Consider purchasing clothing pre-treated with permethrin or treat your own. Permethrin is an insecticide that repels and kills mosquitoes. Do not apply permethrin directly to skin. Only apply it to clothing and gear.
    • Tents with fine mesh netting: Ensure your tent’s mesh is intact and has no holes.
    • Sleeping bags/liners: If sleeping outdoors without a tent, a mosquito net is essential.

    On the Campsite: Active Prevention Strategies

    Once you’ve arrived, smart practices can significantly reduce your exposure.

    1. Choose Your Campsite Wisely
    • Avoid standing water: Mosquitoes breed in stagnant water. Set up camp away from swamps, marshes, puddles, slow-moving streams, and stagnant ponds.
    • Look for breezy areas: Wind makes it difficult for mosquitoes to fly and land.
    • Open, elevated ground: These areas tend to be less humid and have better air circulation.
    • Avoid dense vegetation: Tall grass and thick bushes provide shelter for mosquitoes during the day.
    1. Use Personal Insect Repellents Effectively

    This is one of the most critical steps for direct protection.

    • Choose EPA-registered repellents: Look for active ingredients like:
      • DEET (N,N-Diethyl-meta-toluamide): Highly effective. Concentrations between 20% and 50% are recommended for adults. Lower concentrations (10-20%) are suitable for children.
      • Picaridin: (also known as KBR 3023, Bayrepel, and Icaridin) effective and often preferred for its less oily feel. Concentrations around 20% are effective.
      • Oil of Lemon Eucalyptus (OLE) or PMD: A plant-based option. Ensure it’s formulated for repellent use (contains at least 30% OLE/PMD).
      • IR3535: Another synthetic option, effective for various insects.
    • Apply correctly:
      • Read and follow all label instructions.
      • Apply to exposed skin.
      • Apply after sunscreen.
      • Do not apply under clothing.
      • Avoid applying to hands of young children, eyes, or mouth.
      • Reapply as directed, especially after swimming or sweating.
    1. Maintain Your Campsite
    • Eliminate standing water: Empty any containers that collect water (buckets, tarps, old tires) daily. Even small amounts can serve as breeding grounds.
    • Keep food covered: While not directly related to mosquito-borne diseases, covering food prevents other pests.
    • Secure trash: Dispose of garbage properly in sealed bags or containers.
    1. Protect Your Tent and Sleeping Area
    • Inspect tent netting: Before setting up, thoroughly check your tent’s mesh windows and doors for any tears or holes. Patch them immediately if found.
    • Keep tent zipped: Always keep tent doors and windows zipped shut, especially during dawn and dusk.
    • Use bed nets (if needed): If sleeping in open structures or areas where mosquitoes are prevalent, use a permethrin-treated bed net. Ensure it’s tucked securely under your sleeping mat or mattress.
    • Consider mosquito coils or lanterns: These can provide a localized area of protection, but always use them in well-ventilated areas and away from flammable materials.
    1. Be Mindful of Peak Mosquito Activity Times
    • Dawn and Dusk: These are prime biting times for many mosquito species. Try to be inside your tent or wear full protective clothing during these hours.
    • Overcast Days/Shady Areas: Mosquitoes may be active throughout the day in shady or humid conditions.
    1. Personal Hygiene
    • Shower if heavily sweating: While not definitively proven, some studies suggest sweat and certain body odors can attract mosquitoes.
    • Avoid strong fragrances: Perfumes, colognes, and strongly scented lotions or soaps might attract some insects.

    Post-Trip Considerations

    Even after your trip, stay vigilant for symptoms.

    1. Monitor for Symptoms
    • If you develop symptoms like fever, headache, body aches, rash, or fatigue within a few weeks of your camping trip, especially if you had mosquito bites, seek medical attention.
    • Inform your doctor about your recent travel and potential mosquito exposure.
    1. Clean and Store Gear
    • Clean your camping gear thoroughly. Inspect tents and nets for any damage that might need repair before your next trip.

    By following these comprehensive steps, you can significantly reduce your risk and avoid mosquito-borne diseases while camping, allowing you to enjoy the wilderness with greater peace of mind. Preparation, diligence, and the right gear are your best allies against these tiny but potentially dangerous insects.

  • How to Survive a War as a Civilian

    How to Survive a War as a Civilian

    The unimaginable scenario of war can become a terrifying reality for civilians. In such dire circumstances, knowing how to survive a war as a civilian can be the difference between life and death. This guide provides actionable steps and crucial considerations to help you prepare, react, and endure during armed conflict, focusing on safety, self-reliance, and humanitarian principles.

    Understanding the Threat

    War poses multifaceted dangers to civilians, including direct violence, displacement, disruption of essential services, and psychological trauma. International Humanitarian Law (IHL) offers some protection to civilians, but adherence can vary. It’s crucial to understand that your safety and well-being will largely depend on your preparedness and ability to adapt.

    1. Pre-Conflict Planning: Preparing for the Worst

    Even if war seems distant, proactive preparation can significantly increase your chances of survival.

    • Develop an Emergency Plan:
      • Family Communication Plan: Establish clear communication methods and designated meeting points if separated. This includes out-of-area contacts.
      • Evacuation Routes: Identify multiple primary and alternate escape routes from your home, neighborhood, and city. Practice these routes.
      • Rendezvous Points: Designate safe, secure places to meet family members, both within and outside your immediate area.
    • Prepare a “Go-Bag” (Emergency Kit):
      • This bag should be easily accessible and ready for immediate evacuation. Aim for enough supplies for at least 72 hours, ideally more.
      • Documents: Copies of passports, birth certificates, marriage certificates, property deeds, insurance policies, medical records, and cash. Keep them in a waterproof bag.
      • Water: At least one gallon per person per day. Include purification tablets or a portable filter.
      • Food: Non-perishable, high-energy foods like energy bars, dried fruit, nuts, canned goods (with a manual can opener).
      • First Aid Kit: Comprehensive kit including bandages, antiseptic wipes, pain relievers, prescription medications (at least a 7-day supply), any personal medical necessities (e.g., inhalers, insulin), and essential over-the-counter drugs (anti-diarrhea, antacids).
      • Shelter/Warmth: Emergency blankets, sleeping bags, a small tent if space allows.
      • Tools: Multi-tool, knife, flashlight (with extra batteries or hand-crank), small radio (battery-powered or hand-crank, preferably NOAA weather radio), lighter/matches.
      • Hygiene: Moist towelettes, hand sanitizer, soap, feminine hygiene products, garbage bags.
      • Navigation: Local maps (paper copies), compass, whistle for signaling.
      • Communication: Fully charged power bank for your phone, satellite phone (if accessible), or two-way radios for short-range communication.
      • Clothing: A change of sturdy, comfortable clothes suitable for the climate.
    • Secure Your Home (If Staying):
      • Reinforce windows with tape to prevent shattering.
      • Identify the safest parts of your home (e.g., basement, inner rooms away from windows) for shelter during attacks.
      • Stockpile non-perishable food, water, and medical supplies.
      • Learn how to shut off utilities (gas, electricity, water) in case of damage.
    1. During Conflict: Immediate Actions and Safety

    Once conflict begins, your priorities shift to immediate safety and resource management.

    • Seek Shelter Immediately:
      • When shelling, gunfire, or aerial attacks begin, fall to the ground and cover your head with your hands.
      • Move to the designated safe zone in your home (basement, interior room, or a pre-identified shelter).
      • If outdoors, seek cover behind substantial structures (thick walls, ditches, concrete barriers). Avoid windows and exposed areas.
      • Public shelters, if available and announced by authorities, are designed to offer protection.
    • Stay Informed from Trusted Sources:
      • Rely on official government broadcasts, established news outlets, and verified humanitarian organizations (e.g., Red Cross, UN agencies).
      • Avoid rumors and unverified social media, which can cause panic or spread misinformation.
      • A battery-powered or hand-crank radio is vital if electricity and internet are cut.
    • Conserve Resources:
      • Water: Ration water strictly. Use purified rainwater or collected water for non-drinking purposes (hygiene).
      • Food: Prioritize calorie intake and ration food supplies. Cook efficiently to conserve fuel.
      • Electricity: Conserve battery life on devices. Use flashlights over candles (fire risk).
    • Understand and Adhere to Curfews/Instructions:
      • Listen for and follow instructions from authorities regarding curfews, movement restrictions, and designated safe corridors. Disobeying can put your life at risk.
    • Identify Yourself as a Civilian:
      • Avoid wearing camouflage or military-style clothing.
      • Do not carry weapons or objects that could be mistaken for weapons.
      • If stopped by armed personnel, remain calm, keep your hands visible, and follow instructions. Do not make sudden movements.
    • Avoid Conflict Zones:
      • Steer clear of military installations, checkpoints, and areas of active combat.
      • Do not approach unexploded ordnance or suspicious objects; report them to authorities if possible.
      • Minimize movement, especially at night.
    • Protect Vulnerable Individuals:
      • Children, the elderly, and those with disabilities require extra care and attention.
      • Ensure they have access to their medications, are kept warm, and are psychologically supported.
    1. Evacuation and Movement

    When staying becomes too dangerous, or ordered by authorities, evacuation is necessary.

    • Be Ready to Move:
      • Your “go-bag” should be constantly prepared.
      • Inform trusted contacts of your intentions and destination if possible.
    • Travel Light and Smart:
      • Carry only essentials. Every extra pound will become a burden.
      • Wear comfortable, sturdy shoes.
      • Blend in with the civilian population; avoid drawing attention.
    • Move During Lulls in Fighting (if safe):
      • If not part of an organized evacuation, try to move during periods of relative calm, usually dawn or dusk.
    • Stick to Known Routes (if safe):
      • Avoid shortcuts that might be mined or lead into dangerous areas.
      • Look for signs of recent civilian movement.
    • Seek Humanitarian Aid:
      • Look for signs or information about humanitarian corridors, aid distribution points, or refugee camps.
      • International organizations (ICRC, UNHCR, UNICEF) and NGOs provide crucial support.
    • Maintain Family Unity:
      • Stay together as a family. If separated, remember your pre-arranged meeting points.
      • Teach children their full names, parents’ names, and a contact number if they get lost.
    1. Medical Preparedness and First Aid

    Medical infrastructure often collapses during war, making self-sufficiency vital.

    • Learn Basic First Aid:
      • Knowing how to stop bleeding, treat burns, splint fractures, and address shock can save lives. Consider taking a basic first aid course.
    • Manage Chronic Conditions:
      • Ensure you have a sufficient supply of any necessary prescription medications. Store them safely.
      • Carry your medical history, allergies, and contact information for your doctor.
    • Recognize Symptoms of Common Illnesses:
      • Crowded conditions and poor sanitation can lead to outbreaks of infectious diseases. Be aware of symptoms of common illnesses like diarrhea, respiratory infections, and skin conditions.
    • Be Resourceful with Medical Supplies:
      • Learn improvisational first aid techniques using readily available materials.
      • Prioritize treating life-threatening injuries first.
    1. Psychological Resilience and Mental Well-being

    The psychological toll of war can be immense. Maintaining mental health is as important as physical survival.

    • Acknowledge and Process Emotions:
      • Fear, anxiety, anger, and grief are normal reactions. Do not suppress them.
      • Talk to trusted family members or friends.
    • Maintain Routines (where possible):
      • Familiar routines can provide a sense of normalcy and control in chaotic situations.
      • Maintain hygiene, regular meal times, and sleep patterns if feasible.
    • Engage in Calming Activities:
      • Reading, drawing, simple exercises, or prayer can help manage stress.
      • Limit exposure to distressing news.
    • Support Children:
      • Children are particularly vulnerable to trauma. Provide comfort, reassurance, and maintain a sense of safety.
      • Encourage play and creative expression.
    • Seek Support:
      • If available, connect with mental health professionals or support groups.
      • Helping others can also foster a sense of purpose and reduce feelings of helplessness.

    Important Legal and Ethical Considerations

    • International Humanitarian Law (IHL): Civilians are protected under IHL, which requires combatants to distinguish between military targets and civilians. However, this protection can be violated.
    • Neutrality: As a civilian, maintaining neutrality can be critical for safety. Avoid taking sides or engaging in hostile acts.
    • Humanitarian Aid: You have the right to receive humanitarian assistance. Organizations providing aid operate under principles of neutrality and impartiality.

    Surviving a war as a civilian is an immense challenge. By taking proactive steps to prepare, acting decisively during conflict, and prioritizing your physical and mental well-being, you can significantly increase your chances of enduring such an ordeal.

  • How to Stop Bleeding in a Survival Situation

    How to Stop Bleeding in a Survival Situation

    In a survival situation, uncontrolled bleeding can quickly become life-threatening. Whether it’s a minor cut or a severe wound, knowing how to stop bleeding is a fundamental skill that can save a life—your own or someone else’s. The goal is to control blood loss until professional medical help is available or until the body’s natural clotting mechanisms kick in.

    This guide walks you through the key techniques for managing bleeding when resources are limited.

    Understanding Types of Bleeding

    Recognizing the type of bleeding helps determine the right response:

    • Capillary Bleeding: A slow ooze from a scrape or minor cut. Usually stops on its own.
    • Venous Bleeding: Dark red, steady flow. From veins; significant but generally controllable.
    • Arterial Bleeding: Bright red, spurting or pulsing. From arteries; the most dangerous and urgent.

    Immediate Steps: Assess and Act

    Use the DR ABC framework, but focus on “C” for Circulation/Bleeding once you’ve ensured the scene is safe.

    1. Ensure Scene Safety: Don’t put yourself in danger.
    2. Expose the Wound: Cut or remove clothing to view the bleeding source.
    3. Apply Direct Pressure:
      • Use any clean cloth (shirt, gauze, bandana). Bare hands if necessary.
      • Press firmly and continuously over the wound.
      • Don’t lift to check. Add more cloth if soaked.
      • Elevate the limb if possible and no fracture is suspected.

    Advanced Techniques for Severe Bleeding

    Pressure Bandage

    For controlling bleeding after initial pressure:

    1. Keep pressing.
    2. Add a thick pad over the wound.
    3. Wrap with bandage or cloth tightly, but not enough to cut circulation.
    4. Check distal pulse and skin color/warmth to ensure blood flow.

    Tourniquet (For Severe Limb Bleeding)

    Last resort, used when direct pressure fails:

    1. Use a wide, flat material (belt, scarf). Avoid rope or wire.
    2. Place 2-3 inches above wound, never on a joint.
    3. Wrap, tie a half-knot, insert a rigid object (stick, pen).
    4. Tie a square knot over it, twist until bleeding stops.
    5. Secure the stick, write the time of application.
    6. Do not remove unless directed by medical personnel.

    Wound Packing (For Deep, Non-Limb Wounds)

    Effective in torso, neck, groin, or armpit injuries:

    1. Fully expose the wound.
    2. Find the source of bleeding.
    3. Tightly pack with clean gauze or cloth.
    4. Apply pressure for at least 10 minutes.
    5. Secure with a pressure bandage if moving is necessary.

    General Survival Considerations

    • Gloves/Barrier: Use gloves or any barrier to avoid infections.
    • Prevent Shock: Keep the person warm, elevate legs if no spine injury.
    • Stay Calm: Helps both you and the victim.
    • Seek Help: Once bleeding is under control, medical care becomes the next priority.

    Mastering how to stop bleeding is one of the most essential survival skills. Direct pressure is always your first move. Practice these methods in training or at least review them mentally to stay ready when it counts.

  • How to Craft Primitive Tools for Survival

    How to Craft Primitive Tools for Survival

    Building primitive tools for survival is a foundational skill in any wilderness scenario. In a true survival situation, your ability to fashion basic implements from natural materials can mean the difference between thriving and merely surviving. These tools, though rudimentary, empower you to perform essential tasks like building shelter, processing food, making fire, and ensuring personal defense.

    This guide will walk you through the essential steps and techniques for crafting some of the most crucial primitive tools using only what the natural environment provides. Remember, practice is key, and safety should always be your top priority.

    Understanding the “Primitive Tool” Mindset

    Crafting primitive tools isn’t about perfection; it’s about functionality and resourcefulness. You’re not aiming for factory-grade precision but for a tool that can reliably perform a specific task. The core principle is to use the strongest, most suitable materials available and to make secure fastenings.

    Essential Materials for Primitive Tools

    Before you start crafting, you need to identify and gather the right materials.

    • Stone: Look for flint, chert, obsidian, quartzite, or very fine-grained basalt. These stones fracture predictably, creating sharp edges. They are crucial for cutting and scraping tools.
    • Wood:
      • Hardwood: Dense woods like oak, hickory, ash, or maple are excellent for handles, mallets, and digging sticks due to their strength and durability.
      • Softwood: Lighter woods like pine or willow can be used for lighter tasks or as shafts for arrows.
      • Green Wood: Freshly cut wood is more pliable and easier to work with.
      • Deadfall: Dead branches or fallen trees can provide seasoned wood, but check for rot.
    • Cordage (Natural Fiber): This is vital for binding. Look for:
      • Inner bark: From trees like cedar, basswood, or willow. Scrape off the outer bark, then peel strips of the inner layer.
      • Plant fibers: Yucca, nettle, milkweed, dogbane. You’ll need to process these by retting (soaking to break down non-fibrous material) and stripping.
      • Vines: Supple, strong vines can be used for binding.
    • Bone/Antler: Excellent for awls, needles, and pressure flakers (for stone work). They are strong and hold a point well.
    • Animal Hide/Sinew: If available from hunting, hide can be processed for rawhide (strong lashing) and sinew (extremely strong, thin cordage for precision work).

    How to Craft Essential Primitive Tools

    Let’s break down the creation of some vital survival tools.

    1. The Core Tool: A Sharp Stone Edged Tool (Flake or Blade)

    This is your most important starting point, as it allows you to process other materials.

    Materials:

    • A suitable stone core (flint, chert, obsidian are ideal).
    • A hammerstone (a denser, rounded stone for striking).
    • Safety gear: Gloves, eye protection (if practicing, critical).

    Steps (Percussion Flaking – Basic Method):

    1. Find Your Core and Hammerstone: Select a core stone that is relatively free of cracks. Choose a hammerstone that is slightly softer than your core stone but still dense and heavy enough for impact.
    2. Identify a Striking Platform: Look for a prominent ridge or a sharp edge on your core stone. This is where you will strike.
    3. Position the Strike: Hold the core firmly in one hand (use a thick leather glove if available). Position the hammerstone at a shallow angle (around 10-20 degrees) to the striking platform, aimed slightly inward.
    4. Strike Firmly and Deliberately: Hit the striking platform with a sharp, controlled blow. The goal is to detach a flake that carries a sharp edge. It often takes practice to get the right angle and force.
    5. Examine the Flake: Once a flake detaches, inspect its edges. You’re looking for a sharp, usable edge. If it’s not sharp enough, you can refine it further (see “Refining Edges” below).
    6. Safety First: Stone flaking produces extremely sharp fragments. Always be mindful of flying debris.

    Refining Edges (Pressure Flaking – Optional but Recommended):

    For sharper and more durable edges, you can use pressure flaking.

    1. Materials: A pressure flaker (a piece of antler tine, hardwood dowel, or copper rod) and your stone flake.
    2. Position the Flaker: Place the tip of your pressure flaker on the edge of the stone flake, very close to the edge.
    3. Apply Pressure: Apply steady, downward pressure away from the edge and slightly inward, leveraging the flaker to “pop” off tiny flakes. This refines the edge and makes it sharper.
    4. Work Along the Edge: Work systematically along both sides of the desired edge, applying pressure in consistent increments.
    1. The Digging Stick

    Simple but incredibly useful for roots, grubs, and preparing ground for shelter.

    Materials:

    • A sturdy hardwood branch (around 4-6 feet long, 1-2 inches thick).
    • Your newly crafted stone edged tool (or fire for charring).

    Steps:

    1. Select a Strong Branch: Find a straight, hard branch without major knots or cracks.
    2. Sharpen One End: Use your stone edged tool to carve a point on one end. Alternatively, you can char the end in a fire and then scrape off the softened, charred wood with a rock or your stone tool. Charring hardens the wood and makes it easier to sharpen.
    3. Test for Strength: Ensure the point is strong enough for digging.
    1. The Mallet (Hammer)

    Useful for pounding stakes, processing fibrous plants, or as a striking tool for other projects.

    Materials:

    • A heavy, dense piece of hardwood (a knot or burl works well).
    • Your stone tool for shaping (optional).

    Steps:

    1. Find a Suitable Piece: Look for a heavy, dense piece of wood. A natural burl or a section where a branch forks can provide a good head shape.
    2. Shape if Necessary: Use your stone tool to remove any sharp edges or unwanted protrusions, making it comfortable to hold and effective for striking. You can leave a natural handle or carve one.
    1. The Primitive Axe/Hatchet (Hafted Chopping Tool)

    More complex, but invaluable for processing larger wood.

    Materials:

    • A well-flaked, sturdy stone chopping head (larger than a simple flake).
    • A strong, relatively straight hardwood handle (with a natural curve or fork if possible for the head).
    • Strong cordage (processed inner bark, rawhide, or strong vines).
    • Resin/Pitch (optional, for extra security).

    Steps (Splitting Handle Method):

    1. Prepare the Stone Head: You need a strong, thick stone flake with a good cutting edge.
    2. Prepare the Handle: Find a piece of hardwood, ideally with a fork or a section you can split.
    3. Split the Handle (if applicable): If using a straight branch, carefully split one end about 4-6 inches down.
    4. Insert the Stone Head: Wedge the stone head into the split of the handle, ensuring the sharp edge is aligned correctly. If using a natural fork, fit the stone snugly into the V-shape.
    5. Lash Securely: This is the most critical part.
      • Start by tightly wrapping your cordage around the handle below the stone head, creating a strong anchor point.
      • Then, crisscross the cordage around the stone head and the handle, pulling it as tight as possible with each wrap.
      • Create a “friction knot” or use a series of half hitches to secure the end of the lashing.
    6. Add Resin (Optional): If you have tree resin or pitch, melt it and apply it over the lashing to further solidify the bond. Allow it to cool and harden.
    1. The Primitive Awl (Piercing Tool)

    Essential for making holes in hide, wood, or other materials.

    Materials:

    • A sharp, strong thorn (e.g., from acacia, hawthorn)
    • A small piece of bone or antler (a splinter or tip)
    • A small piece of hardwood

    Steps:

    1. Select Material: Choose the sharpest, strongest thorn you can find, or a suitable piece of bone/antler.
    2. Refine the Tip: If necessary, use your stone tool or rub it against a coarse rock to sharpen the tip into a fine point.
    3. Create a Handle (Optional but Recommended): For better grip and pressure, embed the base of the thorn/bone into a small piece of hardwood. Drill a pilot hole with your stone tool if needed, or simply wedge and secure it with a small amount of resin or lashing.
    1. Primitive Cordage (Fiber Rope/String)

    Crucial for all hafted tools, shelter, traps, and more.

    Materials:

    • Inner bark strips (cedar, basswood, willow)
    • Plant fibers (nettle, yucca, milkweed, dogbane)

    Steps (Reverse Wrap Method):

    1. Process Fibers: Strip the inner bark or process plant stalks to extract long, strong fibers. Dry them if necessary.
    2. Prepare Two Strands: Take two lengths of fiber. Overlap their ends by a few inches.
    3. Twist One Strand: Hold the overlapped section with one hand. With the other hand, twist one of the strands tightly away from you.
    4. Fold and Release: Fold the twisted strand back over the other strand. It will naturally try to twist back on itself.
    5. Repeat: Now, twist the other strand away from you, fold it over, and repeat the process.
    6. Continuously Add Fibers: As your strands get shorter, continually add new fibers by overlapping them into the existing strands and twisting them in. This creates a continuous, strong cord.

    General Principles for All Primitive Tool Crafting

    • Safety First: Always be aware of sharp edges and potential slippage. Wear gloves and eye protection if possible, especially when working with stone.
    • Assess Materials: Before you start, carefully evaluate the strength, flexibility, and suitability of your chosen materials.
    • Work with the Grain: When carving wood, always work with the grain to prevent splitting and to make the carving easier.
    • Practice, Practice, Practice: Primitive tool crafting is a skill that improves with experience. Don’t be discouraged by initial failures.
    • Resourcefulness: Look at every natural object as a potential resource. Can that sharp rock be a blade? Can that strong vine be cordage?
    • Secure Lashings: The strength of a hafted tool relies entirely on the lashing. Make it as tight and secure as possible.

    Mastering the art of crafting primitive tools from nature is a profound survival skill that connects you to ancient human ingenuity. With diligent practice and respect for the environment, you can equip yourself with the essential implements needed to face the challenges of the wilderness.

  • How to Prepare Your Car For An Emergency Evacuation

    How to Prepare Your Car For An Emergency Evacuation

    When an emergency strikes, your car can be your most critical asset. Whether facing a wildfire, flood, hurricane, or any other event that requires an emergency evacuation, being prepared can make all the difference. Having your vehicle ready to go at a moment’s notice eliminates panic and ensures you can get to safety quickly and efficiently.

    This guide provides a clear, step-by-step process to prepare your car for an evacuation. It’s not just about tossing a few water bottles in the back; it’s about creating a reliable and well-stocked lifeline. I’ve learned over the years that preparation is peace of mind. Taking these steps today means you won’t be scrambling when every second counts.

    Step 1: Prioritize Vehicle Maintenance and Readiness

    Before you even think about supplies, you must ensure your car is reliable. An emergency is the worst possible time for a breakdown.

    Keep Your Gas Tank Half-Full (The “Half-Tank Rule”): This is the golden rule of vehicle readiness. Gas stations can be closed, out of fuel, or have massive lines during an emergency. Maintaining at least a half-tank of gas ensures you have enough fuel to get out of the immediate danger zone without delay.

    Perform Regular Maintenance Checks:

    • Tires: Check your tire pressure regularly and ensure they have adequate tread. Don’t forget to check the spare tire. A flat tire can halt your evacuation.
    • Fluids: Keep your oil, coolant, and windshield washer fluid at the proper levels.
    • Battery: Look for corrosion on the terminals. If your battery is more than three years old, have it tested to ensure it holds a charge.
    • Brakes and Lights: Ensure your brakes are responsive and that all your lights (headlights, brake lights, turn signals) are working.

    A well-maintained car is a dependable car. Don’t put off these basic checks.

    Step 2: Assemble Your Vehicle Emergency Kit (Go-Bag)

    Your vehicle emergency kit, or “go-bag,” should be stored in your trunk. It’s best to use a duffel bag or a sturdy plastic container to keep everything organized and accessible.

    Water and Non-Perishable Food

    • Water: Keep one gallon of water per person, per day. Sturdy, sealed water pouches or bottles are ideal as they can withstand temperature changes in your car better than standard plastic jugs.
    • Food: Pack high-energy, non-perishable foods that require no cooking. Think protein bars, granola, dried fruit, nuts, and jerky. Remember to check expiration dates every six months and replace items as needed.

    Safety, First Aid, and Sanitation

    • First-Aid Kit: A well-stocked kit is essential. It should include bandages, antiseptic wipes, pain relievers, gauze, adhesive tape, and any personal medications (keep a rotating 7-day supply).
    • Fire Extinguisher: Get a small ABC-rated fire extinguisher designed for automotive use.

    Light and Communication:

    • Flashlight: A powerful LED flashlight is a must. A hand-crank flashlight is even better as it doesn’t rely on batteries.
    • Radio: A hand-crank or battery-powered AM/FM radio will allow you to receive emergency broadcasts.
    • Whistle: A whistle can be used to signal for help.
    • Sanitation Supplies: Pack toilet paper, paper towels, wet wipes, garbage bags, and hand sanitizer.

    Automotive and Navigation Tools

    • Jumper Cables: Don’t assume another driver will have them.
    • Tire Sealant/Puncture Repair Kit: A can of “fix-a-flat” or a full repair kit can be a lifesaver.
    • Basic Tool Kit: Include a wrench, screwdrivers, and pliers.
    • Navigation: Your phone’s GPS may not work if cell towers are down. Keep physical maps of your local area and surrounding regions. Mark potential evacuation routes on them in advance.
    • Phone Chargers and Power Bank: Have a car charger and a fully charged power bank.

    Step 3: Organize Important Documents and Cash

    In an evacuation, you may not have time to search for vital paperwork. Keep copies in your car.

    How to do it: Place copies of your driver’s license, passport, birth certificates, social security cards, and vehicle registration and insurance in a waterproof and fireproof bag.

    Digital Copies: Also, consider saving encrypted digital copies on a password-protected USB flash drive.

    Keep Cash on Hand: Power outages can render credit and debit cards useless. Keep a small amount of cash, including small bills, in your emergency kit.

    Step 4: Plan and Practice Your Evacuation

    Having the gear is only half the battle. You need a plan.

    Know Your Routes: Identify at least two different evacuation routes from your home, workplace, and your children’s school. Traffic will be heavy on main roads, so having alternate routes is crucial.

    Designate a Meeting Place: If your family gets separated, establish a clear and easily identifiable meeting place—one nearby and one further out of town. Make sure everyone in your family knows the locations.

    Don’t Overpack: While it’s tempting to take everything, a heavy car is less fuel-efficient and harder to handle. Prioritize your emergency kit, important documents, and essential personal items. Your primary goal is to evacuate safely.

    Preparing your car for an emergency evacuation is a proactive step that gives you control in a chaotic situation. Take an afternoon this weekend to go through these steps. Check your vehicle’s maintenance and build your emergency kit. The peace of mind you’ll gain is invaluable.