Category: Survival Tips

  • How to Craft Primitive Tools for Survival

    How to Craft Primitive Tools for Survival

    Building primitive tools for survival is a foundational skill in any wilderness scenario. In a true survival situation, your ability to fashion basic implements from natural materials can mean the difference between thriving and merely surviving. These tools, though rudimentary, empower you to perform essential tasks like building shelter, processing food, making fire, and ensuring personal defense.

    This guide will walk you through the essential steps and techniques for crafting some of the most crucial primitive tools using only what the natural environment provides. Remember, practice is key, and safety should always be your top priority.

    Understanding the “Primitive Tool” Mindset

    Crafting primitive tools isn’t about perfection; it’s about functionality and resourcefulness. You’re not aiming for factory-grade precision but for a tool that can reliably perform a specific task. The core principle is to use the strongest, most suitable materials available and to make secure fastenings.

    Essential Materials for Primitive Tools

    Before you start crafting, you need to identify and gather the right materials.

    • Stone: Look for flint, chert, obsidian, quartzite, or very fine-grained basalt. These stones fracture predictably, creating sharp edges. They are crucial for cutting and scraping tools.
    • Wood:
      • Hardwood: Dense woods like oak, hickory, ash, or maple are excellent for handles, mallets, and digging sticks due to their strength and durability.
      • Softwood: Lighter woods like pine or willow can be used for lighter tasks or as shafts for arrows.
      • Green Wood: Freshly cut wood is more pliable and easier to work with.
      • Deadfall: Dead branches or fallen trees can provide seasoned wood, but check for rot.
    • Cordage (Natural Fiber): This is vital for binding. Look for:
      • Inner bark: From trees like cedar, basswood, or willow. Scrape off the outer bark, then peel strips of the inner layer.
      • Plant fibers: Yucca, nettle, milkweed, dogbane. You’ll need to process these by retting (soaking to break down non-fibrous material) and stripping.
      • Vines: Supple, strong vines can be used for binding.
    • Bone/Antler: Excellent for awls, needles, and pressure flakers (for stone work). They are strong and hold a point well.
    • Animal Hide/Sinew: If available from hunting, hide can be processed for rawhide (strong lashing) and sinew (extremely strong, thin cordage for precision work).

    How to Craft Essential Primitive Tools

    Let’s break down the creation of some vital survival tools.

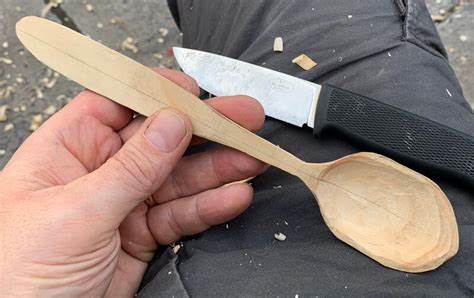
    1. The Core Tool: A Sharp Stone Edged Tool (Flake or Blade)

    This is your most important starting point, as it allows you to process other materials.

    Materials:

    • A suitable stone core (flint, chert, obsidian are ideal).
    • A hammerstone (a denser, rounded stone for striking).
    • Safety gear: Gloves, eye protection (if practicing, critical).

    Steps (Percussion Flaking – Basic Method):

    1. Find Your Core and Hammerstone: Select a core stone that is relatively free of cracks. Choose a hammerstone that is slightly softer than your core stone but still dense and heavy enough for impact.
    2. Identify a Striking Platform: Look for a prominent ridge or a sharp edge on your core stone. This is where you will strike.
    3. Position the Strike: Hold the core firmly in one hand (use a thick leather glove if available). Position the hammerstone at a shallow angle (around 10-20 degrees) to the striking platform, aimed slightly inward.
    4. Strike Firmly and Deliberately: Hit the striking platform with a sharp, controlled blow. The goal is to detach a flake that carries a sharp edge. It often takes practice to get the right angle and force.
    5. Examine the Flake: Once a flake detaches, inspect its edges. You’re looking for a sharp, usable edge. If it’s not sharp enough, you can refine it further (see “Refining Edges” below).
    6. Safety First: Stone flaking produces extremely sharp fragments. Always be mindful of flying debris.

    Refining Edges (Pressure Flaking – Optional but Recommended):

    For sharper and more durable edges, you can use pressure flaking.

    1. Materials: A pressure flaker (a piece of antler tine, hardwood dowel, or copper rod) and your stone flake.
    2. Position the Flaker: Place the tip of your pressure flaker on the edge of the stone flake, very close to the edge.
    3. Apply Pressure: Apply steady, downward pressure away from the edge and slightly inward, leveraging the flaker to “pop” off tiny flakes. This refines the edge and makes it sharper.
    4. Work Along the Edge: Work systematically along both sides of the desired edge, applying pressure in consistent increments.
    1. The Digging Stick

    Simple but incredibly useful for roots, grubs, and preparing ground for shelter.

    Materials:

    • A sturdy hardwood branch (around 4-6 feet long, 1-2 inches thick).
    • Your newly crafted stone edged tool (or fire for charring).

    Steps:

    1. Select a Strong Branch: Find a straight, hard branch without major knots or cracks.
    2. Sharpen One End: Use your stone edged tool to carve a point on one end. Alternatively, you can char the end in a fire and then scrape off the softened, charred wood with a rock or your stone tool. Charring hardens the wood and makes it easier to sharpen.
    3. Test for Strength: Ensure the point is strong enough for digging.
    1. The Mallet (Hammer)

    Useful for pounding stakes, processing fibrous plants, or as a striking tool for other projects.

    Materials:

    • A heavy, dense piece of hardwood (a knot or burl works well).
    • Your stone tool for shaping (optional).

    Steps:

    1. Find a Suitable Piece: Look for a heavy, dense piece of wood. A natural burl or a section where a branch forks can provide a good head shape.
    2. Shape if Necessary: Use your stone tool to remove any sharp edges or unwanted protrusions, making it comfortable to hold and effective for striking. You can leave a natural handle or carve one.
    1. The Primitive Axe/Hatchet (Hafted Chopping Tool)

    More complex, but invaluable for processing larger wood.

    Materials:

    • A well-flaked, sturdy stone chopping head (larger than a simple flake).
    • A strong, relatively straight hardwood handle (with a natural curve or fork if possible for the head).
    • Strong cordage (processed inner bark, rawhide, or strong vines).
    • Resin/Pitch (optional, for extra security).

    Steps (Splitting Handle Method):

    1. Prepare the Stone Head: You need a strong, thick stone flake with a good cutting edge.
    2. Prepare the Handle: Find a piece of hardwood, ideally with a fork or a section you can split.
    3. Split the Handle (if applicable): If using a straight branch, carefully split one end about 4-6 inches down.
    4. Insert the Stone Head: Wedge the stone head into the split of the handle, ensuring the sharp edge is aligned correctly. If using a natural fork, fit the stone snugly into the V-shape.
    5. Lash Securely: This is the most critical part.
      • Start by tightly wrapping your cordage around the handle below the stone head, creating a strong anchor point.
      • Then, crisscross the cordage around the stone head and the handle, pulling it as tight as possible with each wrap.
      • Create a “friction knot” or use a series of half hitches to secure the end of the lashing.
    6. Add Resin (Optional): If you have tree resin or pitch, melt it and apply it over the lashing to further solidify the bond. Allow it to cool and harden.
    1. The Primitive Awl (Piercing Tool)

    Essential for making holes in hide, wood, or other materials.

    Materials:

    • A sharp, strong thorn (e.g., from acacia, hawthorn)
    • A small piece of bone or antler (a splinter or tip)
    • A small piece of hardwood

    Steps:

    1. Select Material: Choose the sharpest, strongest thorn you can find, or a suitable piece of bone/antler.
    2. Refine the Tip: If necessary, use your stone tool or rub it against a coarse rock to sharpen the tip into a fine point.
    3. Create a Handle (Optional but Recommended): For better grip and pressure, embed the base of the thorn/bone into a small piece of hardwood. Drill a pilot hole with your stone tool if needed, or simply wedge and secure it with a small amount of resin or lashing.
    1. Primitive Cordage (Fiber Rope/String)

    Crucial for all hafted tools, shelter, traps, and more.

    Materials:

    • Inner bark strips (cedar, basswood, willow)
    • Plant fibers (nettle, yucca, milkweed, dogbane)

    Steps (Reverse Wrap Method):

    1. Process Fibers: Strip the inner bark or process plant stalks to extract long, strong fibers. Dry them if necessary.
    2. Prepare Two Strands: Take two lengths of fiber. Overlap their ends by a few inches.
    3. Twist One Strand: Hold the overlapped section with one hand. With the other hand, twist one of the strands tightly away from you.
    4. Fold and Release: Fold the twisted strand back over the other strand. It will naturally try to twist back on itself.
    5. Repeat: Now, twist the other strand away from you, fold it over, and repeat the process.
    6. Continuously Add Fibers: As your strands get shorter, continually add new fibers by overlapping them into the existing strands and twisting them in. This creates a continuous, strong cord.

    General Principles for All Primitive Tool Crafting

    • Safety First: Always be aware of sharp edges and potential slippage. Wear gloves and eye protection if possible, especially when working with stone.
    • Assess Materials: Before you start, carefully evaluate the strength, flexibility, and suitability of your chosen materials.
    • Work with the Grain: When carving wood, always work with the grain to prevent splitting and to make the carving easier.
    • Practice, Practice, Practice: Primitive tool crafting is a skill that improves with experience. Don’t be discouraged by initial failures.
    • Resourcefulness: Look at every natural object as a potential resource. Can that sharp rock be a blade? Can that strong vine be cordage?
    • Secure Lashings: The strength of a hafted tool relies entirely on the lashing. Make it as tight and secure as possible.

    Mastering the art of crafting primitive tools from nature is a profound survival skill that connects you to ancient human ingenuity. With diligent practice and respect for the environment, you can equip yourself with the essential implements needed to face the challenges of the wilderness.

  • How to Prepare Your Car For An Emergency Evacuation

    How to Prepare Your Car For An Emergency Evacuation

    When an emergency strikes, your car can be your most critical asset. Whether facing a wildfire, flood, hurricane, or any other event that requires an emergency evacuation, being prepared can make all the difference. Having your vehicle ready to go at a moment’s notice eliminates panic and ensures you can get to safety quickly and efficiently.

    This guide provides a clear, step-by-step process to prepare your car for an evacuation. It’s not just about tossing a few water bottles in the back; it’s about creating a reliable and well-stocked lifeline. I’ve learned over the years that preparation is peace of mind. Taking these steps today means you won’t be scrambling when every second counts.

    Step 1: Prioritize Vehicle Maintenance and Readiness

    Before you even think about supplies, you must ensure your car is reliable. An emergency is the worst possible time for a breakdown.

    Keep Your Gas Tank Half-Full (The “Half-Tank Rule”): This is the golden rule of vehicle readiness. Gas stations can be closed, out of fuel, or have massive lines during an emergency. Maintaining at least a half-tank of gas ensures you have enough fuel to get out of the immediate danger zone without delay.

    Perform Regular Maintenance Checks:

    • Tires: Check your tire pressure regularly and ensure they have adequate tread. Don’t forget to check the spare tire. A flat tire can halt your evacuation.
    • Fluids: Keep your oil, coolant, and windshield washer fluid at the proper levels.
    • Battery: Look for corrosion on the terminals. If your battery is more than three years old, have it tested to ensure it holds a charge.
    • Brakes and Lights: Ensure your brakes are responsive and that all your lights (headlights, brake lights, turn signals) are working.

    A well-maintained car is a dependable car. Don’t put off these basic checks.

    Step 2: Assemble Your Vehicle Emergency Kit (Go-Bag)

    Your vehicle emergency kit, or “go-bag,” should be stored in your trunk. It’s best to use a duffel bag or a sturdy plastic container to keep everything organized and accessible.

    Water and Non-Perishable Food

    • Water: Keep one gallon of water per person, per day. Sturdy, sealed water pouches or bottles are ideal as they can withstand temperature changes in your car better than standard plastic jugs.
    • Food: Pack high-energy, non-perishable foods that require no cooking. Think protein bars, granola, dried fruit, nuts, and jerky. Remember to check expiration dates every six months and replace items as needed.

    Safety, First Aid, and Sanitation

    • First-Aid Kit: A well-stocked kit is essential. It should include bandages, antiseptic wipes, pain relievers, gauze, adhesive tape, and any personal medications (keep a rotating 7-day supply).
    • Fire Extinguisher: Get a small ABC-rated fire extinguisher designed for automotive use.

    Light and Communication:

    • Flashlight: A powerful LED flashlight is a must. A hand-crank flashlight is even better as it doesn’t rely on batteries.
    • Radio: A hand-crank or battery-powered AM/FM radio will allow you to receive emergency broadcasts.
    • Whistle: A whistle can be used to signal for help.
    • Sanitation Supplies: Pack toilet paper, paper towels, wet wipes, garbage bags, and hand sanitizer.

    Automotive and Navigation Tools

    • Jumper Cables: Don’t assume another driver will have them.
    • Tire Sealant/Puncture Repair Kit: A can of “fix-a-flat” or a full repair kit can be a lifesaver.
    • Basic Tool Kit: Include a wrench, screwdrivers, and pliers.
    • Navigation: Your phone’s GPS may not work if cell towers are down. Keep physical maps of your local area and surrounding regions. Mark potential evacuation routes on them in advance.
    • Phone Chargers and Power Bank: Have a car charger and a fully charged power bank.

    Step 3: Organize Important Documents and Cash

    In an evacuation, you may not have time to search for vital paperwork. Keep copies in your car.

    How to do it: Place copies of your driver’s license, passport, birth certificates, social security cards, and vehicle registration and insurance in a waterproof and fireproof bag.

    Digital Copies: Also, consider saving encrypted digital copies on a password-protected USB flash drive.

    Keep Cash on Hand: Power outages can render credit and debit cards useless. Keep a small amount of cash, including small bills, in your emergency kit.

    Step 4: Plan and Practice Your Evacuation

    Having the gear is only half the battle. You need a plan.

    Know Your Routes: Identify at least two different evacuation routes from your home, workplace, and your children’s school. Traffic will be heavy on main roads, so having alternate routes is crucial.

    Designate a Meeting Place: If your family gets separated, establish a clear and easily identifiable meeting place—one nearby and one further out of town. Make sure everyone in your family knows the locations.

    Don’t Overpack: While it’s tempting to take everything, a heavy car is less fuel-efficient and harder to handle. Prioritize your emergency kit, important documents, and essential personal items. Your primary goal is to evacuate safely.

    Preparing your car for an emergency evacuation is a proactive step that gives you control in a chaotic situation. Take an afternoon this weekend to go through these steps. Check your vehicle’s maintenance and build your emergency kit. The peace of mind you’ll gain is invaluable.

  • How to Cook Food Without Electricity

    How to Cook Food Without Electricity

    Living without electricity, whether due to a power outage, camping, or an emergency, doesn’t mean you have to eat cold, raw food. Many practical and effective methods exist for cooking food without electricity. This guide will explore various options, from simple no-cook meals to robust outdoor cooking solutions.

    Why Learn to Cook Without Electricity?

    Knowing how to cook food without electricity is a valuable skill for several reasons:

    • Emergency Preparedness: Power outages can last hours or even days. Having alternative cooking methods ensures you can feed your family.
    • Camping and Outdoor Activities: Enjoy hot meals in nature without relying on modern conveniences.
    • Off-Grid Living: For those seeking a sustainable lifestyle, these methods are essential.
    • Cost Savings: Some methods can be more economical than electric appliances.

    Pre-Requisites: Safety First!

    Before attempting any of these methods, prioritize safety:

    • Ventilation: If using any fuel-burning device indoors (like propane stoves or indoor fireplaces), ensure adequate ventilation to prevent carbon monoxide poisoning. Use a carbon monoxide detector.
    • Fire Safety: Keep a fire extinguisher or a bucket of sand/water nearby when cooking with open flames.
    • Stable Surface: Always cook on a stable, non-flammable surface away from anything that can catch fire.
    • Fuel Storage: Store fuels like propane, charcoal, or wood safely and according to manufacturer guidelines.

    Methods for Cooking Food Without Electricity

    Here are several effective ways to cook food without electricity, categorized by their primary heat source.

    1. Propane/Butane Stoves (Portable Gas Stoves)

    These are arguably the most convenient and popular options for temporary power outages and camping. They are essentially miniature versions of gas stovetops.

    How to Use:

    1. Fuel Source: Connect a small propane cylinder (e.g., 1 lb) or butane canister to the stove as per the manufacturer’s instructions.
    2. Ignition: Turn the control knob to release gas, then use the built-in igniter or a long lighter/match to light the burner.
    3. Cook: Place your pot or pan on the grate and cook as you would on a regular stovetop.
    4. Extinguish: Turn the control knob to the “off” position when done.
    5. Ventilation: If used indoors, ensure a window is open or a fan is running. Never use a propane grill or a large outdoor propane burner indoors.

    Pros: Fast, controllable heat, relatively clean.Cons: Requires fuel canisters, which can be bulky to store in large quantities.

    1. Charcoal Grills (Outdoor Use Only)

    Your backyard charcoal grill isn’t just for barbecues; it’s a versatile tool for cooking food without electricity during an outage.

    How to Use:

    1. Setup: Place the grill on a stable, level, non-flammable surface, far from any structures or flammable materials.
    2. Charcoal Ignition: Place charcoal briquettes or lump charcoal in the grill. Use a charcoal chimney starter (recommended), lighter fluid, or fire starters to ignite the charcoal. Allow the charcoal to ash over (turn gray) for even heat, typically 15-20 minutes.
    3. Cooking:
      • Direct Heat: Place food directly over the hot coals for grilling (steaks, burgers, vegetables).
      • Indirect Heat: Push coals to one side and place food on the other side for slower cooking or roasting (whole chickens, roasts). Close the lid to trap heat.
    4. Temperature Control: Adjust airflow via vents (open for hotter, closed for cooler). Add more charcoal for longer cooking.
    5. Extinguish: Close all vents to starve the coals of oxygen. Do not use water on hot coals as it can create a steam explosion and damage the grill.

    Pros: Great for grilling, imparts a smoky flavor.Cons: Produces smoke and carbon monoxide (must be used outdoors only), takes time to heat up, messy.

    1. Wood Fires (Outdoor Use Only)

    The oldest method of cooking food without electricity is over a wood fire. This can be done in a fire pit, a designated outdoor cooking area, or even a safe, contained campfire.

    How to Use:

    1. Fire Pit/Area: Build a safe fire pit away from structures, trees, and anything flammable. Clear the area of dry leaves and debris.
    2. Fuel: Use dry, seasoned firewood. Smaller kindling and tinder help start the fire.
    3. Building the Fire: Build a tepee or log cabin style fire. Light the tinder, gradually adding kindling, then larger logs as the fire grows.
    4. Cooking Methods:
      • Grates: Place a metal grate over the coals (not directly in the flames) for grilling.
      • Dutch Oven: Place a cast iron Dutch oven directly into the coals or hang it over the fire. You can also place coals on the lid for even heating.
      • Foil Packet Cooking: Wrap food in heavy-duty aluminum foil packets and place them directly in the coals.
      • Skewer/Stick Cooking: Roast food on skewers or sticks over the flames (hot dogs, marshmallows).
    5. Temperature Control: Move food closer to or further from the coals, or adjust the amount of wood. Coals provide more consistent heat than active flames.
    6. Extinguish: Douse the fire completely with water, stir the ashes, and then add more water until everything is cool to the touch.

    Pros: Abundant fuel source in many areas, rustic experience, versatile.Cons: Requires significant safety precautions (outdoor use only), takes skill to manage heat, smoky.

    1. Rocket Stoves

    A rocket stove is a highly efficient, small, portable wood-burning stove designed for outdoor cooking. They use small twigs, branches, or biomass as fuel and create a powerful, concentrated flame.

    How to Use:

    1. Setup: Place the rocket stove on a stable, non-flammable surface outdoors.
    2. Fuel: Feed small pieces of wood or biomass into the fuel chamber.
    3. Ignition: Light the fuel. The design of the stove creates a strong draft, pulling air in and rapidly heating up.
    4. Cook: Place a pot or pan on the top grate. The concentrated heat quickly boils water or cooks food.

    Pros: Extremely fuel-efficient, uses readily available small biomass, heats quickly, portable.Cons: Still requires outdoor use, requires constant feeding of small fuel pieces.

    1. Solar Ovens

    Solar ovens use the sun’s energy to cook food without electricity. They are slow but effective and completely silent and safe.

    How to Use:

    1. Assembly/Setup: Set up your solar oven (box cooker, panel cooker, or parabolic cooker) in a sunny location.
    2. Food Placement: Place food in dark, lidded pots or directly in dark baking dishes inside the oven. Dark colors absorb more heat.
    3. Orientation: Angle the solar oven directly towards the sun. Adjust its position every 30-60 minutes to track the sun.
    4. Cooking: Cooking times are significantly longer than conventional ovens. A pot of rice might take 1-2 hours, while larger dishes could take 3-5 hours or more, depending on sun intensity.
    5. Check Temperature: Use a thermometer if possible to ensure food reaches safe cooking temperatures.

    Pros: Completely silent, no fuel required, environmentally friendly, safe (no open flame or fumes).Cons: Dependent on clear sunlight, slow cooking times, not suitable for night cooking or cloudy days.

    1. Hay Box Cookers (Retained Heat Cooking)

    A hay box cooker, also known as a wonder box or thermal cooker, isn’t a heat source itself but an insulator. It works by retaining heat from partially cooked food, allowing it to finish cooking slowly and gently.

    How to Use:

    1. Partial Cooking: Bring food (e.g., stew, soup, rice) to a boil on a propane stove, wood fire, or even a hot plate (if you have residual heat). Boil for a few minutes.
    2. Transfer: Immediately transfer the tightly lidded pot into the hay box (an insulated box filled with hay, blankets, or towels).
    3. Insulate: Pack the insulating material tightly around the pot, ensuring minimal air space. Close the box.
    4. Retained Cooking: The trapped heat will continue to cook the food slowly over several hours. This method is great for tough cuts of meat or dishes that benefit from slow simmering.

    Pros: Saves fuel, prevents scorching, keeps food warm for hours, very safe once transferred.Cons: Requires an initial heat source, slow cooking times.

    1. Indoor Fireplace/Wood Stove

    If you have a functional fireplace or wood stove in your home, it can be used for cooking food without electricity during a power outage.

    How to Use:

    1. Cleanliness: Ensure your chimney is clean and free of creosote buildup.
    2. Fire Building: Build a fire as you normally would.
    3. Cooking Methods:
      • Grates: Place a cast iron skillet or pot on a sturdy metal grate over the coals.
      • Hanging Pots: Use a fireplace crane to suspend pots over the flame.
      • Baking: Place a Dutch oven directly into the coals for baking (e.g., bread, casseroles).
      • Foil Packets: Place foil-wrapped food directly in the ashes or coals.
    4. Safety: Use heat-resistant gloves. Ensure proper ventilation and a carbon monoxide detector.

    Pros: Warmth for the home, can handle large pots.Cons: Requires a dedicated fireplace/wood stove, messy, can be difficult to regulate temperature precisely.

    1. No-Cook Meals

    Sometimes, the simplest solution is the best. Having a supply of no-cook foods is crucial for immediate needs during an outage.

    Examples:

    • Canned goods (tuna, chicken, beans, vegetables, fruits – with a manual can opener)
    • Peanut butter and jelly
    • Bread, crackers, tortillas
    • Hard cheeses
    • Dried fruits and nuts
    • Granola bars, protein bars
    • Ready-to-eat cereals (with shelf-stable milk)
    • Fresh fruits and vegetables (if you have refrigeration or consume quickly)

    Pros: Zero equipment needed, quick and easy.Cons: Limited variety, might not provide hot food comfort.

    Essential Supplies for Electricity-Free Cooking

    To effectively cook food without electricity, consider gathering these supplies:

    • Manual Can Opener: Absolutely essential for canned goods.
    • Matches/Lighters: Long-stemmed ones are safest.
    • Fuel: Propane canisters, charcoal, firewood, kindling, fire starters.
    • Cast Iron Cookware: Excellent for retaining and distributing heat on various heat sources.
    • Heavy-Duty Aluminum Foil: For foil packet cooking.
    • Heat-Resistant Gloves/Potholders: For handling hot items.
    • Thermometer: To ensure food reaches safe internal temperatures.
    • Water: For cooking and cleanup.
    • Manual Coffee Grinder/French Press: If coffee is a priority!

    By preparing for different scenarios and understanding these diverse methods, you can confidently cook food without electricity, ensuring you and your family can enjoy warm, nourishing meals no matter what.

  • How to Identify Poisonous Plants and Berries

    How to Identify Poisonous Plants and Berries

    Spending time outside—whether gardening, visiting a park, or hiking—connects us with nature. But it’s important to remember that some plants and berries, while often quite beautiful, can be harmful or even deadly if touched or eaten. Knowing how to spot poisonous plants and berries is a useful skill that helps keep you, your children, and pets safe.

    1. Adopt a “Look, Don’t Touch, Never Eat” Rule

    The simplest, most important guideline is this: never touch or eat any plant or berry unless you’re absolutely sure it’s safe. This is especially crucial for kids, who might be drawn to colorful berries.

    • Teach Children Early: Help kids understand that wild plants or berries aren’t snacks. Only fruits from trusted sources—like grocery stores or your own garden—are safe to eat.
    • Supervise Closely: Keep a watchful eye on children and pets when outdoors in areas where unknown plants grow.
    1. Learn Common Warning Signs in Plants

    While there’s no foolproof rule, certain features often hint that a plant could be poisonous.

    • Milky or Colored Sap: Plants that ooze milky or unusual sap when broken—like poinsettias or some spurges—are often toxic.
    • Bitter or Soapy Taste: Poisonous plants tend to taste bitter or unpleasant. (But never test by tasting!)
    • Umbellifer Family Look: Plants with umbrella-shaped flower clusters—like parsley and carrot relatives—can be tricky since some are edible, but others like poison hemlock are deadly. Expert knowledge is needed here.
    • Spines, Thorns, or Fine Hairs: These may cause skin irritation or injury, even if the plant isn’t poisonous internally.
    • Almond Scent: A bitter almond smell when crushing leaves or seeds may signal cyanide presence (e.g., wild cherry leaves).
    • Mushrooms: Assume all wild mushrooms are poisonous unless an expert says otherwise.
    1. Identify Common Poisonous Plants (Visual Cues)

    Familiarizing yourself with a few key plants helps you recognize danger at a glance.

    Poison Ivy, Oak, and Sumac (Contact Poisons)

    These cause itchy, blistering rashes from an oily sap called urushiol.

    • Poison Ivy: “Leaves of three, let it be.” Leaflets shiny and smooth or toothed, often red in spring and fall. May have greenish-white berries. Vines can be hairy.
    • Poison Oak: Also “leaves of three,” but more rounded or lobed, resembling oak leaves. Often fuzzier than poison ivy.
    • Poison Sumac: Shrub or small tree in wetlands, with 7-13 smooth, elongated leaflets. Has white, hanging berries (unlike harmless sumac’s red, upright clusters).

    Hemlock (Highly Toxic)

    • Poison Hemlock: Tall (3-6 feet), hollow stems with purple spots, fern-like leaves, white umbrella flowers, and a musty odor.
    • Water Hemlock: Found near water, stout hollow stems with purple blotches, compound leaves with distinctive vein patterns, and white umbrella flowers. Roots look like parsnips but are deadly.

    Deadly Nightshade (Atropa belladonna)

    Bushy plant with dull green leaves, bell-shaped purple flowers, and shiny black berries that look like cherries—but are extremely poisonous.

    Pokeweed

    Tall with reddish stems, large oval leaves, and dark purple berry clusters resembling grapes. All parts, especially roots and raw berries, are toxic.

    Castor Bean

    Ornamental plant with star-shaped leaves, spiny seed pods in bright colors, and seeds containing ricin—a deadly poison.

    Lily-of-the-Valley

    Garden perennial with fragrant white bell flowers and bright red/orange berries—all parts highly toxic.

    Foxglove

    Tall spikes of purple-pink bell flowers spotted inside, with hairy leaves. Toxic to the heart.

    Oleander

    Evergreen shrub or small tree with narrow leathery leaves, clusters of fragrant flowers, and highly toxic leaves, flowers, and even smoke.

    1. Utilize Resources for Identification

    Don’t rely solely on memory.

    • Field Guides: Regional plant books are very helpful.
    • Plant ID Apps: Many apps let you snap a photo for identification, but double-check with other sources.
    • Local Experts: Botanical gardens or extension offices often offer plant ID help.
    • Online Databases: University or government sites with trusted plant info.
    1. What to Do in Case of Exposure

    If you suspect contact or ingestion:

    1. Don’t Induce Vomiting.
    2. Act Fast: Move the person away from the plant.
    3. Remove Contaminated Clothing.
    4. Rinse Thoroughly: Wash skin with soap and water for 10-15 minutes; rinse mouth but don’t swallow.
    5. Call Poison Control Immediately: In the U.S. and Canada, dial 1-800-222-1222. Be ready to describe the plant, amount ingested, and symptoms.
    6. Call Emergency Services if Needed: If breathing is difficult, unconsciousness occurs, or seizures happen, call 911 or your local emergency number.
    7. Save a Sample: If possible, safely collect or photograph the plant for medical professionals.

    Being proactive and learning to spot poisonous plants is the best way to stay safe and enjoy nature worry-free. A little caution goes a long way.

  • How to Carve a Spoon Using a Survival Knife

    How to Carve a Spoon Using a Survival Knife

    In a wilderness survival scenario, having a functional utensil can significantly improve your ability to eat and stay nourished. While purpose-built carving tools are ideal, knowing how to carve a spoon using a survival knife is a valuable skill that utilizes the most basic and essential piece of bushcraft gear. This guide will walk you through the process, focusing on safety, effective techniques, and making the most of limited tools.

    Why Carve a Spoon in a Survival Situation?

    Eating hot food or consuming liquids like broth can be challenging and messy without a spoon. A carved spoon provides:

    • Hygiene: Prevents direct contact with hot food or contaminated surfaces.
    • Efficiency: Allows for easier consumption of stews, porridges, or liquids.
    • Morale: A small comfort that can boost spirits in a difficult situation.
    • Practice: Hones your knife skills, a crucial element of survival.

    Safety First: Essential Precautions

    Carving with a survival knife is inherently risky. Sharp tools require extreme caution.

    • Always Carve Away from Your Body: This is the most crucial rule to prevent accidental cuts.
    • Wear Gloves (if available): Protects your non-dominant hand from slips.
    • Maintain a Stable Grip: Ensure both your knife and the wood are held firmly.
    • Use Controlled, Short Strokes: Avoid long, uncontrolled cuts that can slip.
    • Keep Your Blade Sharp: A dull knife is more dangerous as it requires more force, increasing the chance of a slip.
    • Clear Your Workspace: Remove any distractions or obstacles.

    Materials and Tools You’ll Need

    To carve a spoon using a survival knife, you primarily need:

    • Survival Knife: A fixed-blade knife with a sturdy, full tang is ideal. The blade should be sharp.
    • Wood:
      • Green Wood (Freshly Cut): Much easier to carve than dry wood. Look for fallen branches or small saplings.
      • Ideal Wood Types: Willow, birch, maple, sycamore, basswood, aspen, and fruitwoods are relatively soft and carve well. Avoid extremely hard woods like oak or very resinous woods like pine (unless it’s your only option).
      • Branch Size: A branch about 1.5 to 2 inches in diameter and 8-12 inches long is a good starting point.
    • Optional (but helpful):
      • Saw: For quickly cutting your wood blank to size. Your survival knife might have a saw back, or you can use its batoning technique.
      • Sharpening Stone/Strop: To maintain your knife’s edge.
      • Larger piece of wood/log: For batoning (splitting wood) safely.

    Step-by-Step Guide: Carving a Spoon

    This process requires patience and deliberate action.

    Phase 1: Preparing the Wood Blank

    1. Select Your Wood: Find a suitable piece of green wood, roughly 1.5 to 2 inches in diameter and 8-12 inches long. Look for relatively straight grain and no major knots or defects.
    2. Cut the Blank to Length:
      • If you have a saw, cut the branch to your desired spoon length (e.g., 8-10 inches).
      • If using only your survival knife, you can carefully baton the branch. Place the blade on the branch where you want to cut, and then strike the spine of the blade with a piece of heavier wood to drive it through. Be extremely careful not to cut yourself.
    3. Split the Wood (Optional but Recommended): For a flatter, easier-to-carve surface, you can split the branch lengthwise down the middle. Use the batoning method to split it carefully. This gives you two halves, each potentially becoming a spoon. If the branch is small enough (under 2 inches), you can carve directly from the round piece, but it will be more challenging.

    Phase 2: Shaping the Outer Profile

    1. Rough Out the Shape: Visualize your spoon. It has a bowl, a neck, and a handle.
      • Marking (Optional): You can use a piece of charcoal or the knife tip to lightly sketch the outline of your spoon on the wood blank.
    2. Carve the Handle and Neck:
      • Remove Bulk: Using a controlled push cut (pushing the blade away from you with your thumb or palm for control) or a chest lever cut (holding the knife against your chest, bracing the wood with your other hand, and pulling the wood towards the blade), begin to remove wood from the sides of what will be the handle and the narrower neck section.
      • Establish Thickness: Reduce the thickness of the handle to a comfortable grip. Remember to always cut away from your body.
    3. Define the Bowl Shape:
      • Taper: Gradually taper the wood from the neck outwards to form the general shape of the spoon bowl. Think of an oval or rounded shape.
      • Rough Edges: Don’t worry about the hollowing yet; just get the outer perimeter and thickness of the bowl section established.

    Phase 3: Hollowing the Bowl

    This is the most challenging part with a survival knife.

    1. Establish the Bowl’s Edge: Use the tip of your knife to carefully score a circle or oval that defines the outer edge of your bowl. This provides a boundary.
    2. Hollow Out (Leverage and Thumb Push):
      • Initial Cuts: Place the tip of your knife inside the marked bowl area. Using your thumb on the spine of the blade for leverage and control, slowly push the blade into the wood, scooping out small chips.
      • Gouge Motion: Angle the blade slightly and use a gentle rocking or scooping motion to remove material. Always keep your non-carving hand well clear of the blade’s path.
      • Rotation: Rotate the spoon as you work, moving from the center outwards to create the desired concave shape.
      • Patience is Key: This will take time and many small cuts. Avoid trying to remove large chunks, as this can lead to slips or cracking the wood.
      • Consider a ‘Hook’ Edge: If your knife has a slight curve or a robust tip, it can be slightly easier to scoop out the bowl. Some larger survival knives might have a belly that helps.

    Phase 4: Refining and Finishing

    1. Smooth the Surfaces: Once the basic shape and hollow are achieved, go back over all surfaces with smaller, finer cuts.
      • Pare Cuts: Use short, controlled pare cuts (where the blade is pulled towards you, but with your other hand controlling the wood, ensuring the blade never points at your body) to smooth out any rough edges or tool marks.
      • Rounded Edges: Round off all sharp edges on the handle and bowl for comfort.
    2. Check for Comfort and Functionality: Hold the spoon. Does the handle feel good in your hand? Is the bowl deep enough to hold food? Make any necessary adjustments.
    3. Optional Sanding/Polishing:
      • In a survival situation, this is less critical. However, if you have fine-grit rock, sand, or rough cloth, you can rub down the spoon for a smoother finish.
      • Burnishing: You can also use a hard, smooth object (like a smooth stone or another piece of hardwood) to rub the spoon vigorously. This compacts the wood fibers, making it smoother and more durable.
    4. Preservation (Optional):
      • If you have any animal fat, vegetable oil (from seeds/nuts), or even tree sap, you can rub it into the wood. This helps seal the wood, makes it more water-resistant, and prevents cracking.

    My Personal Experience Carving with Limited Tools

    I remember my first attempt at carving a spoon in a bushcraft course. I had a decent fixed-blade knife, but no specialized hook knife. Hollowing the bowl felt like trying to dig a hole with a flat shovel. It was slow, and frustrating at times. The biggest lesson was patience and understanding that with a single tool, every cut needs to be precise and deliberate. I learned to use the tip of my knife almost like a drill, slowly excavating small chips, and then using the blade’s belly for broader scooping motions. The final spoon wasn’t a work of art, but it functioned, and the satisfaction of eating my trail stew with something I had made myself was immense. It truly taught me the value of resourcefulness and basic tool mastery.

    Conclusion

    Carving a spoon using a survival knife is a testament to your resourcefulness and skill in a wilderness environment. While it demands patience and precision, the ability to create a functional utensil from raw materials can make a significant difference to your comfort and well-being. Always prioritize safety, choose your wood wisely, and approach each cut with control. With practice, you’ll gain confidence in your knife skills and the satisfaction of self-sufficiency.

  • How to Survive an EMP Attack with Minimal Gear

    How to Survive an EMP Attack with Minimal Gear

    An Electro-Magnetic Pulse (EMP) attack or a severe solar flare—more technically known as a Coronal Mass Ejection (CME)—has the potential to wipe out most modern electronics. The result? Society could be thrown abruptly back into a pre-industrial state. It might not seem immediately apocalyptic, but the long-term fallout on infrastructure, communication, and supply chains would be profound. Surviving such an event, especially with minimal gear, hinges on returning to the basics: human essentials and non-electronic solutions.

    Here’s a practical, no-frills guide to preparing for and adapting to life after an EMP.

    1. Grasp the Immediate Impact and What Might Still Work Before you can respond, you need to understand what an EMP actually does.
    • What it affects:
      • Electronics: Pretty much anything with microchips, complex circuits, or long wires is vulnerable. This includes your phone, laptop, car (if it’s newer), most appliances—even some battery-powered devices.
      • Power Grid: This is the big one. The national grid is highly exposed and could fail almost completely.
    • What might survive:
      • Analog or older mechanical systems: Think pre-1980s vehicles with carbureted engines, wind-up clocks, or anything purely mechanical.
      • Simple unpowered electronics: Some might make it if they’re off, unplugged, and isolated—though results can be unpredictable.
      • Faraday cages: If you’ve stored devices in one, they stand a good chance. But let’s assume for now that you haven’t.
      • People: EMPs don’t harm humans or animals directly. The danger comes from the domino effect on society.
    1. Water: Your First and Fastest Need Without power, most water systems stop working. That makes clean water your most urgent concern.
    • Immediate steps:
      • Fill your bathtub, sinks, containers: The moment you suspect an EMP, fill everything.
      • Stock bottled water: It doesn’t expire quickly and it’s your safest source.
    • Sourcing long-term:
      • Rain collection: A tarp and some buckets can go a long way.
      • Natural water sources: Know where your nearest stream, lake, or river is. But never drink untreated water.
    • Purification with minimal tools:
      • Boiling: The gold standard. Rolling boil for one minute (three minutes if you’re up in the mountains).
      • Cloth filtration: Just removes visible particles. Won’t kill germs.
      • Portable filters: If you have a LifeStraw or Sawyer filter tucked away somewhere safe, great. Otherwise, solar disinfection (SODIS) using clear PET bottles in sunlight is your next best bet.
    1. Food: Secure What You Can, Then Grow More Our food system depends on electricity at every level. Grocery store shelves won’t stay full for long.
    • Short-term stores:
      • Stockpile non-perishables: Canned foods, dried fruits, nuts, granola bars. Ideally, aim for a month’s worth.
      • Manual can opener: An obvious essential that’s easy to overlook.
    • Sustainable food options:
      • Foraging: Only if you know what you’re doing. Some wild plants are deadly.
      • Basic hunting or trapping: This is not the time to learn. Only go this route if you already have skills and simple tools like slingshots or snares.
      • Gardening: Even a few seed packets can help. Fast-growing, calorie-dense veggies are your best bet.
      • Preservation: Learn to dry, salt, or smoke food. It makes a big difference.
    1. Communication Without Electronics If everything digital goes silent, you’ll need fallback methods.
    • Battery-powered AM/FM radio: Store it in a makeshift Faraday cage, even if it’s just a metal trash can.
    • Ham radio: Useful if you’re licensed and can protect it beforehand.
    • Low-tech signaling: Whistles, mirrors, even handwritten notes.
    • Pre-arranged plans: Decide now where to meet family or friends if you can’t talk.
    1. Shelter and Staying Warm Cold can be as deadly as thirst. Your home is your first defense.
    • Insulation and layers: Wool, cotton, and lots of layers. Don’t count on electric blankets.
    • Heating: Fireplaces, wood stoves, or outdoor fires are your only real option. Have firewood and fire-starting tools ready.
    • Sleeping gear: Blankets, sleeping bags—whatever keeps body heat in.
    • Cooking: Propane stoves or fire pits work, assuming you have fuel.
    1. Security and Defense Law enforcement may be stretched thin. You’ll need to think about basic safety.
    • Reinforce your home: Lock doors, secure windows.
    • Neighbor support: Work with people you trust. A small, cooperative group can be a huge advantage.
    • Basic defense: A sturdy stick or knife is better than nothing. Avoid confrontation if you can.
    1. Health and Sanitation Injuries and illness will become much more dangerous without modern medicine.
    • First-aid: Stock bandages, antiseptics, medications you rely on.
    • Cleanliness: Soap, hand sanitizer, and TP are more important than they sound.
    • Waste management: Plan where and how you’ll handle waste if plumbing fails. A shovel might become your most-used tool.
    • Learn basic care: Knowing how to clean wounds, reduce fevers, and handle minor infections could save lives.
    1. Build Useful Skills Now When technology fails, know-how becomes your best resource.
    • Navigation: Maps and compasses matter again.
    • Fire-starting: Learn more than just using a lighter.
    • Knots and repairs: Helps with shelter, gear, and more.
    • Gardening and foraging: Essential for long-term survival.
    • Mental resilience: Perhaps the most important. This won’t be easy.

    Final Thoughts

    Surviving an EMP with minimal gear isn’t about going full survivalist. It’s about being thoughtful and prepared in advance. Focus on the basics: water, food, warmth, security, and communication. You don’t need to go off-grid tomorrow, but starting to learn and gather a few essentials now could make all the difference later. Preparedness, ultimately, is less about fear and more about confidence in the face of uncertainty.

  • How to Prevent Dehydration in Extreme Heat

    How to Prevent Dehydration in Extreme Heat

    Dehydration during extreme heat is a real threat, especially for people who work outdoors, exercise in hot environments, or live in areas experiencing heatwaves. I’ve personally dealt with heat exhaustion while trekking during summer and learned how quickly the body can lose water. Preventing dehydration isn’t just about drinking more water—it’s about adopting smart habits before, during, and after heat exposure. In this guide, I’ll walk you through a step-by-step approach to prevent dehydration in extreme heat, using a combination of personal experience and trusted health practices.

    What Is Dehydration?

    Dehydration occurs when your body loses more fluids than it takes in. In extreme heat, this happens faster due to excessive sweating. Without enough fluids, your body can’t cool down efficiently, which increases the risk of heat cramps, heat exhaustion, and heatstroke.

    Symptoms of dehydration include:

    • Dry mouth and dry skin
    • Dizziness or lightheadedness
    • Fatigue and muscle cramps
    • Headache
    • Dark yellow urine or infrequent urination

    Preventing dehydration is about being proactive—not just reacting when symptoms appear.

    Step-by-Step Guide to Prevent Dehydration in Extreme Heat

    Step 1: Start Hydrating Early in the Day

    Begin drinking water before you go outside or start any physical activity.

    • Drink at least 500ml (17 oz) of water first thing in the morning.
    • Don’t wait until you feel thirsty. By the time you feel thirsty, dehydration may already be starting.

    When I had early-morning construction tasks, preloading water helped me avoid afternoon crashes caused by dehydration.

    Step 2: Drink Water Consistently Throughout the Day

    Rather than gulping large amounts at once, sip water regularly.

    • Aim for 250–500ml (8–17 oz) every hour during periods of extreme heat.
    • Use a reusable water bottle with measurements to track intake.
    • Set alarms or reminders on your phone to drink water if you’re prone to forgetting.

    This habit helped me stay consistent when I was doing fieldwork under the sun for long hours.

    Step 3: Include Electrolytes

    During intense sweating, your body loses electrolytes like sodium, potassium, and magnesium. These are essential for muscle function and hydration.

    • Use oral rehydration solutions (ORS) or sports drinks in moderation.
    • Include coconut water, lemon water with salt, or homemade electrolyte drinks if you want a natural option.
    • Avoid drinks with high sugar or caffeine, as they may contribute to fluid loss.

    I started adding electrolyte packets to my water after experiencing muscle cramps during summer hikes. It made a noticeable difference.

    Step 4: Eat Hydrating Foods

    Fluids aren’t the only way to hydrate—food contributes too.

    • Eat water-rich fruits like watermelon, cucumber, oranges, grapes, and berries.
    • Include salads, soups, and vegetables in your meals.
    • Avoid salty snacks and fried foods, as they can increase dehydration.

    I found that carrying sliced cucumber and fruit helped maintain hydration during long drives or outdoor shoots.

    Step 5: Wear the Right Clothing

    Clothing affects how your body regulates temperature.

    • Wear light-colored, loose-fitting, breathable fabrics like cotton or linen.
    • Avoid dark colors and synthetic materials that trap heat.
    • Use a hat or scarf to protect your head and neck from direct sun exposure.

    During one of my summer field trips, switching to light linen shirts reduced my sweating and made me feel less fatigued.

    Step 6: Limit Physical Activity During Peak Heat

    The sun is strongest between 12 p.m. and 4 p.m. Avoid heavy activity during these hours if possible.

    • Schedule workouts or physical labor for early morning or evening.
    • Take frequent breaks in the shade or indoors if you must work outside.
    • Monitor your body—stop immediately if you feel dizzy or nauseated.

    When I started moving my running schedule to 6 a.m., I noticed I didn’t lose as much water and recovered faster.

    Step 7: Use Cooling Measures

    Help your body cool down externally.

    • Use a damp towel on your neck, wrists, or forehead.
    • Splash cool water on your face or take cold showers.
    • Stay in air-conditioned rooms or use a fan to improve air circulation.

    In one instance, I cooled down faster by soaking a bandana in cold water and tying it around my neck while walking.

    Step 8: Monitor Urine Color

    Your urine is a direct indicator of your hydration status.

    • Light yellow urine means you’re well hydrated.
    • Dark yellow or amber indicates dehydration.

    If your urine is very dark or you’re not urinating often, it’s a clear sign to increase fluid intake immediately.

    I got into the habit of checking urine color throughout the day to stay ahead of dehydration.

    Step 9: Avoid Alcohol and Excess Caffeine

    Both alcohol and caffeine can act as diuretics, increasing fluid loss.

    • Avoid alcoholic drinks during the day in hot weather.
    • If you drink coffee or tea, balance it with extra water.

    I personally limited coffee intake during heatwaves, replacing my second cup with coconut water to stay hydrated.

    Step 10: Know Who Is Most at Risk

    Certain groups are more vulnerable to dehydration:

    • Elderly individuals
    • Young children
    • People with chronic illnesses
    • Outdoor workers and athletes

    If you’re caring for children or seniors, monitor their hydration more closely. During summer holidays, I made it a point to check my kids’ water bottles and encourage sips every hour.

    Bonus Tip: Prepare an Emergency Hydration Kit

    If you live in a hot climate or are traveling to one, prepare a small kit with:

    • Bottled water or a hydration bladder
    • Electrolyte tablets or packets
    • Rehydration sachets
    • Cooling wipes or towel
    • Extra set of lightweight clothing

    This was especially useful during a camping trip when water sources were limited and temperatures soared above 40°C.

    Conclusion

    Preventing dehydration in extreme heat takes planning, consistency, and awareness of your body’s needs. Start hydrating early, sip water regularly, eat water-rich foods, and use electrolytes when needed. Limit exposure to peak sun, wear proper clothing, and check your urine color as a simple hydration indicator. These habits helped me avoid heat-related illness multiple times and made summer conditions more manageable. Don’t wait for dehydration symptoms to appear—take steps proactively to keep yourself and your family safe.

  • How to Survive an Economic Collapse

    How to Survive an Economic Collapse

    Economic downturns can be challenging, but with proactive measures, individuals can navigate these periods more effectively. This guide provides practical steps to help you prepare for and endure economic hardships.

    1. Assess Your Financial Situation

    Begin by evaluating your current financial standing:

    • Income Stability: Determine if your job or business is secure.
    • Expenses: List all monthly expenses to identify essential and non-essential costs.
    • Debts: Note all outstanding debts, their interest rates, and payment schedules.
    • Savings: Check the amount available in your emergency fund and other savings.

    Understanding your financial landscape is crucial for making informed decisions during economic downturns.

    1. Create a Budget and Reduce Expenses

    Develop a realistic budget:

    • Prioritize Essentials: Focus on necessities like housing, food, utilities, and healthcare.
    • Cut Non-Essentials: Eliminate or reduce spending on dining out, subscriptions, and luxury items.
    • Monitor Spending: Use budgeting tools or apps to track expenses and stay within limits.

    Regularly reviewing and adjusting your budget helps maintain financial stability.

    1. Build an Emergency Fund

    Aim to save three to six months’ worth of living expenses:

    • Start Small: Begin by setting aside a small portion of each paycheck.
    • Automate Savings: Set up automatic transfers to a dedicated savings account.
    • Use Windfalls Wisely: Allocate bonuses, tax refunds, or other unexpected income to your emergency fund.

    An emergency fund provides a financial cushion during unforeseen circumstances.

    1. Diversify Income Streams

    Explore additional income opportunities:

    • Freelancing: Offer skills or services on freelance platforms.
    • Part-Time Jobs: Consider part-time work in essential sectors.
    • Online Sales: Sell unused items or handmade products online.

    Diversifying income can help offset losses from primary income sources.

    1. Pay Down High-Interest Debt

    Reducing debt lessens financial strain:

    • Prioritize: Focus on paying off debts with the highest interest rates first.
    • Consolidate: Consider consolidating debts to secure lower interest rates.
    • Avoid New Debt: Refrain from taking on additional debt during uncertain times.

    Lower debt levels enhance financial flexibility.

    1. Secure Your Employment

    Take steps to maintain job security:

    • Enhance Skills: Pursue training or certifications relevant to your field.
    • Network: Build professional relationships that may lead to job opportunities.
    • Stay Informed: Keep abreast of industry trends and adapt accordingly.

    Proactive career management can mitigate employment risks.

    1. Invest Wisely

    Make informed investment decisions:

    • Diversify Portfolio: Spread investments across various asset classes to reduce risk.
    • Long-Term Focus: Avoid panic selling; maintain a long-term perspective.
    • Consult Professionals: Seek advice from financial advisors to navigate volatile markets.

    Prudent investing can preserve and potentially grow wealth during downturns.

    1. Stockpile Essential Supplies

    Prepare for potential shortages:

    • Non-Perishable Food: Keep a supply of canned goods, grains, and other long-lasting foods.
    • Medical Supplies: Ensure access to necessary medications and first-aid items.
    • Household Necessities: Stock up on hygiene products and cleaning supplies.

    Having essentials on hand reduces dependence on disrupted supply chains.

    1. Develop Self-Sufficiency Skills

    Learn skills that promote independence:

    • Gardening: Grow your own fruits and vegetables.
    • Cooking: Prepare meals from basic ingredients to save money.
    • DIY Repairs: Handle minor home and appliance repairs yourself.

    Self-sufficiency can lower living costs and increase resilience.

    1. Foster Community Connections

    Build supportive relationships:

    • Share Resources: Collaborate with neighbors to share tools and supplies.
    • Exchange Skills: Offer your expertise in exchange for others’ skills.
    • Support Networks: Join local groups focused on mutual aid and support.

    Strong communities can provide assistance and security during tough times.

    1. Stay Informed and Adaptable

    Keep abreast of economic developments:

    • Monitor News: Stay updated on financial news and government policies.
    • Adjust Plans: Be prepared to modify your strategies as situations evolve.
    • Seek Guidance: Consult financial experts for personalized advice.

    Being informed enables timely and effective decision-making.

    1. Maintain Mental and Physical Health

    Prioritize well-being:

    • Routine: Establish daily routines to provide structure.
    • Exercise: Engage in regular physical activity to reduce stress.
    • Seek Support: Talk to friends, family, or professionals about your concerns.

    Good health is foundational to enduring economic hardships.

  • How to Survive an Earthquake in a High-Rise Building

    How to Survive an Earthquake in a High-Rise Building

    Surviving an earthquake in a high-rise building requires calmness, quick thinking, and adherence to safety protocols. High-rise structures are engineered to withstand seismic activities, but occupants must know how to respond effectively during such events. This guide provides a comprehensive, step-by-step approach to staying safe before, during, and after an earthquake in a high-rise building.

    Understanding Earthquake Risks in High-Rise Buildings

    High-rise buildings are designed with flexibility to absorb seismic shocks, often incorporating features like base isolators and tuned mass dampers. These elements help reduce the impact of ground movements. However, during an earthquake, the upper floors may experience more noticeable swaying due to the building’s design to withstand wind forces, which can be unsettling but is typically safe.

    Before the Earthquake: Preparation is Key

    1. Familiarize Yourself with the Building’s Emergency Plan
    • Locate all emergency exits and stairwells.
    • Know the designated assembly points outside the building.
    • Understand the building’s alarm systems and evacuation procedures.
    1. Prepare an Emergency Kit

    Include:

    • Water and non-perishable food for at least 72 hours.
    • Flashlight with extra batteries.
    • First-aid supplies.
    • Whistle to signal for help.
    • Personal documents and essential medications.
    1. Secure Your Living or Working Space
    • Anchor heavy furniture and appliances to walls.
    • Store heavy items on lower shelves.
    • Avoid placing heavy objects above beds or seating areas.

    During the Earthquake: Stay Calm and Protect Yourself

    1. Drop, Cover, and Hold On
    • Drop: Get down on your hands and knees to prevent being knocked over.
    • Cover: Protect your head and neck with your arms. If possible, take shelter under a sturdy desk or table.
    • Hold On: Hold onto your shelter until the shaking stops.
    1. Stay Indoors
    • Do not use elevators.
    • Avoid windows, mirrors, and glass partitions.
    • Stay away from exterior walls and corners.
    • Do not rush outside; debris falling from the building poses a significant hazard.
    1. If You’re in Bed
    • Stay in bed and protect your head with a pillow.
    • Avoid getting up during the shaking to prevent injury from falling objects.
    1. If You’re in a Wheelchair
    • Lock the wheels.
    • Cover your head and neck with your arms or a sturdy object.
    • Stay in place until the shaking stops.

    After the Earthquake: Assess and Act Safely

    1. Check for Injuries and Hazards
    • Provide first aid if trained.
    • Be alert for hazards like gas leaks, water line damage, or electrical issues.
    • Do not use open flames until you are sure there are no gas leaks.
    1. Evacuate If Necessary
    • Use stairs, not elevators, when evacuating.
    • Proceed calmly to the designated assembly area.
    • Be cautious of aftershocks; they can cause additional damage.
    1. Stay Informed
    • Listen to emergency broadcasts for updates.
    • Follow instructions from emergency personnel.

    Additional Tips for High-Rise Residents

    • Regular Drills: Participate in building evacuation drills to stay prepared.
    • Communication Plan: Establish a communication plan with family or roommates.
    • Emergency Contacts: Keep a list of emergency contacts accessible.

    Conclusion

    Being prepared and knowing how to respond during an earthquake can significantly increase your chances of staying safe in a high-rise building. Remember to stay calm, protect yourself during the shaking, and follow the building’s emergency procedures. Regular preparation and awareness are your best tools for earthquake survival.

  • How to Survive a Power Outage

    How to Survive a Power Outage

    Experiencing a power outage can be challenging, but with proper preparation and knowledge, you can navigate it safely and comfortably. This guide provides a comprehensive, step-by-step approach to help you survive a power outage effectively.

    Before the Power Outage

    1. Assemble an Emergency Kit

    Prepare a kit that includes:

    • Flashlights with extra batteries
    • Battery-powered or hand-crank radio
    • Portable power banks for charging devices
    • Non-perishable food items and a manual can opener
    • Bottled water (at least one gallon per person per day)
    • First-aid supplies
    • Essential medications
    • Cash in small denominations
    • Warm clothing and blankets for cold weather
    • Hygiene items like moist towelettes and hand sanitizer .
    1. Charge Devices and Power Banks

    Ensure all your electronic devices and power banks are fully charged. Consider investing in solar-powered chargers for extended outages.

    1. Fuel Your Vehicles

    Keep your vehicle’s gas tank at least half full. Gas stations rely on electricity to operate pumps, and during outages, fuel may be unavailable .

    1. Backup Power Solutions

    If you have essential medical equipment or need to power critical devices, consider investing in a generator. Ensure it’s installed and operated safely, following manufacturer guidelines and local regulations .

    During the Power Outage

    1. Stay Informed

    Use a battery-powered or hand-crank radio to receive updates from local authorities. Avoid relying solely on smartphones, as conserving battery life is crucial.

    1. Conserve Food and Water
    • Keep refrigerator and freezer doors closed to maintain cold temperatures. A full freezer can keep food frozen for up to 48 hours; a refrigerator will keep food cold for about 4 hours .
    • Use perishable foods first, then non-perishable items.
    • Avoid consuming food that has been exposed to temperatures above 40°F for more than two hours.
    1. Ensure Safety
    • Use flashlights instead of candles to reduce fire risk.
    • Unplug sensitive electronics to prevent damage from power surges when electricity is restored.
    • Operate generators outdoors and away from windows to prevent carbon monoxide poisoning .
    1. Maintain Comfort
    • In cold weather:
      • Wear layers of clothing and use blankets.
      • Close off unused rooms to retain heat.
      • Never use ovens or grills for heating.
    • In hot weather:
      • Stay hydrated.
      • Use battery-powered fans.
      • Stay in the coolest part of your home.
    1. Communication

    Limit phone use to essential calls and texts to conserve battery. Use text messages or social media to communicate, as they use less power than voice calls.

    After the Power Outage

    1. Check Appliances

    Once power is restored, wait a few minutes before turning on appliances to prevent overloading the electrical system.

    1. Inspect Food

    Discard any perishable food that has been above 40°F for more than two hours. When in doubt, throw it out to avoid foodborne illnesses.

    1. Restock Supplies

    Replenish your emergency kit with any items used during the outage to ensure preparedness for future events.

    Additional Tips

    • Stay Connected: Sign up for local emergency alerts to receive real-time information during outages.
    • Community Support: Check on neighbors, especially the elderly or those with medical conditions.
    • Practice Drills: Conduct regular family drills to ensure everyone knows what to do during a power outage.

    By following these steps, you can effectively manage and survive a power outage, ensuring the safety and comfort of you and your loved ones.