
In an urban survival scenario, whether due to natural disaster, civil unrest, or economic collapse, securing a safe and discreet place to shelter can be paramount to your safety and longevity. Unlike wilderness survival, where natural elements provide cover, urban environments present unique challenges and opportunities for concealment. The goal of a stealth shelter is to remain undetected by others who might pose a threat, such as those seeking resources or causing harm.
Historically, humans have always sought refuge in times of crisis. From the catacombs of ancient Rome used as hidden burial grounds and later as shelters during conflicts, to the vast underground networks in cities like Beijing and Cappadocia designed for wartime refuge, the concept of hidden urban shelters is deeply rooted in human history. In modern urban survival, this translates to utilizing existing infrastructure and blending seamlessly into the chaotic environment, rather than drawing attention. This article will guide you through the process of establishing a discreet, temporary shelter in an urban setting.
Key Principles of Urban Stealth Sheltering
Before attempting to build, understand the core principles that define successful urban stealth:
- Concealment over Fortification: Your primary defense is not being seen. A strong, visible shelter is a target. A hidden, vulnerable one is safer.
- Mobility: Be prepared to move at a moment’s notice. Urban situations are fluid. Your shelter should be temporary and easily abandoned.
- Low Profile: Minimize your footprint and activities that create noise, light, or odors.
- Blend In: Your shelter and your presence should not appear out of place. Utilize urban camouflage.
- Escape Routes: Always have multiple, pre-planned ways to exit your shelter quickly and safely if discovered.
Step 1: Site Selection – Finding the Right Location
Location is the most critical aspect of a stealth urban shelter. The ideal spot offers concealment, protection from the elements, and reasonable security.
How to Choose a Location:
- Avoid High-Traffic Areas: Stay away from main roads, active commercial zones, or residential areas with high pedestrian traffic.
- Seek Overlooked Spaces: Look for abandoned or derelict buildings, disused industrial areas, overgrown lots, or “dead spaces” between structures.
- Abandoned Factories/Warehouses: Can offer structural protection, but check for stability and hazardous materials.
- Attics/Basements: If accessible discreetly and structurally sound, these can provide good concealment and temperature regulation.
- Undersides of Bridges/Overpasses: Offer overhead cover but can be prone to wind and often visible from multiple angles.
- Rooftops (lower buildings): Can provide refuge with minimal ground visibility, but access must be discreet and safe.
- Utility Spaces/Structural Voids: Less common but highly effective if found and accessed without detection (e.g., maintenance tunnels, unused utility rooms).
- Overgrown Areas: Parks, greenbelts, or neglected lots with dense vegetation can offer natural concealment within the urban sprawl.
- Assess Security:
- Line of Sight: Can your chosen spot be easily seen from public vantage points (roads, other buildings, security cameras)?
- Foot Traffic: Is the area regularly patrolled by security, police, or scavengers? Observe patterns before setting up.
- Entry/Exit Points: Identify at least two distinct, discreet escape routes. Avoid dead ends.
- Structural Integrity: If using an existing structure, ensure it’s not prone to collapse, flooding, or other structural hazards.
- Consider the Elements:
- Wind and Rain: Look for natural windbreaks (walls, dense bushes) and overhead cover.
- Temperature: Concrete and brick offer thermal mass, radiating heat (or cold) but also providing insulation from extreme temperatures. Underground spaces tend to be more stable in temperature.
- Water Drainage: Avoid areas that will become puddles or flood during rain.
- Minimize Evidence:
- Choose a spot where your presence leaves minimal disturbance. Avoid breaking branches, leaving trash, or creating new paths.
Step 2: Essential Materials – What to Carry and Find
Your gear should be minimal, multi-purpose, and blend in. You’ll likely rely on scavenged materials.
Recommended Gear (Minimalist Approach):
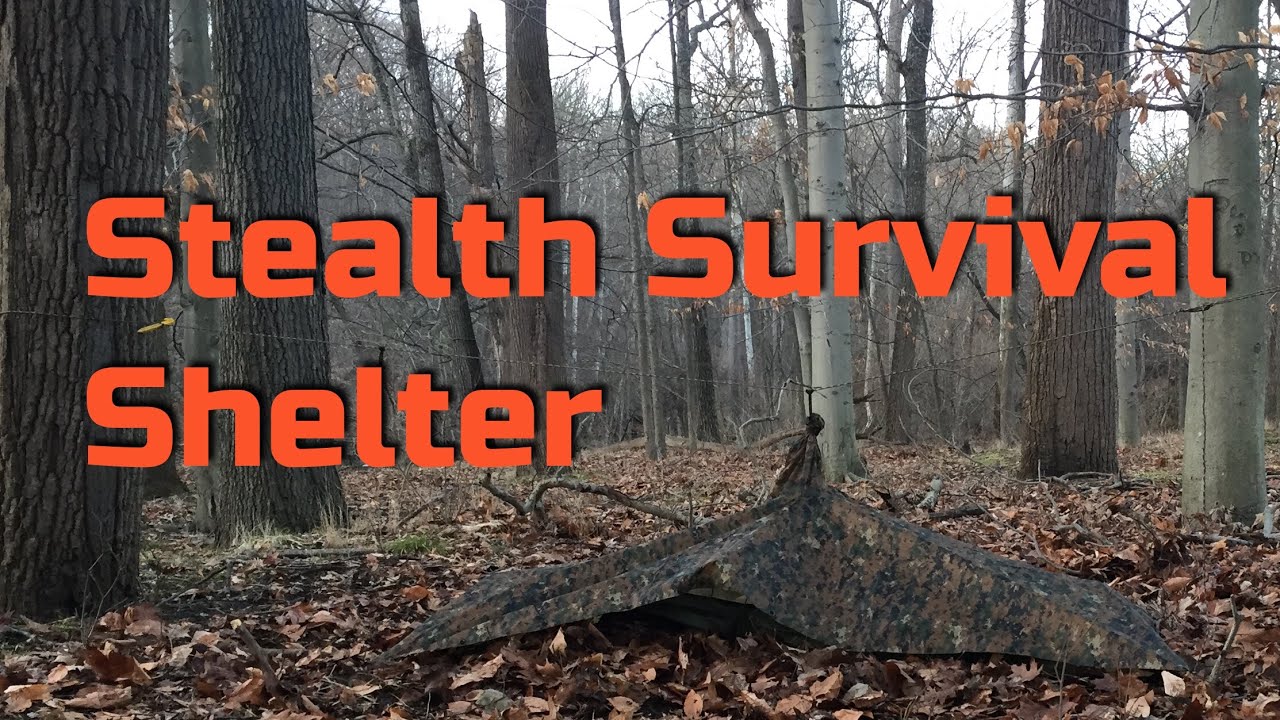
- Tarp (Dark/Neutral Color): A dark green, grey, or black tarp (e.g., an 8×10 or 10×12 silnylon or heavy-duty plastic sheeting) is essential for rain and wind protection, and for creating walls or roofing.
- Cordage: Strong rope or paracord for securing tarps, creating clotheslines, or emergency uses.
- Duct Tape: Invaluable for quick repairs, sealing gaps, and reinforcing materials.
- Sleeping Bag/Bivy Bag/Warm Blanket: For insulation and comfort. A bivy bag offers a sealed, low-profile sleeping solution.
- Ground Cloth/Tarp: To keep your sleep system dry and clean from the ground.
- Headlamp (Red Light Setting): Essential for nighttime visibility without broadcasting your location.
- Multi-tool/Knife: For various tasks, including cutting, prying, and minor repairs.
- Water Filter/Purification Tablets: Access to clean water is paramount.
- Minimal Food Rations: Non-perishable, high-calorie items.
- Small First Aid Kit: For minor injuries.
Scavenged Materials (Adapt to your environment):
- Cardboard: Excellent for insulation (layers), creating walls, or as a makeshift bed.
- Plastic Sheeting/Trash Bags: For waterproofing, ground cover, or makeshift windows.
- Pallets: Can be broken down for wood, or stacked to create elevated platforms or walls.
- Metal Sheets/Corrugated Iron: Found in industrial areas, can be used for robust roofing or walls.
- Old Furniture/Debris: Can be rearranged to create barriers, camouflage, or support structures.
- Natural Debris: Leaves, branches, dirt, and rubble to enhance camouflage.
Step 3: Construction Techniques – Building Your Covert Shelter
The method of construction depends heavily on your chosen site and available materials.
Option 1: The Lean-to/Tarp Shelter (Versatile & Quick)
This is the most common and adaptable urban stealth shelter.
- Identify a Support Structure: A sturdy wall, fence, large dumpster, or even two vehicles parked closely together can serve as your main support.
- Attach the Tarp:
- Secure one edge of your dark tarp tightly to the top of your chosen support structure using cordage or duct tape.
- Ensure a slight slope for water runoff.
- Create the Roof and Walls:
- Extend the tarp outwards and down, forming a roof and one or two walls.
- Secure the outer edges to the ground using heavy objects (bricks, rocks), or tie-downs if available.
- Use additional smaller tarps or cardboard to close off any open sides, creating a more enclosed space.
- Add Ground Insulation:
- Lay down a layer of cardboard, flattened trash bags, or scavenged fabric on the ground beneath your sleeping area for insulation.
- Place your ground cloth, then your sleeping bag/blanket.
- Camouflage:
- Drape additional cardboard, old fabric, or strategically placed garbage around the exterior to break up the shape and blend with the surroundings.
- If near vegetation, use branches and leaves sparingly to further disguise the shape.
Option 2: Utilizing Existing Structures (Max Concealment)
This involves modifying or occupying an existing overlooked space.
- Assess the Void: Explore abandoned buildings for small, overlooked rooms, large closets, or under stairwells. Consider areas behind billboards or unused utility enclosures.
- Clean and Secure: Clear out any dangerous debris (glass, nails) and ensure the space is structurally sound. If possible, reinforce with scavenged wood or metal.
- Block Entry Points (Subtly):
- Use cardboard, old plywood, or dark fabric to block windows or openings from the inside to prevent light seepage.
- If using a doorway, prop a large piece of junk (e.g., an old cabinet, a stack of boxes) in front of it from the inside, making it look like part of the general debris.
- Create a Sleeping Area:
- Layer cardboard or scavenged fabric on the floor for insulation.
- Set up your sleeping bag.
- Concealment and Blending:
- False Fronts: Use old furniture, stacked debris, or even strategically placed graffiti or posters to create a “false front” that obscures your entrance.
- Controlled Clutter: Make the area around your shelter look naturally messy, like typical urban refuse, but ensure your actual entry is clean and clear for quick access.
- Light Discipline: Absolutely no visible light at night. Use blackout curtains or heavy fabrics over any openings.
- Scent Control: Avoid cooking strong-smelling foods. Use odor neutralizers if possible.
Option 3: Vehicle-Based Shelter (If Applicable)
If you have access to a vehicle, it can be a highly effective mobile stealth shelter.
- Parking Strategy:
- Park in well-lit areas with security patrol signs (ironically, these areas can be less scrutinized by casual observers than dark alleys). Security patrols often drive through but rarely get out.
- Choose a spot near a 24/7 business if possible.
- Avoid isolated spots. Blend in with other parked cars.
- Always have an escape route.
- Concealment:
- Use sun shades, dark blankets, or custom-fit window covers to block visibility into the vehicle.
- Keep the interior tidy and free of obvious survival gear.
- Comfort:
- Use blankets, sleeping bags, and potentially a foam pad for comfort.
- Ventilation is key to avoid condensation and stuffiness. Crack windows slightly (covered to prevent visibility).
- Consider a portable battery bank for charging devices without running the engine.
Step 4: Maintenance and Security – Staying Undetected
Building the shelter is only half the battle. Maintaining your stealth is crucial.
- Noise Discipline:
- Move quietly within and around your shelter.
- Avoid loud activities, talking, or music.
- If using tools, do so only when ambient noise is high (e.g., during peak traffic hours) or away from the immediate shelter.
- Light Discipline:
- No visible light after dark. Use a red-light headlamp sparingly only when absolutely necessary inside the shelter.
- Ensure all cracks and openings are completely sealed to prevent light seepage.
- Odor Control:
- Do not cook strong-smelling foods in or near your shelter.
- Dispose of waste carefully and as far away as possible. Double-bag all trash.
- Avoid using perfumes or strong-smelling hygiene products.
- Garbage Management:
- Pack out everything you pack in. Leave no trace.
- If you must dispose of waste, blend it with existing urban debris far from your shelter.
- Observation and Reconnaissance:
- Before entering or leaving your shelter, take time to observe the surroundings. Look for signs of recent activity, new footpaths, or surveillance.
- Periodically scout the area around your shelter from a distance to ensure it remains undiscovered and to identify potential threats or new opportunities.
- Circle around your site before making an entrance to ensure you are not being observed.
- Regular Relocation (if possible):
- No temporary shelter is truly permanent in an urban environment.
- Periodically relocate to new stealth shelters to avoid detection from recurring patrols or opportunistic individuals.
Legal Considerations for Urban Shelters
It’s vital to understand that unauthorized sheltering on private or public property is generally illegal. In a true survival scenario, these legalities may become secondary to personal safety, but awareness is key.
- Trespassing: Occupying abandoned buildings or private land without permission is trespassing.
- Public Property: Camping or residing in public parks, under bridges, or on other municipal land is usually prohibited.
- Disorderly Conduct/Vagrancy: Your presence could lead to legal issues if discovered by authorities or concerned citizens.
The goal is to avoid detection, thereby avoiding legal repercussions. This underscores the importance of the stealth and mobility principles.
By adhering to these principles and techniques, you significantly increase your chances of remaining safe and undetected in a challenging urban survival situation. Remember, practice and preparation are key to successful adaptation.
FAQ
Q1: How long can I realistically stay in a stealth urban shelter?
A1: A stealth urban shelter is intended for temporary use. The duration depends heavily on the level of disruption, population density, and vigilance of others. In a truly chaotic, short-term crisis, you might stay for days or even a few weeks. In a prolonged collapse scenario, the constant need for resources and the risk of detection make long-term occupancy of a static stealth shelter highly impractical and dangerous. The goal is to be mobile and adapt.
Q2: What are the biggest risks when building a stealth urban shelter?
A2: The biggest risks are discovery by hostile individuals, structural collapse (in abandoned buildings), exposure to hazardous materials (e.g., asbestos, lead paint in old structures), legal repercussions if discovered by authorities, and exposure to the elements if the shelter is poorly constructed. Fire is also a significant risk if not managed with extreme caution.
Q3: Can I have a fire in a stealth urban shelter?
A3: Having a fire in a stealth urban shelter is extremely risky and generally not recommended. Fire creates smoke and light, both of which are major indicators of human presence and can be seen from a long distance, especially at night. It also poses a significant fire hazard in urban environments (especially in abandoned buildings). If absolutely necessary for warmth or cooking, it must be very small, contained, away from windows or drafts, and meticulously concealed. Prioritize other methods for warmth (layers, insulation) and cooking (cold meals, portable stove with minimal smoke/odor).
Q4: How do I handle waste in a stealth urban shelter without leaving a trace?
A4: Waste management is crucial for stealth. The best method is to pack out everything you pack in. This means carrying a robust, sealable trash bag and discreetly disposing of waste in established public dumpsters (if available and safe) far from your shelter, or burying it deeply if in an appropriate environment (e.g., an overgrown lot with sufficient soil depth, though this carries its own risks of discovery). Human waste must be handled with extreme care – burying it deeply away from water sources is critical, or using a portable commode with sealed waste bags.
Q5: What are “urban camouflage” materials, and how do I use them effectively?
A5: Urban camouflage materials are items that blend seamlessly into the typical urban landscape. This includes drab colors (grey, brown, black, muted greens) for tarps and clothing, and materials like cardboard, corrugated metal, brick, concrete, or distressed wood. Effective use involves breaking up your silhouette, mimicking existing lines and textures, and creating controlled clutter around your shelter so it looks like part of the natural decay or refuse of the environment, rather than a deliberate structure. Avoid anything shiny, bright, or out of place.