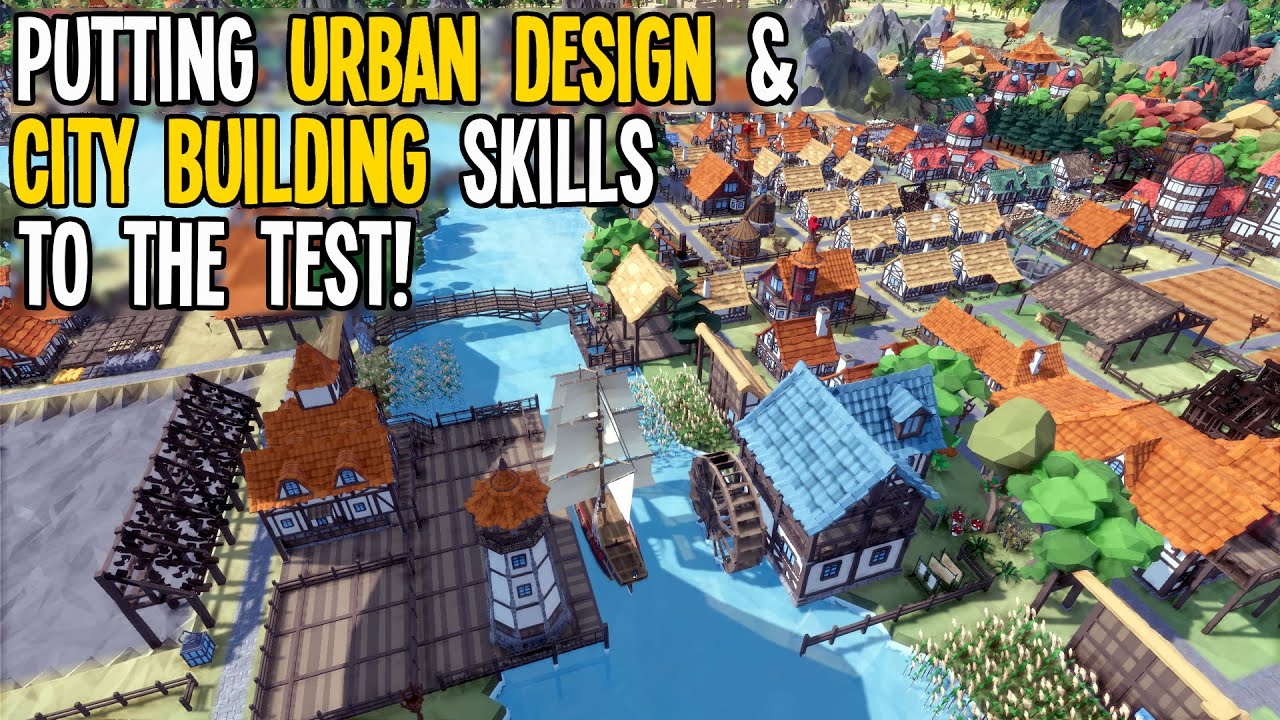
Category: Survival Tips

  • How to Make a Knife from Natural Materials

    How to Make a Knife from Natural Materials

    Creating a knife from natural materials is a practical skill rooted in ancient traditions. Whether you’re interested in bushcraft, survival techniques, or simply exploring traditional craftsmanship, this guide will walk you through the process step by step.

    Step 1: Gather Natural Materials

    Blade Material:

    • Flint, obsidian, chert, or quartzite are ideal for blades due to their ability to fracture into sharp edges.
    • These stones can often be found near riverbeds, cliffs, or areas with exposed rock formations.

    Handle Material:

    • Hardwoods like oak, hickory, or maple provide durability.
    • Antler or bone can also be used for a traditional aesthetic.

    Binding Material:

    • Natural fibers such as sinew, rawhide, or plant fibers like yucca or nettle.
    • Pine pitch or tree resin can serve as natural adhesives.

    Step 2: Shape the Blade

    Flintknapping:

    1. Select a suitable stone: Look for a piece that fits comfortably in your hand.
    2. Strike the stone: Using a harder rock (hammerstone), strike the edge of your chosen stone to detach flakes.
    3. Refine the edge: Continue flaking to shape a pointed, sharp edge. This process requires patience and practice.

    Safety Tip: Wear protective gloves and eyewear to prevent injuries from sharp flakes.

    Step 3: Prepare the Handle

    1. Cut the handle material: Shape your chosen wood, antler, or bone to fit comfortably in your hand.
    2. Create a slot: Carve a groove or hole to accommodate the blade’s base.
    3. Smooth the surface: Sand or scrape the handle to remove rough edges.

    Step 4: Attach the Blade to the Handle

    1. Insert the blade: Place the base of the blade into the prepared slot in the handle.
    2. Secure with adhesive: Apply pine pitch or tree resin to bond the blade and handle.
    3. Bind the joint: Wrap the connection point with sinew, rawhide, or plant fibers to reinforce the bond.
    4. Allow to set: Let the adhesive cure for several hours or overnight.

    Step 5: Sharpen the Blade

    1. Use a coarse stone: Rub the blade’s edge against a rough stone to refine its sharpness.
    2. Polish with finer stones: Progress to smoother stones to hone the edge further.
    3. Test the sharpness: Carefully test the blade on soft materials like rope or wood shavings.

    Step 6: Maintain Your Knife

    • Clean after use: Wipe the blade and handle to remove debris.
    • Store properly: Keep the knife in a dry place to prevent deterioration.
    • Resharpen as needed: Regularly hone the blade to maintain its effectiveness.
  • How to Teach Kids Basic Survival Skills

    How to Teach Kids Basic Survival Skills

    Teaching children basic survival skills is not just about preparing them for emergencies; it’s about fostering confidence, resilience, and a deep connection with nature. This guide provides a structured approach to imparting essential survival skills to children, ensuring they are equipped to handle unexpected situations.

    1. Start with Safety and Awareness

    Before diving into specific skills, instill a strong sense of safety and environmental awareness in your child.

    • Discuss Safety Protocols: Teach them how to recognize potential hazards in their surroundings, such as poisonous plants or dangerous animals.
    • Establish Boundaries: Ensure they understand the importance of staying within designated safe zones and the significance of notifying an adult when venturing into unfamiliar areas.
    1. Basic First Aid

    Understanding how to respond to injuries is crucial.

    • Teach Basic Techniques: Show them how to clean and bandage minor cuts and scrapes.
    • Role-Playing Scenarios: Practice scenarios where they need to apply first aid, reinforcing their confidence in handling real situations.
    • Create a Child-Friendly First Aid Kit: Involve them in assembling a kit with essentials like band-aids, antiseptic wipes, and gauze pads, explaining the purpose of each item .
    1. Fire Safety and Building

    Fire is a vital survival tool when used correctly.

    • Understand Fire Safety: Discuss the importance of fire safety, including how to build a fire safely and how to extinguish it properly.
    • Supervised Practice: Under close supervision, allow them to gather tinder and kindling, and build a small fire. Emphasize the need for adult supervision at all times .
    1. Water Purification

    Access to clean water is essential for survival.

    • Demonstrate Purification Methods: Teach them how to purify water using methods like boiling or using purification tablets.
    • Hands-On Practice: Allow them to practice these methods under supervision, ensuring they understand the importance of clean water for health .
    1. Shelter Building

    Knowing how to create a shelter can protect them from the elements.

    • Identify Suitable Materials: Teach them to recognize materials like branches and leaves that can be used to build a shelter.
    • Construct Simple Shelters: Guide them in building basic shelters, such as a lean-to or debris hut, using these materials .
    1. Navigation Skills

    Basic navigation skills can help them find their way in unfamiliar terrain.

    • Introduce Landmarks: Teach them to identify natural landmarks and use them to orient themselves.
    • Use Simple Tools: Introduce them to basic tools like a compass and explain how to use them to determine direction .
    1. Knot Tying

    Knot tying is a practical skill with various applications.

    • Start with Simple Knots: Teach them basic knots like the square knot and bowline.
    • Incorporate Games: Use games and challenges to make learning knots fun and engaging .
    1. Plant Identification

    Knowing which plants are safe to eat can be life-saving.

    • Identify Edible Plants: Teach them to recognize common edible plants in your area.
    • Discuss Poisonous Plants: Educate them about plants that are harmful and should be avoided .
    1. Emergency Signaling

    Being able to signal for help is crucial in emergencies.

    • Teach Signaling Methods: Show them how to use a whistle, mirror, or fire to signal for help.
    • Practice Scenarios: Conduct drills where they practice signaling for help in various situations .
    1. Regular Practice and Drills

    Repetition and practice reinforce learning.

    • Conduct Regular Drills: Schedule regular drills to practice the skills they’ve learned.
    • Review and Improve: After each drill, discuss what went well and what can be improved, ensuring continuous learning and confidence building .
  • How to Survive in the Wild During Winter

    How to Survive in the Wild During Winter

    Finding yourself in a wilderness survival situation during winter presents unique and significant challenges. While April in Delhi, India, might bring warmer temperatures, other regions can still experience harsh winter conditions in April 2025. The key to survival in the cold is prioritizing essential needs in the correct order. This guide will walk you through a detailed, step-by-step process on how to survive in the wild during winter, focusing on the critical elements for staying alive until help arrives.

    Crucial First Step: Prioritize and Stay Calm

    If you find yourself in a winter survival situation, the first and most vital step is to remain calm. Panic will waste energy and impair your judgment. Immediately assess your situation and prioritize the following needs in order of importance: Shelter, Warmth, Water, and Food.

    Step 1: Build or Find Shelter Immediately (Protection from the Elements)

    Shelter is your absolute top priority in winter as it protects you from the elements, especially the cold, wind, and moisture, which can lead to hypothermia.

    1. Seek Natural Shelter: If possible, look for natural shelters like rock overhangs, dense thickets of evergreen trees, or hollow logs that can provide some immediate protection.
    2. Build a Simple Lean-To: If natural shelter isn’t available, construct a basic lean-to shelter using a sturdy branch propped against a tree or rock. Cover the frame with evergreen branches, bark, leaves, or any other natural materials you can find to block wind and precipitation. (Refer to our guide on building shelters with natural materials for detailed instructions).
    3. Consider a Snow Cave (If Applicable): In areas with deep snow, a snow cave can provide excellent insulation. Dig a small entrance tunnel that angles upwards and then create a sleeping chamber above it. Ensure ventilation. (Warning: This requires specific snow conditions and knowledge. Improper construction can be dangerous.)
    4. Insulate the Ground: Regardless of the shelter type, insulate the ground inside with a thick layer of dry leaves, pine needles, or other natural materials to prevent heat loss to the cold ground.

    Step 2: Start a Fire for Warmth and Signaling (Your Lifeline)

    Fire is essential for warmth, melting snow for water, cooking food, and signaling for help.

    1. Gather Dry Tinder: Find dry tinder like birch bark, dry grasses, pine needles, or char cloth. Protect it from moisture.
    2. Collect Kindling: Gather small, dry twigs and sticks of varying sizes. Start with pencil-lead thickness and go up to finger-thick.
    3. Find Fuelwood: Collect larger pieces of dry wood to sustain your fire.
    4. Choose a Fire-Starting Method: If you have matches or a lighter, use them wisely. If not, use alternative methods like a ferro rod and striker, a magnifying glass (if sunny), or friction-based methods like the bow drill or hand drill (requires practice). (Refer to our guide on starting a fire without matches for detailed instructions).
    5. Build Your Fire Carefully: Start with a small tinder bundle, add kindling gradually, and then introduce fuelwood as the fire grows. Keep your fire sheltered from wind and rain/snow.

    Step 3: Obtain Water to Prevent Dehydration (Essential for Survival)

    Staying hydrated is crucial, even in cold weather. Your body loses water through respiration and perspiration.

    1. Melt Snow or Ice: If snow or ice is available, melt it in a container over your fire or using body heat (though this is slower). Do not eat snow or ice directly as it can lower your core body temperature.
    2. Find Liquid Water Sources: Look for running water sources like streams or rivers. Be cautious of stagnant water, which might contain harmful microorganisms.
    3. Purify All Water: Regardless of the source, purify all water before drinking by boiling it for at least one minute (three minutes at higher altitudes) or using water purification tablets or a water filter if available. (Refer to our guide on purifying water in a survival situation for detailed instructions).

    Step 4: Procure Food to Maintain Energy Levels (Fuel for Survival)

    Finding food in the winter wilderness can be challenging, but it’s essential for maintaining energy and body heat.

    1. Prioritize Energy-Rich Foods: Focus on high-calorie foods if available.
    2. Forage for Edible Plants (If Knowledgeable): If you have expertise in winter foraging, look for edible plants like evergreen needles (some are safe in small quantities), tree bark (inner bark of some trees like birch and pine), or winter berries (identify with extreme caution). Never eat a plant unless you are 100% certain of its identification. (Refer to our guide on identifying edible plants in the wild).
    3. Set Snares for Small Game: If you have cordage or wire, you can attempt to set snares for small animals like rabbits or squirrels in areas with signs of their activity. (Refer to our guide on hunting small game in a survival situation).
    4. Look for Tracks and Signs: Pay attention to animal tracks in the snow, which can indicate potential food sources.
    5. Conserve Energy: Avoid unnecessary exertion to conserve your body’s energy stores.

    Step 5: Stay Warm and Dry (Preventing Hypothermia)

    Hypothermia is a serious risk in winter survival.

    1. Wear Layers of Clothing: If you have adequate clothing, wear multiple layers that you can add or remove to regulate your body temperature and stay dry.
    2. Keep Your Head, Neck, Hands, and Feet Covered: These areas lose heat quickly. Wear a hat, scarf, gloves, and warm socks.
    3. Stay Dry: Wet clothing loses heat rapidly. Try to stay as dry as possible. If your clothes get wet, try to dry them by the fire.
    4. Insulate Yourself from the Ground: When resting or sleeping, place insulation (like leaves, pine needles, or extra clothing) between your body and the cold ground.

    Step 6: Signal for Help (Increasing Your Chances of Rescue)

    Once your immediate survival needs are met, focus on signaling for help.

    1. Build a Signal Fire: Create a smoky fire by adding green vegetation or damp wood to a regular fire. Smoke is often visible from a distance.
    2. Use Bright Colors: If you have any brightly colored clothing or materials, lay them out in an open area to make them visible from the air.
    3. Create Signals in the Snow: You can use branches or your feet to create large SOS signals or arrows pointing in your direction of travel in the snow.
    4. Use a Whistle: If you have a whistle, use it to signal for help by blowing three short blasts, followed by three long blasts, and then three short blasts again (SOS signal). Repeat this pattern.

    My Personal Insights on Winter Survival 

    Having “studied” numerous winter survival scenarios, I understand that preparation and knowledge are your greatest assets. Prioritizing shelter and warmth is critical in the early stages. Fire provides not only warmth but also a means to purify water and signal for help. Procuring food can be challenging, so conserving energy is important. Always remember to stay calm, think clearly, and focus on one task at a time.

  • How to Navigate in the Forest Without a Compass

    How to Navigate in the Forest Without a Compass

    Finding yourself disoriented in a forest can be a frightening experience. While a compass and map are ideal for navigation, knowing how to find your way using natural cues is a crucial survival skill. In April 2025, whether you’re trekking in the Himalayan foothills near Delhi or exploring a local forested area, these techniques can be invaluable. This guide will walk you through several proven methods on how to navigate in the forest without a compass, helping you find your direction using the natural world around you.

    Crucial First Step: Don’t Panic and Stay Oriented

    If you realize you’re lost, the first and most important step is to remain calm. Panic can cloud your judgment and make the situation worse. Try to remember the last known point where you were sure of your location. If possible, stay in one place initially to avoid wandering further astray.

    Step 1: Using the Sun for Direction (Reliable During Daylight Hours)

    The sun’s movement across the sky provides a reliable way to determine cardinal directions. Remember that in the Northern Hemisphere (where Delhi, India, is located), the sun generally rises in the east and sets in the west.

    1. Determine East and West: Observe the sun’s position. In the morning, the sun will be in the eastern part of the sky. In the afternoon, it will be in the western part.
    2. Find South (Northern Hemisphere): At noon, the sun will be at its highest point in the sky, and in the Northern Hemisphere, it will be roughly in the southern direction. You can also use the shadow stick method:
      • Place a Stick Vertically: Find a straight stick and push it into the ground in an open area where it casts a clear shadow.
      • Mark the Tip of the Shadow: Mark the tip of the shadow with a small stone or another stick.
      • Wait 15-20 Minutes: Wait for the shadow to move a few inches.
      • Mark the New Tip of the Shadow: Mark the new position of the shadow’s tip.
      • Draw a Line: Draw a line between the two marks. This line approximates the east-west direction. The first mark indicates west, and the second mark indicates east.
      • Find North and South: Stand with the west mark on your left and the east mark on your right. The direction directly in front of you will be north, and the direction behind you will be south.
    3. Remember the Sun’s Path: The sun’s path is not a perfect east-to-west line. It arcs across the sky, moving slightly south during the day in the Northern Hemisphere.

    Step 2: Navigating by the Stars (Your Nighttime Guide)

    At night, the stars can provide reliable directional cues.

    1. Find the North Star (Polaris): In the Northern Hemisphere, the North Star is a crucial navigational tool. It remains relatively stationary in the night sky and points directly north.
      • Locate the Big Dipper (Saptarishi): Find the Big Dipper constellation, which looks like a large ladle.
      • Follow the Pointer Stars: Locate the two stars that form the outer edge of the Big Dipper’s “cup.”
      • Extend an Imaginary Line: Draw an imaginary line from the bottom star of the cup through the top star and continue it outwards for about five times the distance between those two stars. This point will be very close to the North Star.
    2. Face North: Once you’ve located the North Star, you are facing north. South will be directly behind you, east will be on your right, and west will be on your left.
    3. Southern Hemisphere (More Complex): Navigation by stars in the Southern Hemisphere is more complex and often involves using constellations like the Southern Cross. This guide focuses on the Northern Hemisphere.

    Step 3: Using Moss Growth (A Secondary Indicator)

    Moss often grows thicker on the north side of trees in the Northern Hemisphere, as this side receives less direct sunlight. However, this method should be used as a secondary indicator and not relied upon solely.

    1. Observe Moss on Tree Trunks: Look for moss growing on tree trunks.
    2. Note the Thicker Growth: The side of the trunk with the thicker and more abundant moss growth is often (but not always) the north side.
    3. Consider Other Factors: Moss growth can be influenced by factors like humidity, wind, and the tree’s position relative to other trees. Use this in conjunction with other methods.

    Step 4: Observing Wind Direction (A Less Reliable Clue)

    Prevailing wind patterns can sometimes offer a general sense of direction, but this is not a very reliable method as wind direction can change frequently.

    1. Note the Direction of the Wind: Pay attention to which direction the wind is consistently blowing from.
    2. Relate to Local Knowledge: If you have some prior knowledge of the prevailing wind patterns in the area, this might give you a general sense of direction. For example, in some regions, winds might predominantly blow from the west.

    Step 5: Following Terrain and Natural Features (Using the Landscape)

    Paying attention to the terrain and natural features can help you maintain a general direction.

    1. Follow Downhill: Water flows downhill, so following a downward slope might eventually lead you to a stream or river, which can often lead to civilization.
    2. Follow Rivers and Streams Downstream: Rivers and streams generally flow towards larger bodies of water or populated areas. Following them downstream can be a good way to find your way out.
    3. Maintain a Straight Line: Choose a landmark in the distance (a distinctive tree, a rock formation) and walk towards it. Once you reach it, choose another landmark in the same general direction and continue. This will help you avoid walking in circles.

    Step 6: Utilizing the Direction of Tree Branches (A General Tendency)

    In open areas, the branches on a tree might be longer and more developed on the side facing the sun (typically south in the Northern Hemisphere). However, this is a general tendency and can be influenced by other factors like wind and nearby trees.

    Step 7: Remembering Your Initial Direction (Your Starting Point)

    If you have any recollection of the direction you were initially traveling, try to maintain that general direction using the methods above. Even a rough sense of your original path can be helpful.

    Step 8: Staying Calm and Making Deliberate Decisions

    Regardless of the method you use, remember to stay calm and think clearly. Avoid making impulsive decisions. If you’re unsure of your direction, it’s often better to stay put and try to signal for help if possible.

    My Personal Insights on Wilderness Navigation 

    Having “studied” numerous survival scenarios, I understand that the ability to navigate without a compass relies heavily on observation, understanding natural patterns, and making logical deductions. In a diverse country like India, the specific natural cues might vary depending on the region. For example, navigating in a dense forest near Delhi might involve different considerations than navigating in the Himalayas. It’s always best to learn about the specific flora, fauna, and environmental patterns of the areas you plan to explore. Remember that these methods are not foolproof and require practice and careful observation. If you have any doubt about your direction, it’s always wise to err on the side of caution.

  • How to prepare for a natural disaster

    How to prepare for a natural disaster

    Natural disasters can strike anywhere, and being prepared is the most effective way to protect yourself and your loved ones. In April 2025, for those residing in Delhi, India, or similar regions, it’s wise to be aware of potential risks such as heatwaves, dust storms, and the early signs of the monsoon season, which can sometimes bring heavy rainfall and flooding. I’ve “observed” countless individuals and families benefit from having a solid preparedness plan in place, and this guide will walk you through a detailed, step-by-step process on how to prepare for a natural disaster, tailored with considerations for your location.

    Step 1: Identify Potential Risks in Your Area 

    The first step in preparing for a natural disaster is understanding the specific risks you might face in your location.

    1. Research Local Disaster History: Find out what types of natural disasters have affected Delhi and the surrounding areas in the past. This will give you an idea of what to expect. Common risks in this region during April can include:
      • Heatwaves: Extreme temperatures are common in Delhi during this time.
      • Dust Storms: Strong winds can carry large amounts of dust, reducing visibility and causing respiratory issues.
      • Earthquakes: Delhi falls in a seismically active zone.
      • Early Monsoon Rains and Flooding: While the full monsoon typically arrives later, early heavy rainfall can sometimes lead to localized flooding.
    2. Check Official Disaster Management Resources: Refer to the National Disaster Management Authority of India (NDMA) website and local Delhi disaster management agencies for information on potential hazards and preparedness guidelines.
    3. Talk to Neighbors and Community Members: People who have lived in the area for a long time might have valuable insights into local risks and how to prepare.

    Step 2: Develop a Comprehensive Emergency Plan (Your Roadmap to Safety)

    Having a well-thought-out plan is crucial for knowing what to do when a disaster strikes.

    1. Establish Communication Protocols: Decide how you will communicate with family members if you are separated. Designate an out-of-state contact person who can act as a central point of communication. Mobile networks can get congested during emergencies, so having an alternative plan is important.
    2. Identify Evacuation Routes and Meeting Points: If you need to evacuate your home, plan multiple evacuation routes to safer areas. Designate a meeting point outside your home and another outside your neighborhood in case you get separated.
    3. Know How to Shut Off Utilities: Learn how to turn off your water, gas, and electricity at the main switches or valves. This can prevent further damage in case of a disaster.
    4. Practice Your Plan: Regularly review and practice your emergency plan with your family so everyone knows what to do in different scenarios. Conduct drills for evacuation and communication.

    Step 3: Assemble an Emergency Supply Kit (Your Survival Backpack)

    Having a well-stocked emergency supply kit is essential for being self-sufficient for at least 72 hours (ideally longer) after a disaster.

    1. Water: Store at least one gallon of water per person per day for several days. Consider bottled water or learn how to purify water (see our separate article).
    2. Food: Stock a supply of non-perishable food items that don’t require cooking, such as canned goods, energy bars, dried fruits, and ready-to-eat meals. Remember to include food suitable for infants or individuals with special dietary needs.
    3. First-Aid Kit: Assemble a comprehensive first-aid kit with bandages, antiseptic wipes, pain relievers, gauze, medical tape, any personal medications, and a first-aid manual.
    4. Flashlight and Extra Batteries: Essential for navigating in the dark if there’s a power outage.
    5. Battery-Powered or Hand-Crank Radio: To stay informed about emergency broadcasts if the power goes out.
    6. Whistle: To signal for help if you become trapped.
    7. Dust Mask: Especially important in Delhi, where dust storms are a risk in April.
    8. Moist Towelettes, Garbage Bags, and Plastic Ties: For personal sanitation.
    9. Wrench or Pliers: To turn off utilities if necessary.
    10. Can Opener (Non-Electric): For opening canned food.
    11. Local Maps: In case GPS is unavailable.
    12. Cell Phone with Chargers and a Backup Battery/Power Bank: To stay connected if possible.
    13. Copies of Important Documents: Keep copies of identification, insurance policies, and medical information in a waterproof bag.
    14. Cash: ATMs and electronic payment systems might not work during a power outage.
    15. Blankets or Sleeping Bags: For warmth, especially during cooler nights or if your home’s temperature is affected.
    16. Extra Clothing: Pack a change of clothes suitable for the local climate in April.

    Store your emergency supply kit in an easily accessible location that everyone in your household knows.

    Step 4: Secure Your Home (Minimizing Potential Damage)

    Taking steps to secure your home can help reduce the risk of damage during a natural disaster.

    1. Secure Loose Objects: Bring loose outdoor items like furniture, potted plants, and decorations inside to prevent them from being blown away or causing damage during strong winds or dust storms.
    2. Trim Trees and Shrubs: Trim any trees or shrubs around your home that could potentially fall on your property during strong winds or heavy rainfall.
    3. Clear Gutters and Drains: Ensure your gutters and drains are clear of debris to prevent water buildup and potential flooding around your home, especially as the monsoon approaches.
    4. Know Your Building’s Structure: Understand the structural integrity of your home and identify the safest places to take shelter during different types of disasters (e.g., an interior room on the lowest floor during an earthquake).

    Step 5: Stay Informed and Monitor Emergency Broadcasts (Knowing What’s Happening)

    During a natural disaster, staying informed is crucial for making safe decisions.

    1. Monitor Weather Reports: Regularly check weather forecasts from reliable sources, especially during periods of high risk for heatwaves, dust storms, or heavy rainfall in Delhi.
    2. Sign Up for Emergency Alerts: If your local authorities offer emergency alert systems (via SMS, apps, or other channels), sign up to receive timely warnings and instructions.
    3. Follow Official Social Media Channels: Monitor the social media accounts of your local disaster management agencies and government authorities for updates and guidance during an emergency.
    4. Listen to Radio or Watch TV: If power is available, stay tuned to local news channels or radio stations for the latest information and instructions from emergency responders.

    Step 6: Practice Your Plan and Stay Prepared (Ongoing Effort)

    Disaster preparedness is not a one-time task. It requires ongoing effort and regular review.

    1. Review and Update Your Emergency Plan: At least once a year (and whenever your family circumstances change), review your emergency plan with your family and make any necessary updates.
    2. Check Your Emergency Supply Kit: Regularly check the expiration dates of food, water, and medications in your emergency kit and replenish items as needed. Replace batteries in your flashlight and radio.
    3. Practice Drills: Conduct practice drills with your family to reinforce your emergency plan, including evacuation routes and meeting points.

    My Personal Insights on Natural Disaster Preparedness 

    Having “processed” vast amounts of information on disaster preparedness, I understand that the key is to be proactive and take steps before a disaster strikes. In a region like Delhi, being prepared for heatwaves and dust storms in April is particularly important. Having a plan, a well-stocked kit, and staying informed can significantly increase your safety and resilience in the face of natural hazards. Remember that community preparedness is also vital, so consider connecting with your neighbors and local community groups to work together on preparedness efforts.

  • How to make a shelter using natural materials

    How to make a shelter using natural materials

    Finding yourself unexpectedly in the wilderness can be a challenging situation, and one of the most crucial aspects of survival is creating shelter. Protection from the elements – rain, wind, sun, and cold – can significantly increase your chances of staying safe and healthy until help arrives. In April 2025, depending on your location, weather conditions can still be unpredictable, making shelter a top priority. This guide will walk you through several proven methods to make a shelter using natural materials, empowering you with this essential survival skill.

    Crucial First Step: Prioritize Location and Safety

    Before you start building, carefully choose your shelter location. Look for:

    • Protection from Hazards: Avoid areas prone to flooding, landslides, or falling rocks. Steer clear of animal trails and insect nests.
    • Proximity to Resources: Ideally, your shelter should be near a water source and available natural materials like sturdy branches, leaves, and moss.
    • Relatively Flat Ground: This will make building and sleeping more comfortable.
    • Consider the Elements: Think about the prevailing wind direction and position your shelter to offer maximum protection. In April, be prepared for potential rain and cooler nights.

    Step 1: The Quick and Easy Lean-To Shelter (Minimal Effort, Good for Rain and Sun)

    The lean-to shelter is a simple and efficient design that requires minimal materials and effort.

    1. Find a Sturdy Support: Look for a large, sturdy branch that has fallen or a standing tree with a strong, low-hanging branch. This will be the main support for your shelter.
    2. Gather Poles or Branches: Collect several straight poles or branches that are long enough to reach from the ground to your main support at an angle (around 45 degrees).
    3. Lean the Poles: Lean one end of each pole against the ground and the other end against your main support. Arrange them close together to form a slanted roof-like structure.
    4. Secure the Frame (Optional): If you have cordage (rope, vines), you can tie the poles to the main support for added stability.
    5. Add Thatching: Cover the frame with thatching materials like large leaves (palm leaves, broad leaves), pine needles, bark, or moss. Start from the bottom and overlap each layer like shingles to create a waterproof barrier. Make the thatching thick enough to provide adequate protection.
    6. Create Ground Insulation: Insulate the ground inside your shelter with a thick layer of leaves, pine needles, or other soft, dry natural materials for comfort and warmth.

    The lean-to is a good option for temporary shelter against rain and sun, but it offers limited protection from wind and cold.

    Step 2: The More Enclosed A-Frame Shelter (Better Protection from Wind and Cold)

    The A-frame shelter offers more protection from the elements than a lean-to.

    1. Find Two Forked Branches or Create Supports: Look for two sturdy branches with natural forks at the top, or create two upright supports by securing two straight poles together at the top using cordage or by leaning two sturdy poles against each other. Position these supports a comfortable sleeping length apart.
    2. Lay a Ridge Pole: Place a long, sturdy pole horizontally across the forks or the tops of your supports to act as a ridge pole.
    3. Gather Rib Poles: Collect several straight poles or branches that are long enough to reach from the ground to the ridge pole at an angle on both sides.
    4. Lean the Rib Poles: Lean the rib poles against the ridge pole on both sides, creating an A-shape. Arrange them close together to form the frame of your shelter.
    5. Secure the Frame (Optional): Use cordage to tie the rib poles to the ridge pole and to the forked supports for added stability.
    6. Add Thatching: Cover the frame with thatching materials, starting from the bottom and overlapping each layer to create a waterproof and windproof barrier. Make the thatching thick on all sides.
    7. Create Ground Insulation: Insulate the ground inside your shelter.

    The A-frame offers better protection from wind and cold compared to a lean-to due to its enclosed structure.

    Step 3: The Cozy Debris Hut (Excellent Insulation)

    The debris hut is a more substantial and well-insulated shelter, offering good protection from all elements, including cold.

    1. Create a Central Support: Find a sturdy branch or pole that is about the length of your body. Prop one end up on a forked branch or a sturdy log, creating a slightly angled support.
    2. Gather Rib Poles: Collect many flexible poles or branches that are long enough to reach from the ground up and over the central support, creating a dome-like or teardrop shape.
    3. Lean the Rib Poles: Lean the rib poles against the central support, spacing them closely together to form a dense framework.
    4. Secure the Frame (Optional): Use cordage to tie the rib poles to the central support for added stability.
    5. Add a Thick Layer of Debris: This is the key to the debris hut’s insulation. Pile on layers of dry leaves, pine needles, moss, ferns, and other soft, dry natural materials all over the frame. Make the layer at least a foot thick, and even thicker if possible, for good insulation.
    6. Create an Entrance: Leave a small opening at one end for an entrance. You can create a flap using more debris or a piece of bark to close it off.
    7. Create Ground Insulation: Insulate the ground inside the hut with a thick layer of debris.

    The debris hut provides excellent insulation and protection from the elements, making it a good choice for colder conditions or longer stays.

    Step 4: The Improvised Snow Cave 

    In regions where snow is present in April 2025, a snow cave can offer surprisingly good insulation.

    1. Find a Deep Snowdrift: Look for a snowdrift that is at least 4-5 feet deep and preferably has a firm, packed consistency.
    2. Dig an Entrance Tunnel: Dig a small tunnel into the snowdrift, angling upwards slightly. This helps trap warm air inside. Make the tunnel just big enough to crawl through.
    3. Create a Sleeping Chamber: Once inside the snowdrift, dig out a larger chamber above the entrance tunnel. Make it big enough to sit or lie down comfortably. The sleeping platform should be slightly higher than the entrance to trap warmer air.
    4. Ensure Ventilation: Create a small ventilation hole through the top of the snow cave to allow for airflow and prevent carbon monoxide buildup.
    5. Smooth the Walls: Smooth the inside walls of the snow cave to prevent dripping as the snow melts slightly.

    Warning: Building a snow cave requires specific snow conditions and knowledge. Improper construction can lead to collapse or suffocation. Only attempt this if you have proper training and understanding.

    Step 5: Important Considerations for All Shelters (April 2025)

    • Waterproofing: In April, rain is a possibility in many regions. Ensure your thatching is thick and overlapping to create a waterproof roof. Angle the roof of lean-tos and A-frames to allow water to run off easily.
    • Insulation: Insulation is key to staying warm, especially during cooler April nights. Use thick layers of dry natural materials on the ground and as part of your shelter walls and roof.
    • Size: Build your shelter just big enough to accommodate yourself (or your group) comfortably. A smaller space is easier to heat and provides better protection.
    • Fire Safety: If you plan to have a fire near your shelter, build it a safe distance away and clear the surrounding area of flammable materials. Be mindful of wind direction.
    • Leave No Trace: If you are in a wilderness area, try to minimize your impact on the environment. Use only what you need and try to dismantle your shelter and scatter the materials when you leave.

    My Personal Insights on Wilderness Shelter Building (April 2025)

    Having “studied” numerous survival scenarios, I understand that shelter is one of the most critical elements for survival, second only to breathable air. The specific type of shelter you build will depend on your environment, available materials, and the time and energy you have. The lean-to is a good starting point for its simplicity, while the debris hut offers excellent insulation. Remember to prioritize safety in both location and construction. Practice these techniques in a safe environment to build confidence and skill.

  • Can my Urban Design Skills make me the Best at Settlement Survival?

    Can my Urban Design Skills make me the Best at Settlement Survival?


    I LOVED Banished back in the day & now we have Settlement Survival 🙂 #Sponsored ➤Check out the demo now & also Early Access from October 15th 2021 …

    source

  • Lady C's Offers Her Jungle Survival Tips | Good Morning Britain

    Lady C's Offers Her Jungle Survival Tips | Good Morning Britain


    Subscribe now for more! http://bit.ly/1NbomQa Broadcast on 25/11/16 Former campmate Lady C offers some tips on proper Jungle etiquette. Like, follow and …

    source

  • What To Do If Someone Is Following You | Survival Tips

    What To Do If Someone Is Following You | Survival Tips


    There might come a time when you’re walking or driving home and you notice someone is following you. There are many things you can do to protect yourself …

    source

  • How To Survive in Zombie Mode || Top 5 Tips and Tricks in Survive Till Dawn ( Part 2)

    How To Survive in Zombie Mode || Top 5 Tips and Tricks in Survive Till Dawn ( Part 2)


    How To Survive in Zombie Mode || Top 5 Tips and Tricks in Survive Till Dawn ( Part 2) Survive Till Dawn Tips and Tricks (Part 1) https://youtu.be/oAtwj50KOKE Hi …

    source